AN UPDATE FROM THE SWISS MOUNTAINS
PART 2: AMATEUR RADIO ENTHUSIAST, METEOR OBSERVER AND RASPBERRY SHAKER!
29 August, 2019
Written by: Jochen Richert
Radio Handle: HB9DRT
Website: http://wetter.richert.ch/
Earlier this year Amateur Radio Enthusiast, Jochen Richert, told us all about his incredible Earth monitoring station he has set up in the mountains of Switzerland. Incorporating; sky cameras, for meteor detection, a multitude of sensors, including seismographs, infrasound, lightning (amongst others) and solar powered!
If you haven’t read his first article yet, please check it out – HERE.
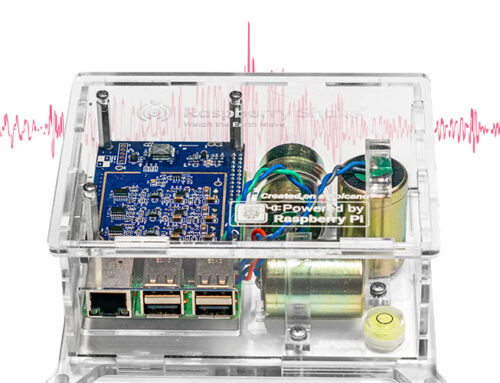
In the following, Jochen picks up his story from where he left off, as he continues with the installation and integration of his new RS3D seismograph and RBOOM infrasound sensors.
The story continues…
TEST, TEST AND TEST AGAIN!
During the test run of my RS3D setup unfortunately I found out that periodical disturbances occurred in the seismograms.

After consultation with Raspberry Shake Technical Support we came to the conclusion that the unusually long sensor lines from the Shake to the geophones might be the problem. We suspected HF radiation, so we decided to equip the sensors with as short as possible sensor lines.


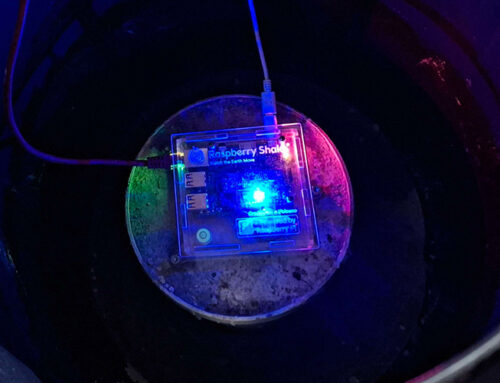
With wise foresight, I chose a sensor housing big enough to fit both the Raspberry Pi and Raspberry Shake PCB (Printed circuit board).
During further tests I found out that the periodic disturbances were still there. After doing a little more troubleshooting I discovered that by removing the Raspi UPS card and supplying the Pi directly via a 5 Volt power supply, the noise was gone.
This meant I now needed a solution to generate a 5 Volt supply for the Pi from the 12 Volt supply at the RDCU (Remote Data Collection Unit).
To resolve this, I used a small 5 Volt DC/DC module that could supply approx. 5 A. The power supply was a 5 Volt DC/DC module and with this modification everything had to be checked again in a longer testing phase.
The tests were a success!
Now it was necessary to bring the Lan signal from the Shake/sensor case to the RDCU, and from the RDCU 5 volts had to be delivered to the case. Since I already had a Güralp CMG5-TDE with LAN connection in operation, I decided to use the same LAN connection for the Raspberry Shake case.

A look inside the RDCU
NOW THINGS GOT SERIOUS!
Before winter came, which can sometimes happen very quickly here, I wanted to finish my new Seismic Vault. A helpful neighbor dug me a hole with his small excavator.


I buried an old petrol barrel in it.


The foundation consists of a 60 kg granite sunshade stand, which rests on a thin layer of sand, to provide a stable and level base.

The remaining free space in the barrel was filled with three layers of 180 mm rigid foam.


Finally, I constructed a small shelter over the installation to protect the seismometers from environmental influences like rain or hail.

ADDING INFRASOUND
The measurement of infrasound activity is an extension to my meteor detection setup, to monitor infrasonic signals which can originate from bolides.
In order to prevent wind influences it is possible to use an array of several pipes, which can help to reduce pressure fluctuations. Since my last article I had started to test a small array with some PVC hoses which brought promising results, but being exposed to changing weather conditions, durability was a problem.
With that in mind, I decided to build a more stable and durable version out of aluminum which is a great material to work with. It is soft, easy to manipulate and UV resistant, so I would build my pipe array using aluminum parts.
I already had one infrasound sensor running in my RDCU and I wanted to add my Raspberry Boom to this new pipe array set up. The RBOOM is powered by the Raspberry Pi and incorporates a micro barometer sensor with a mechanical filter that limits the frequency to 1 Hz. Also included is a 20 sec. filter, which I will install instead of the 1 Hz filter.
BUILDING MY NEW PIPE ARRAY
The first step was to get all the parts together. This involved acquiring a lot of aluminum pipes and an aluminum ring for the center of the array.


With the parts in hand I started construction, drilling holes in the center ring to mount the pipes.


My daughter helped with the drilling


With the pipes mounted, I started installation at the RDCU and added an upper and lower cover to the center ring of the array.


It was now time to add the Raspberry Boom into the aluminum RDCU box.


With everything in place, I finished off the set up by installing the pipe array over a 0.5 mm UV-resistant pond foil, which I hope will be durable enough to withstand outdoor conditions here.
The finished Pipe Array is now up and running and testing with the 20 sec. filter has been successful.

UP AND RUNNING!
Since the install, everything has been working fine, however, when winter set in occasionally there were a few power outages during longer periods of bad weather.
It seems, that the “good deal” batteries I purchased were probably older than I thought and give out after 4-5 days of no sunshine. With all devices running, I am pulling 2.5 Amps out, which means, 60 Ah a day. The batteries have a 400AH capacity, so after 6.6 days they are empty.
My workaround has been to switch off secondary devices like the webcam and active antennas for the SDR, in bad weather conditions.


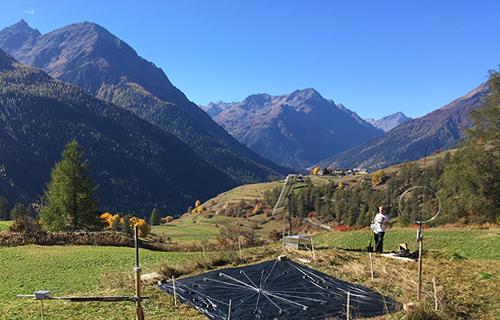
A birds eye view of my monitoring station
MORE TO COME?!
My next project is to replace the single axis single panel solar tracker, with a dual axis 2 panel system with LAN connection. This will allow me to get twice the power with the same bad light conditions I encountered in winter.
With the second axis, I will also be able to position the panel so that no snow will stay on it and also track the sun better throughout the year. More battery capacity would also be nice, so perhaps I will consider adding a second “battery” housing as well.
You can see a feed of Jochen’s Raspberry Shake here and the Raspberry Boom here on Station View.
For more details on his set up go to wetter.richert.ch, but please note it is only in German!
At Raspberry Shake we would like to say a huge thank you to Jochen for continuing to keep ourselves, and the Raspberry Shake community, up to date with the developments at his amazing monitoring station.