MY DIY GUIDE FOR A HOME RASPBERRY SHAKE VAULT
November 07, 2018
By Shaker: Steve Caron
@SteveBCaron
www.chinohillsweather.com
When I was contacted by a member of the shake team to write an article about my setup for my Raspberry Shake, I was a bit hesitant to take them up on their offer. I really appreciated their interest in what I have done, but I have never written any type of article or blog before. However, I remembered how much I learned from others sharing what they had tried, so I thought I should take the opportunity to do the same so that others may benefit from what I have done.
BACKGROUND
I have always had an interest in computers. I started with the Commodore 64 and then worked my way through all the early generations of PCs. I dabble in programing here and there, in the early days starting with basic and cobol. Today I use php and javascript. By no means am I an expert but I have enough knowledge to write small programs and to modify other users code to suit my needs. I ended up getting a degree in computer information systems. My career path took me into a role of business systems analyst. A role I have been in for almost 20 years.
MY HOME MONITORING PROJECT WAS BORN
About 12 years ago, I decided it would be cool (at least to me) to be able to view the weather from my backyard from anywhere in the world. I had free webspace from my internet provider, so why not try to get a website going?! This was the birth of www.chinohillsweather.com
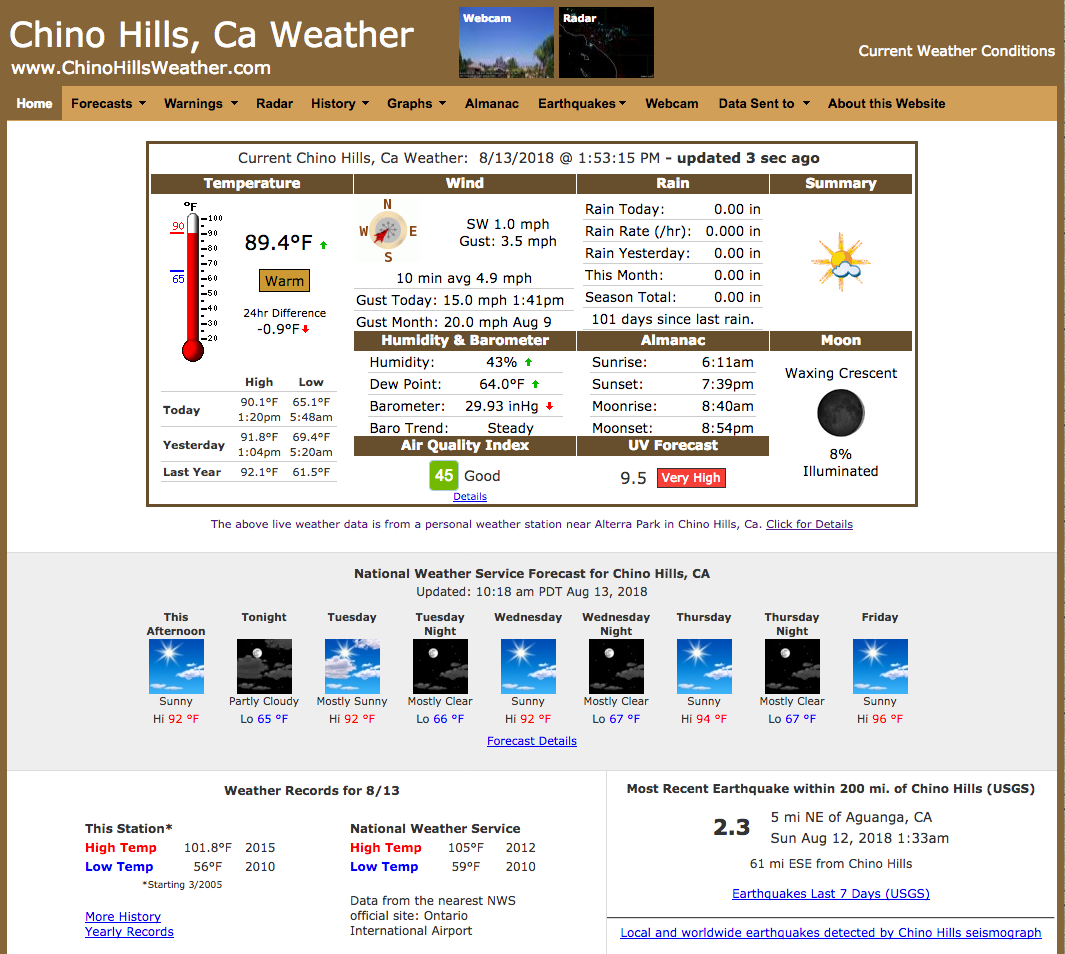
It is funny to think how plain it was when I look on it now. It was a single page and updated every 10 minutes. Twelve years later, with the help of those that shared their ingenuity and efforts, my site has greatly expanded and now feeds weather information to the National Weather Service. My website has been a great playground for me to try to add information that I find interesting and provide information to others that they might also find intriguing. I think this is what drives me at times. If something is interesting to me, there has to be someone out there that would also like to see it. Right?
FROM BACKYARD WEATHER TO QUAKES
Weather is not the only thing I always wanted to monitor. Growing up in Southern California, or any seismically active area, earthquakes become part of your life. From earthquake drills at school to constant education on what to do when the ground moves. I always wanted a seismograph to see what the ground was doing. I would check from time to time over the years to see what was out there. If I did find anything, they were either too expensive or not feasible for home use. At one time, the USGS was offering to install a seismograph in your home. All you needed was Wifi and power. I have that. Let me sign up. However, *sigh*, no more funding for any new installations.
One day, I was reading one of my weather discussion groups and someone mentioned this thing called a Raspberry Shake seismograph. Hmmm, I think this is what I have been looking for. I did more research and confirmed this was indeed what I needed to study the Earth’s movement. I placed my order and waited not so patiently for its arrival.
When my Shake arrived, I immediately put it into service in the garage. Within a day or two, it picked up a large earthquake in Alaska. I was taken aback on how this little unit could pick up motion from some 2,400 miles away. It performed well in the garage. However, I wanted to see how much I could reduce the cultural noise. The garage was close to the street and cars were causing spikes. The parking of cars in our garage and taking out the trash were additional noisy events. Now, how do I do this?
BACK TO THE BACKYARD WITH VAULT 1.0
I had no other buildings or portions of the house that would perform any better than the garage. I would have to put the shake outside. This made me nervous. I was really concerned about putting my new investment into the elements. I read through this thread in the Raspberry Shake Google Group which gave me some ideas of what others were trying. In the discussion was a link to a USGS document on the construction of a seismic vault. This is where I received most of my ideas.
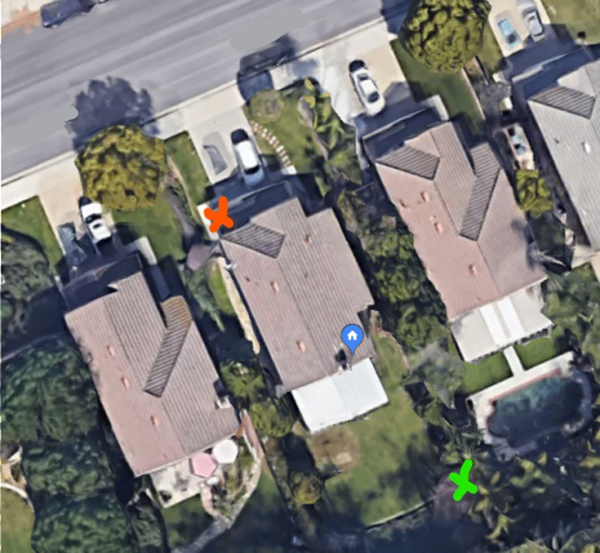
An aerial view of my home. The green “X” marks the Raspberry Shake vault location.
Now, I did not jump right into my current setup. I took one baby step. I will not go into too much detail but my vault 1.0 was a much more scaled down version of what I currently have. I wanted to make sure my location and ability to keep moisture out would work. I choose a location that was far enough away from the street and out of the way of backyard fun. It is near a tree and on a slight slope in the backyard. Not the ideal place, but better than the garage.
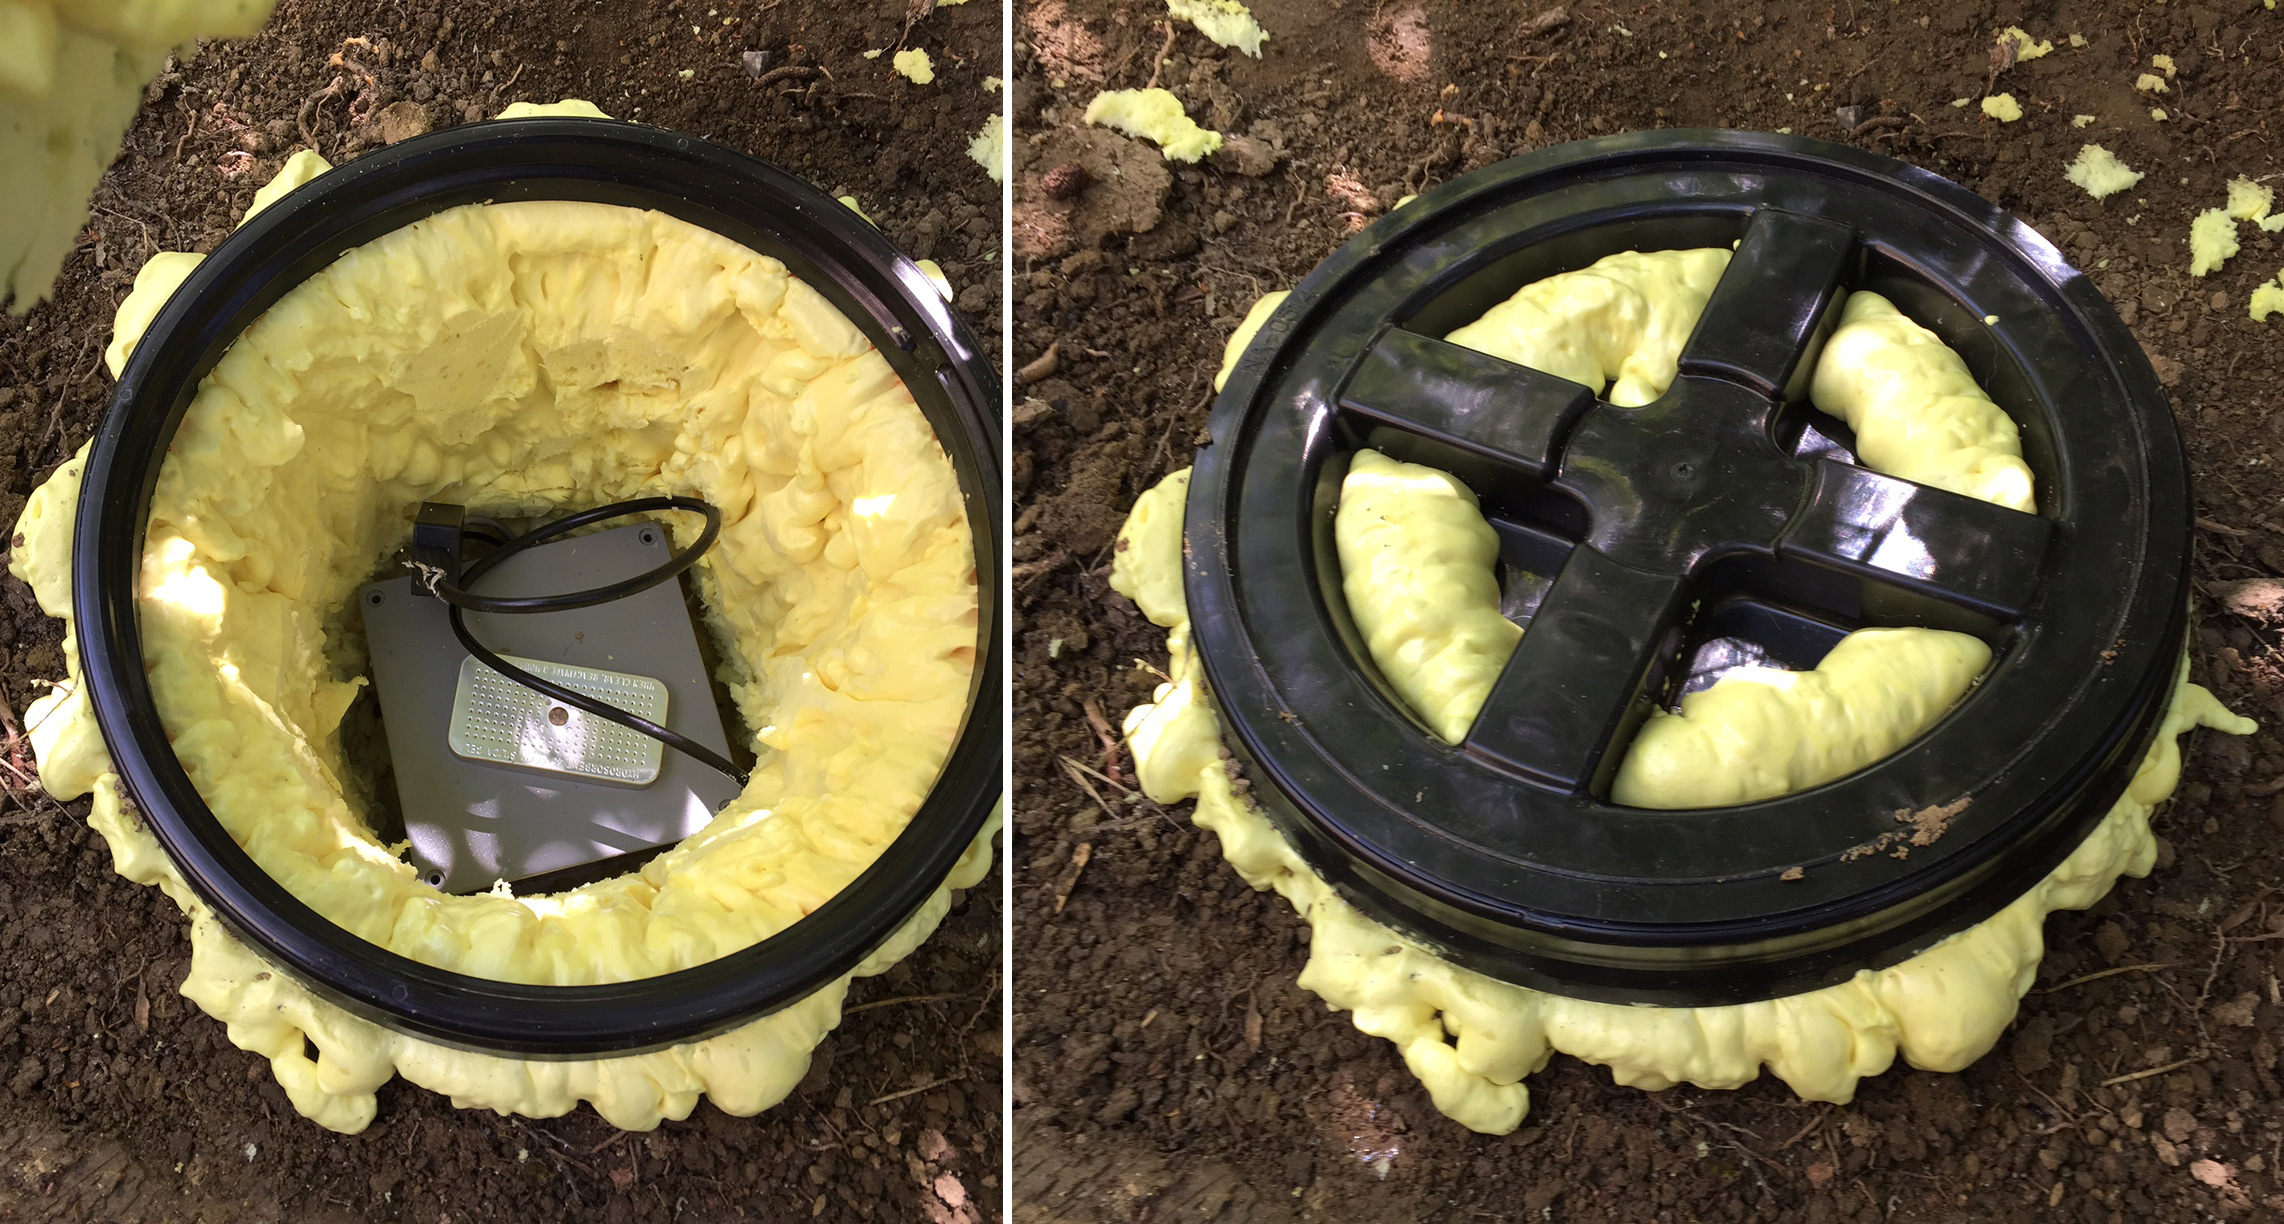
Raspberry Shake Seismograph Vault 1.0
The first vault (it may be a stretch to call it a vault) was simply a Home Depot 5-gallon bucket with the bottom cut out placed in a hole with Quikrete fast-setting concrete poured in. I added a screw top lid and plenty of spray foam insulation. I even protected the Shake in an electrical box. Can you tell I was worried about moisture? Power (POE) and network were provided by a buried cat5e cable located in a ½ inch liquid tight flexible conduit.
Vault 1.0 performed well. The first week or so I kept opening it daily to check for moisture. No moisture was found. So, all was good. However, I just had a nagging feeling I could do better. The vault 1.0 was somewhat of a hurried project because I was anxious to get the shake out of the garage. Now that I was happy with the location and vault as a proof concept. It was time to take things a little further and bigger. Time for vault 2.0
VAULT 2.0 – GO BIG OR GO HOME!
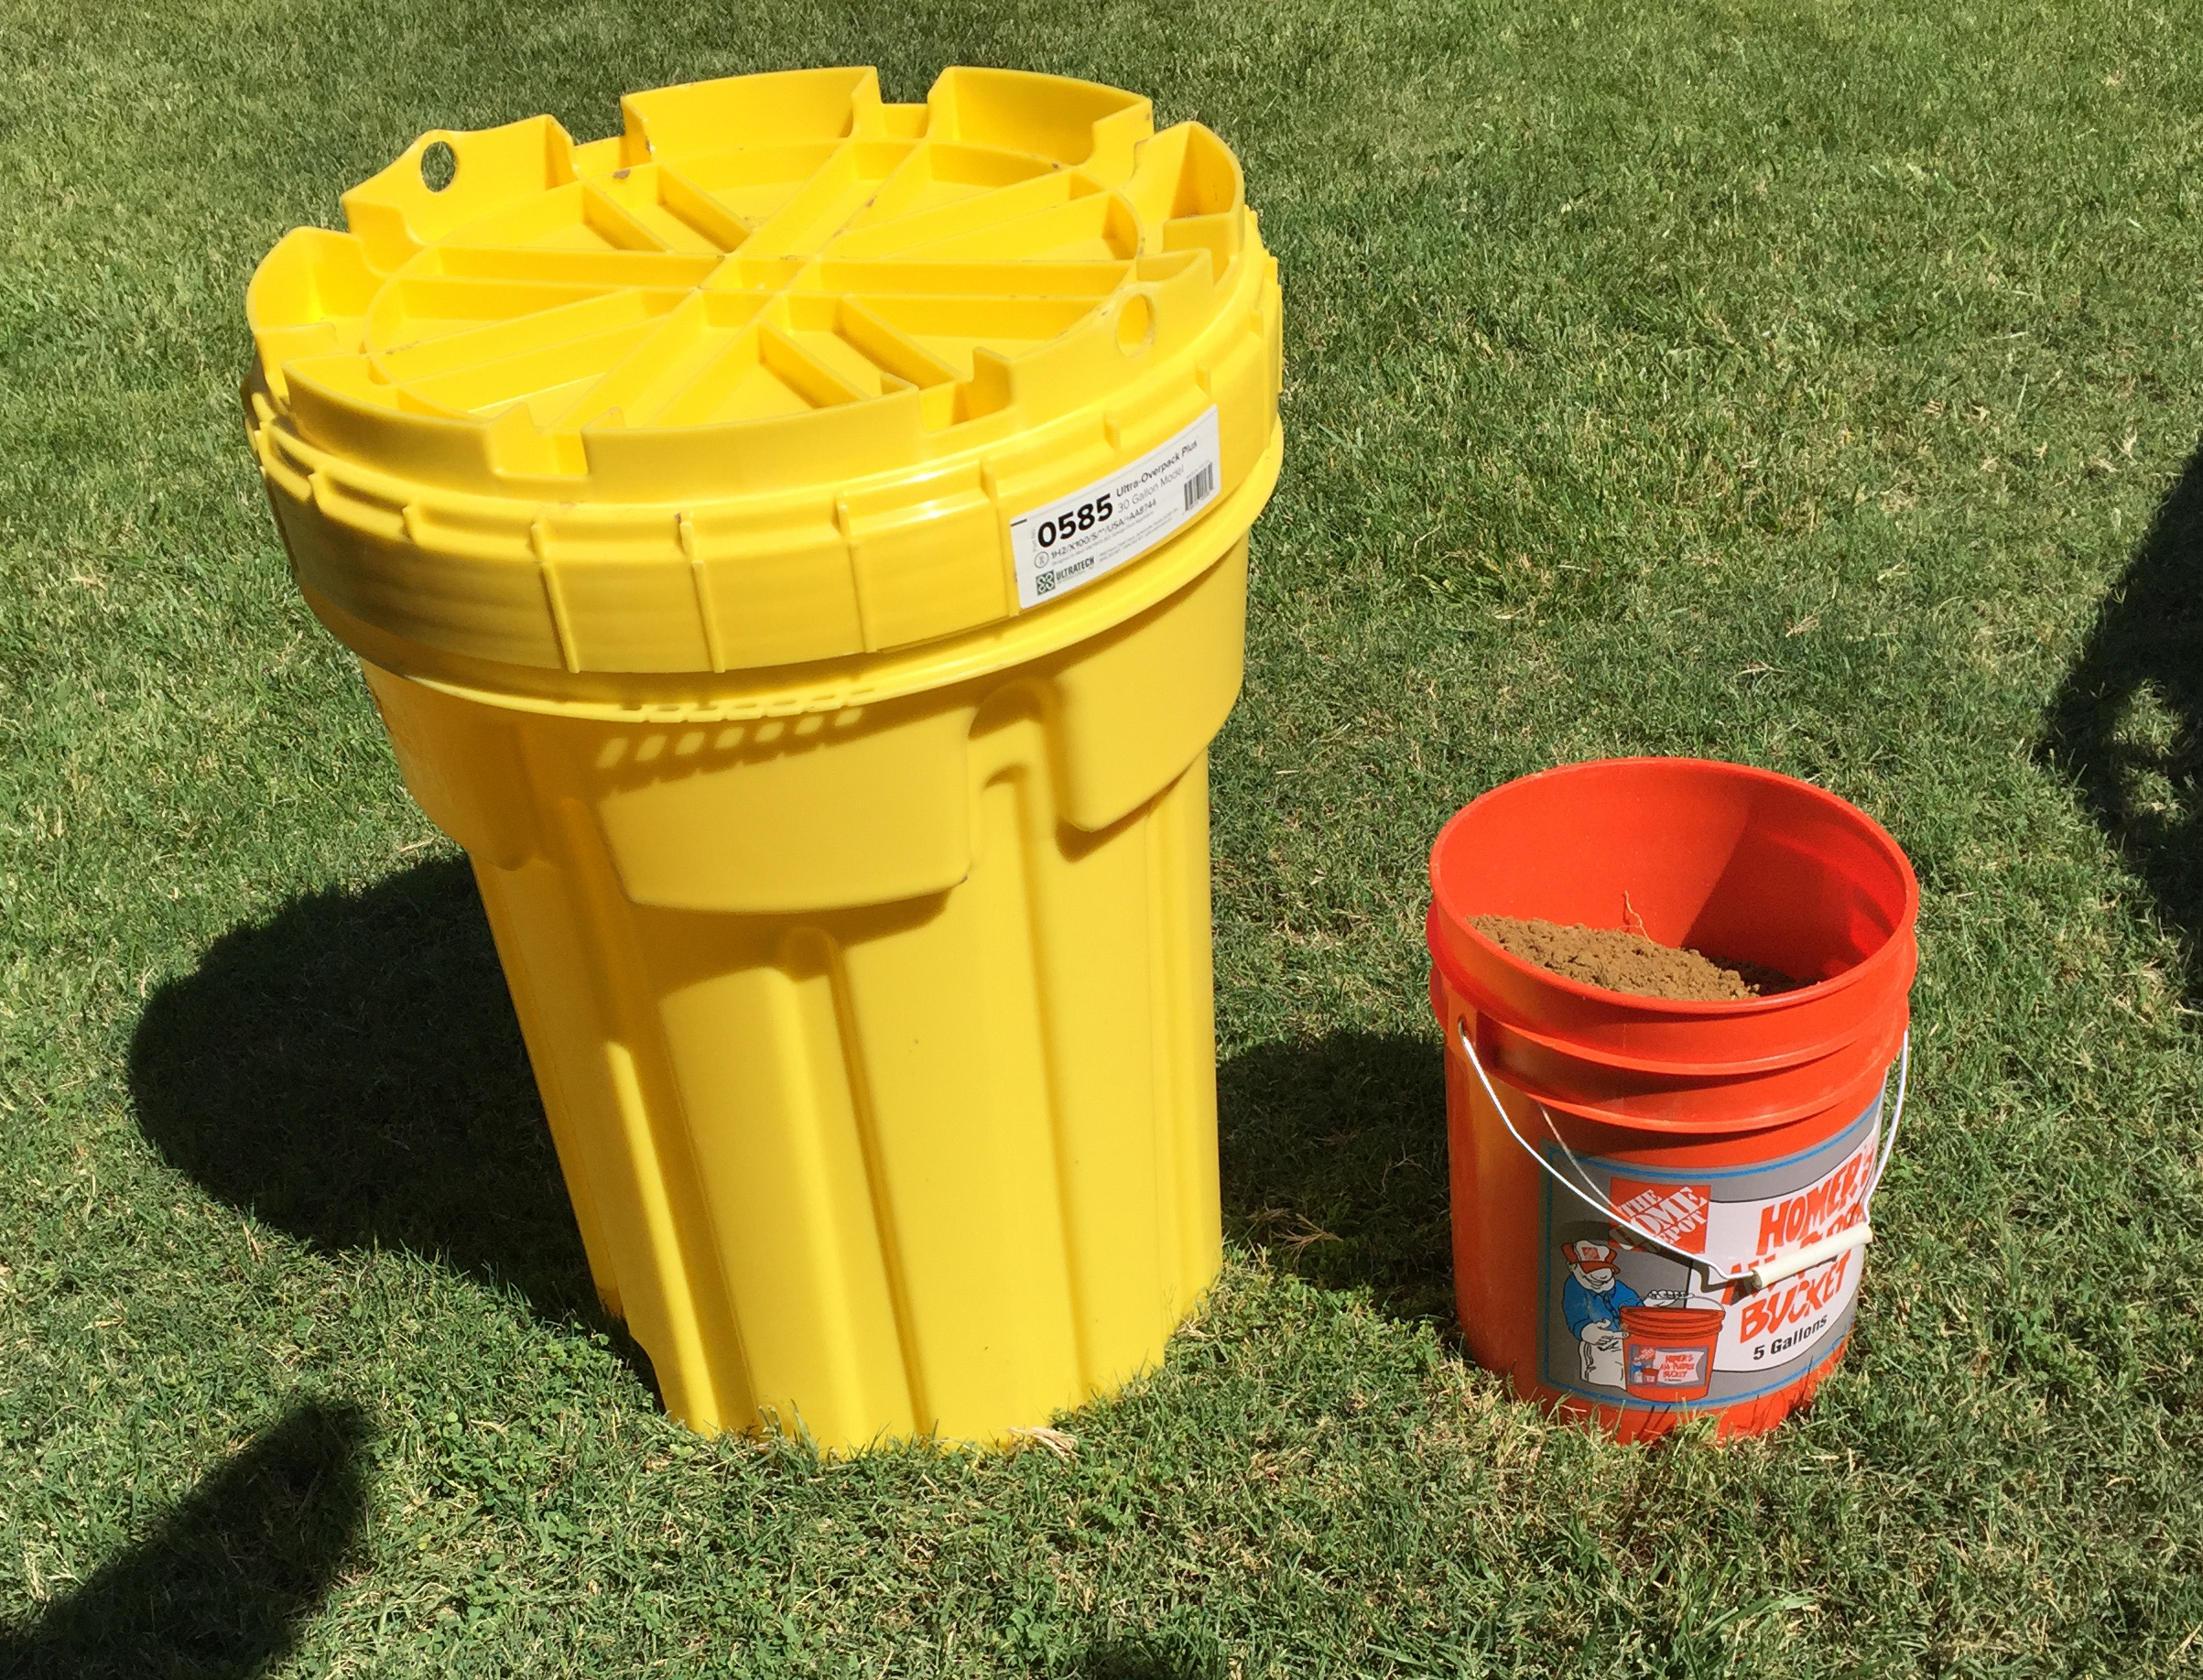
Side by side comparison of the two vault containers
My second vault would be in the same location and used the same cable as ver 1.0. The first piece I needed was the container. I looked for a container similar to the one used in the USGS construction guide. I was able to locate a 30 Gallon overpack drum. When the overpack arrived, the size surprised me. You can see the size difference when compared to the 5-gallon drum I used for my first vault. I realized I had a lot of digging to do.
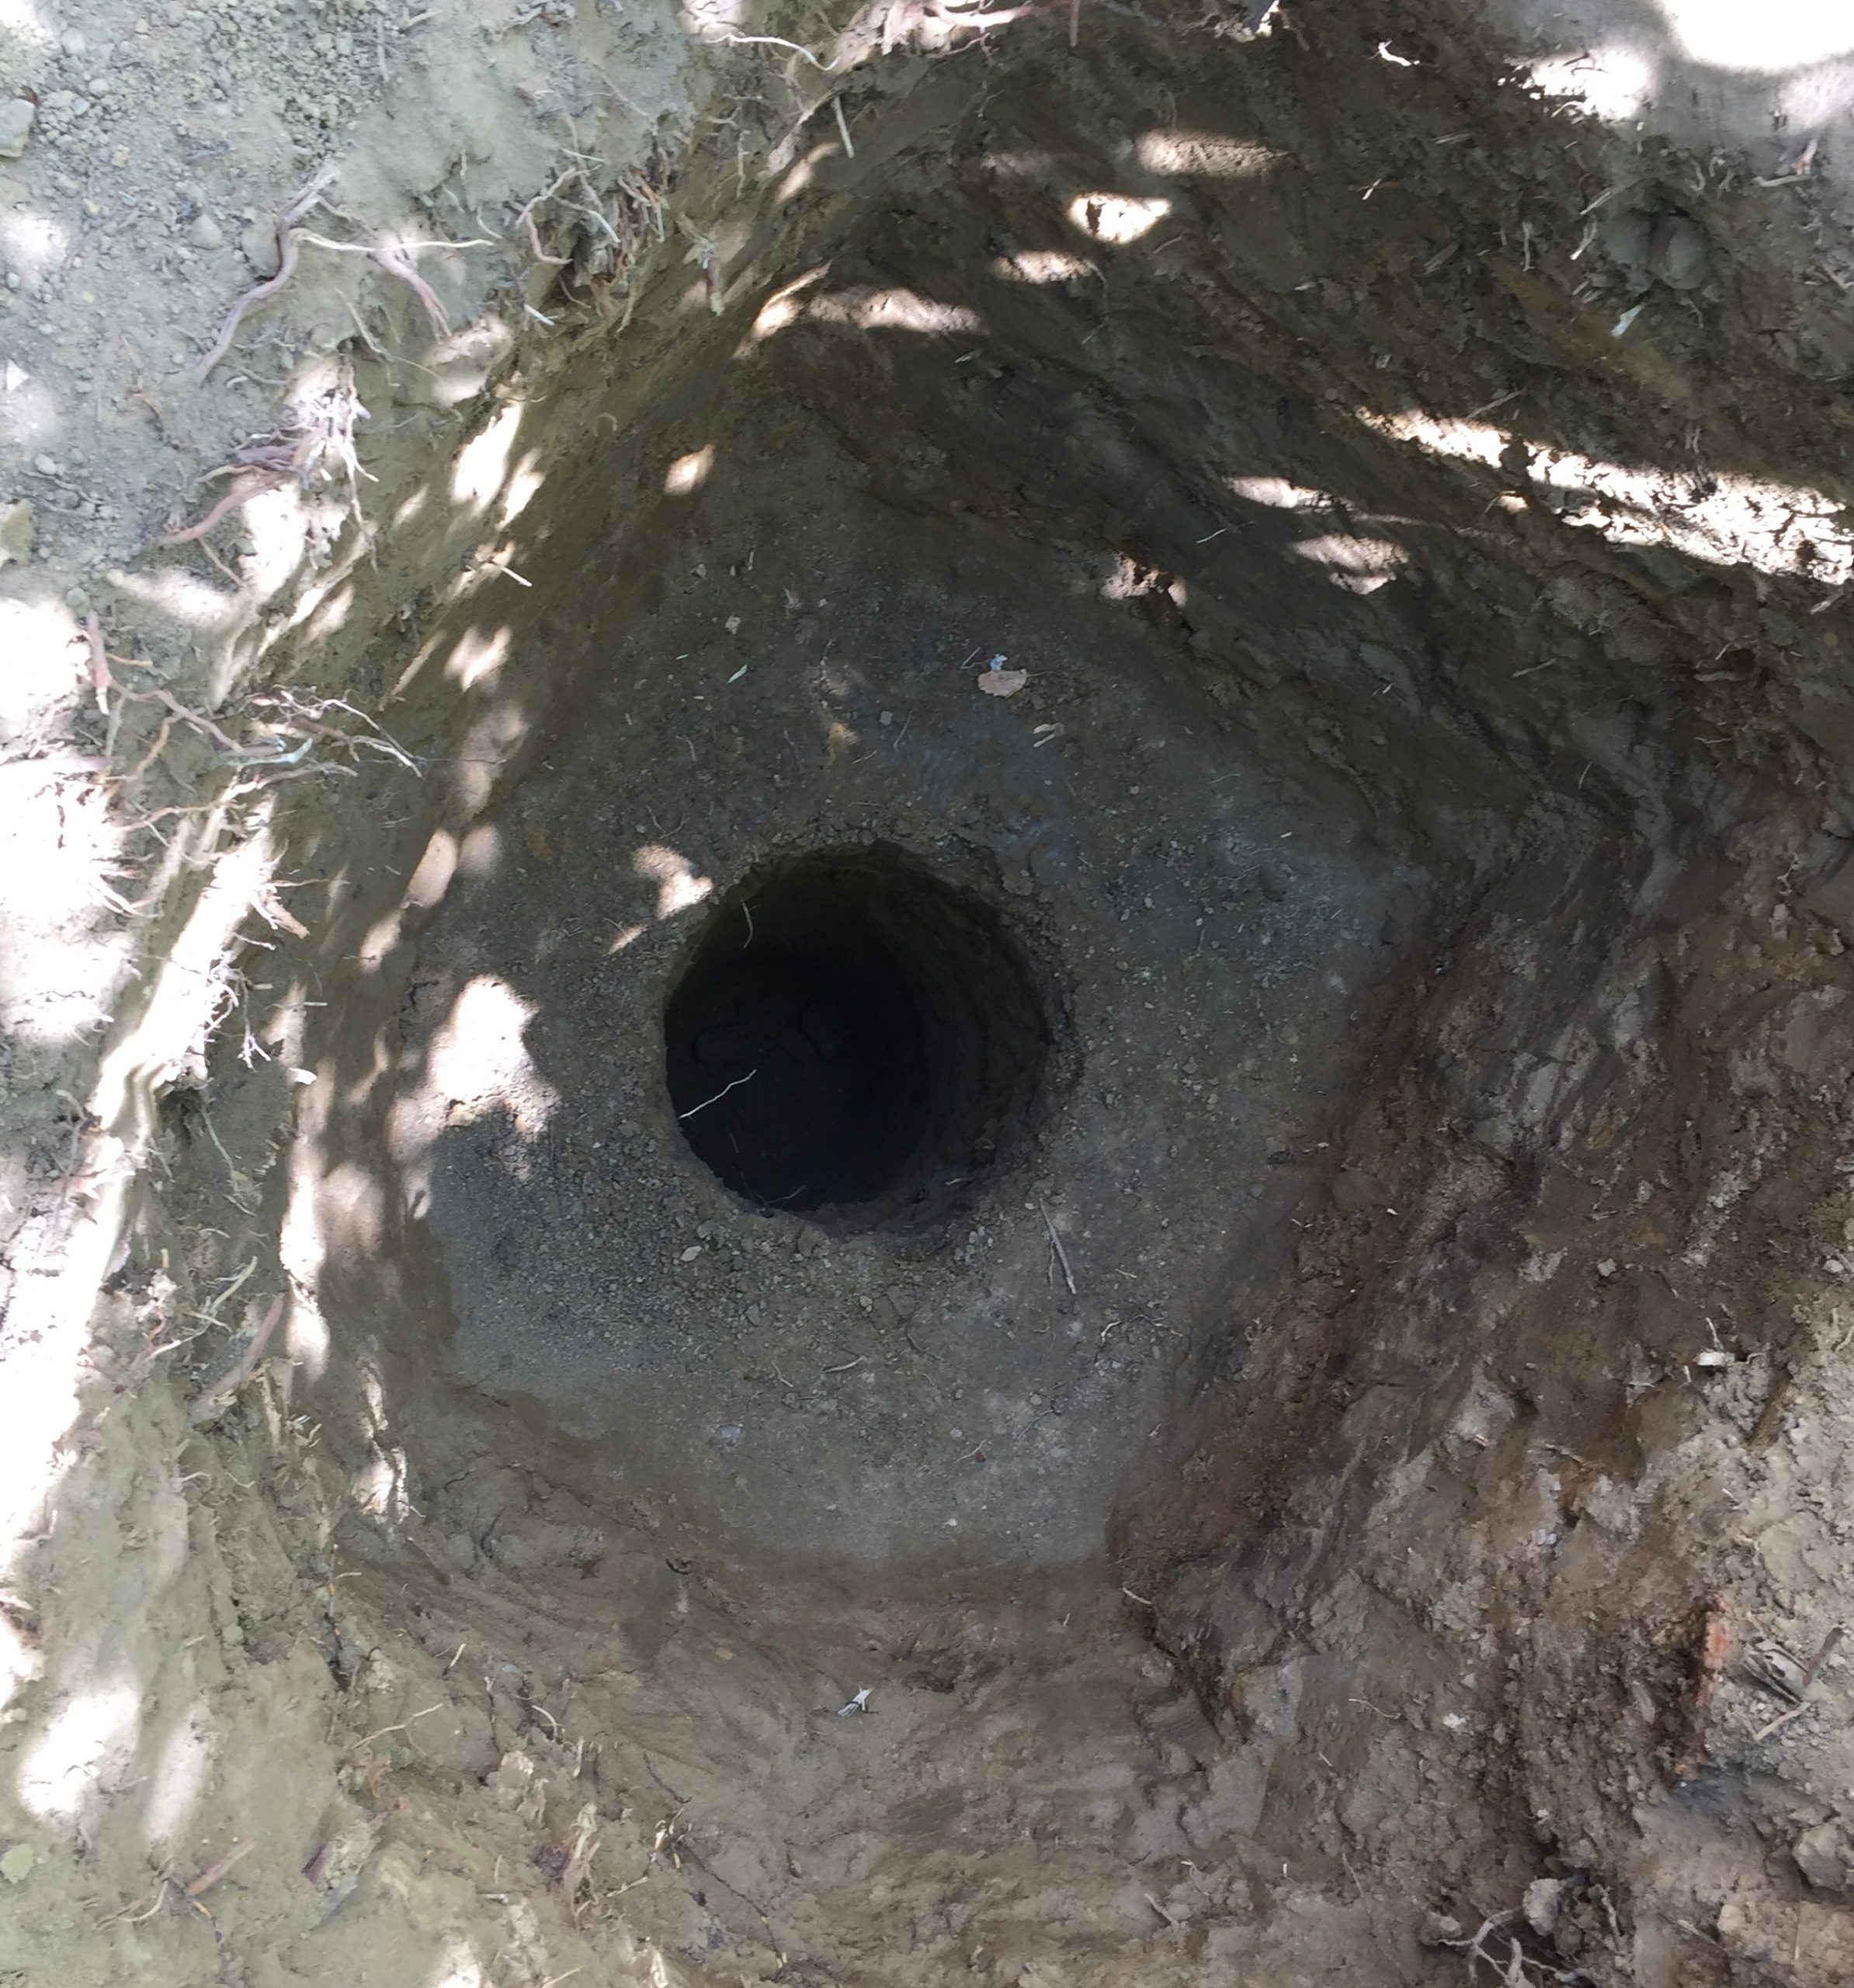
The hole for the new vault container and pier hole
And digging I did. I dug out the old vault. Then I dug a hole big enough to place the overpack container in the ground. Once I had dug to the desired size, I began to dig a hole for the pier the shake would sit atop. I used a post hole manual auger to make the hole. I dug a hole with an 8-inch diameter. I was digging through very compact clay layers. It almost seemed as hard as rock at times, but it would break up. I stopped at 24 inches. The pier hole started about 20 inches below ground. This made the bottom of the pier hole about 44 inches below ground in total. I figured it was good enough for my purposes. It was also very hot on the day of the digging and that also influenced my decision to stop.
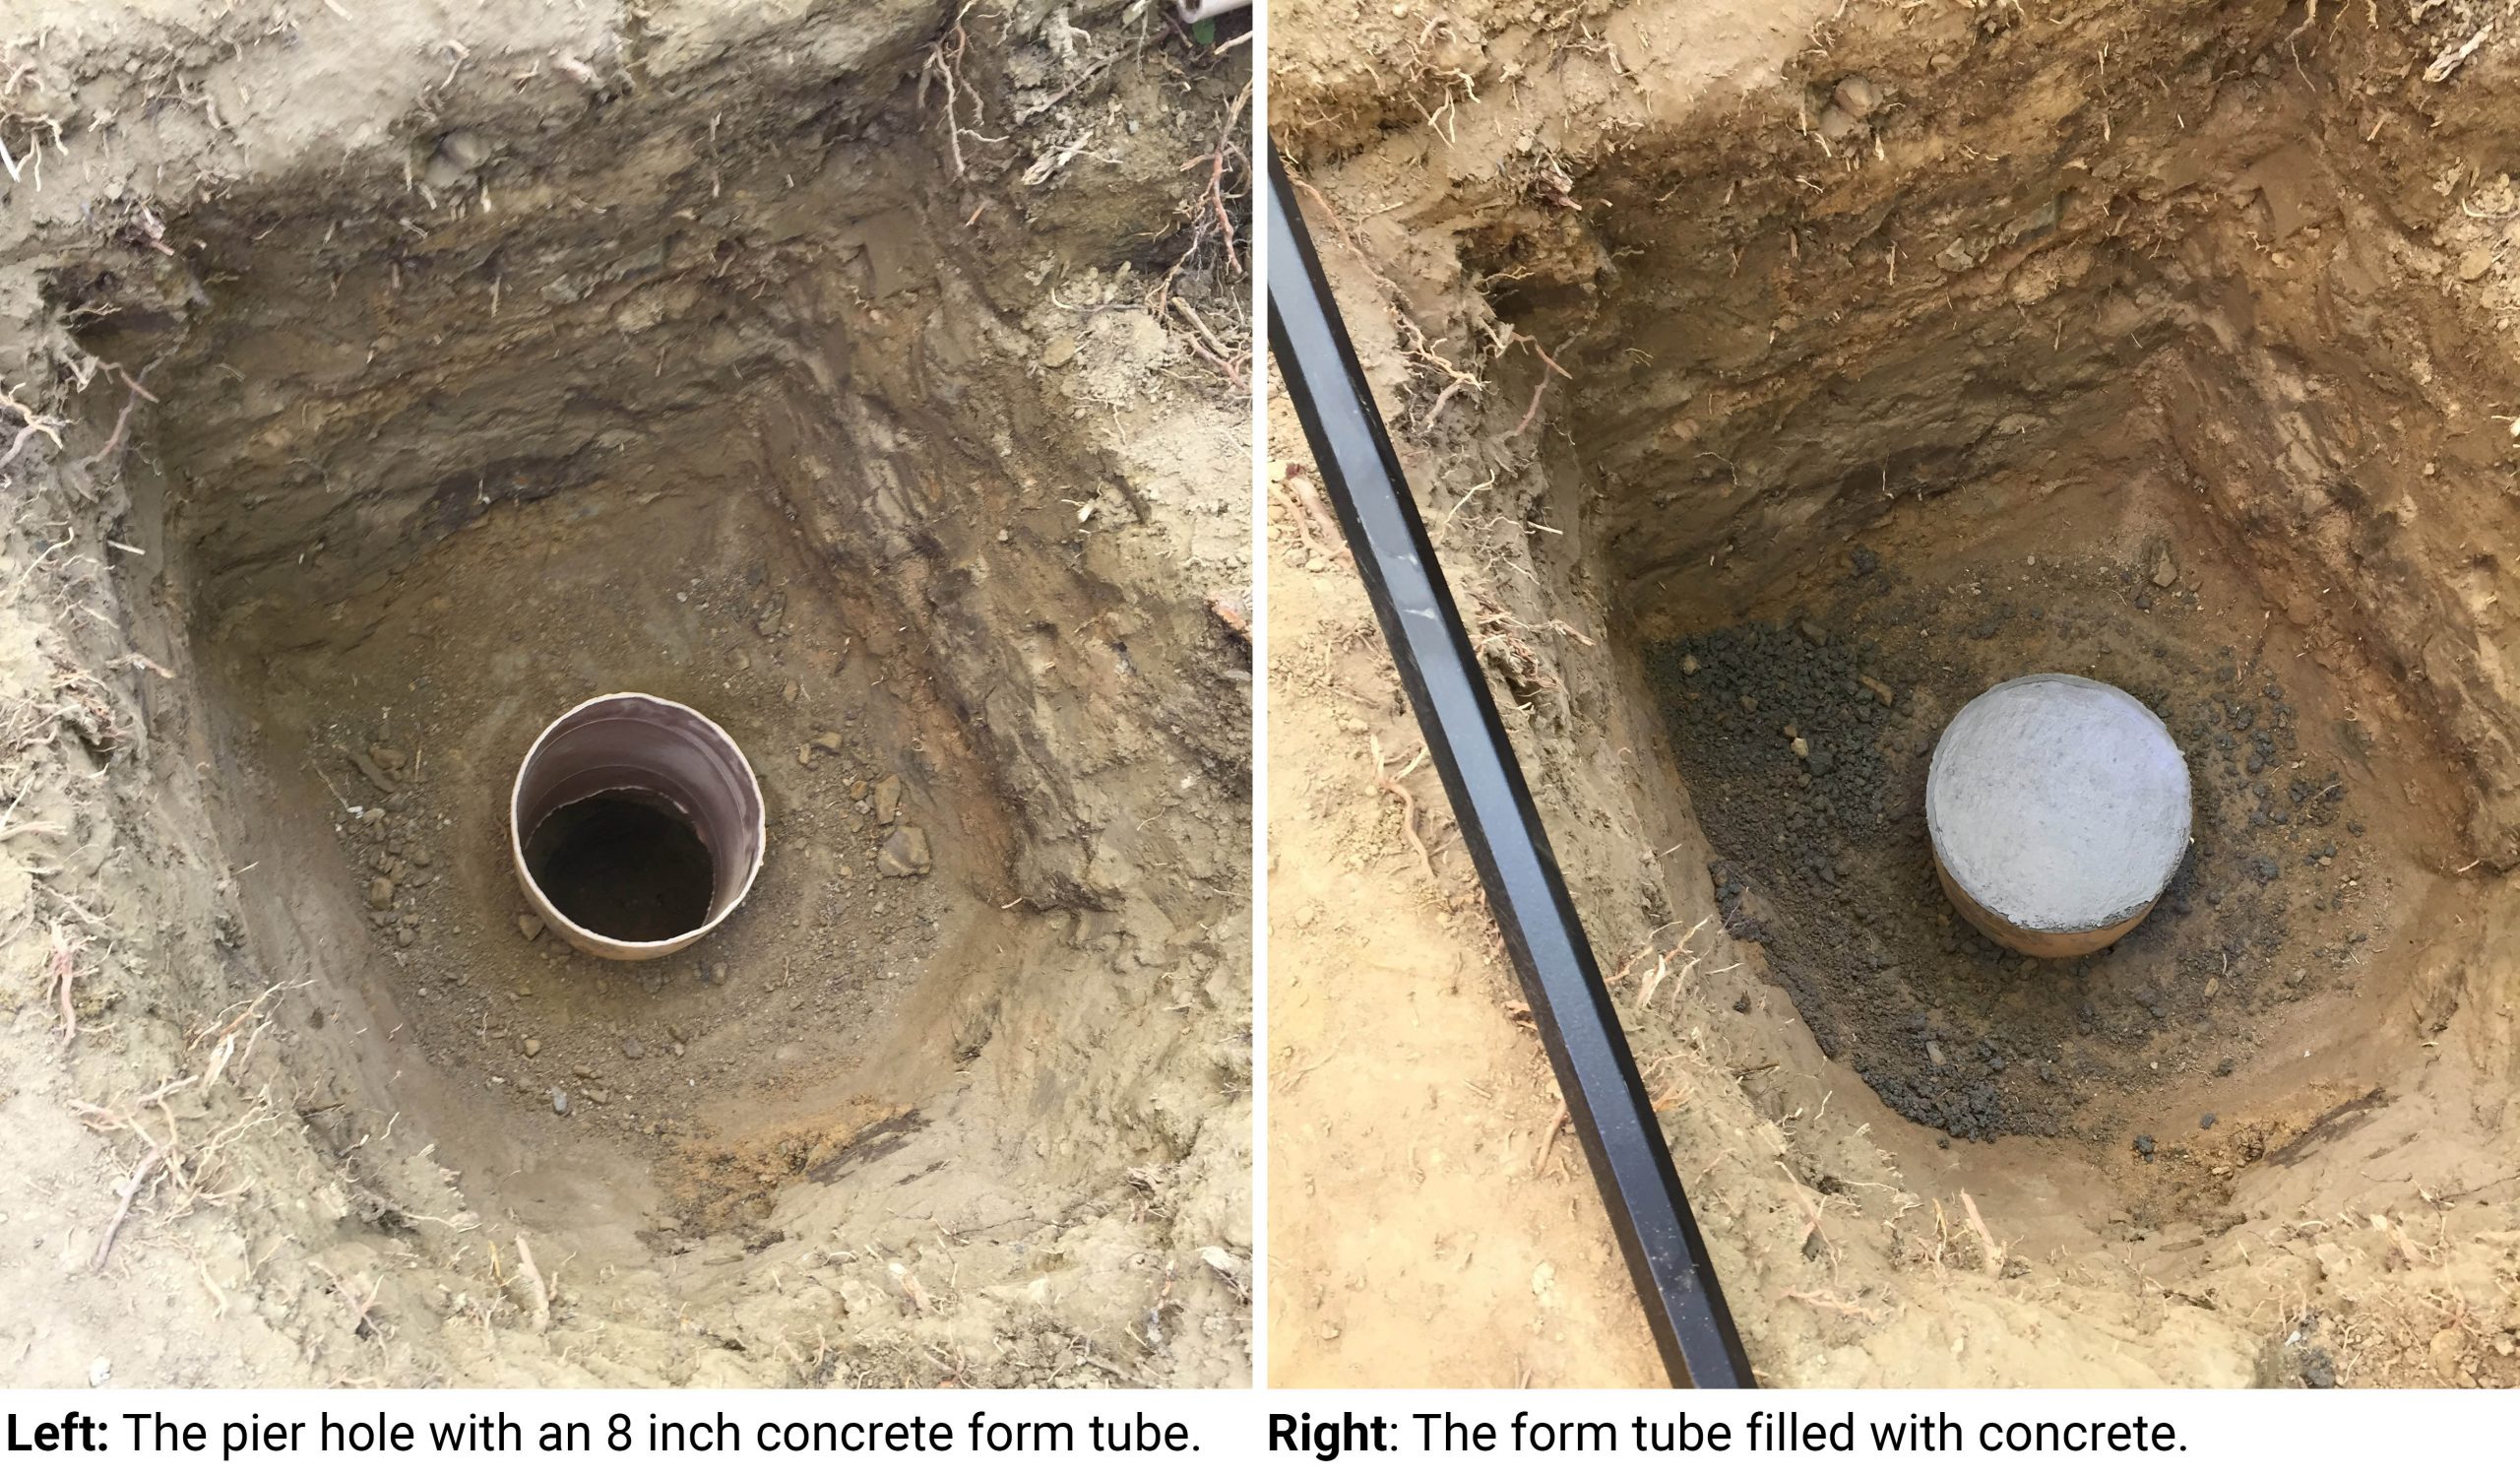
When the pier hole was complete, I slipped an 8 inch concrete form tube into the hole. I had the form extended about 2 to 3 inches above the top of the pier hole. I then mixed and poured the concrete. I used premixed concrete (Quikrete concrete mix). I read about recommendations for using a mix with little to no aggregate to prevent noise from aggregate expanding and contracting with temperature changes. I figured that with the concrete being below ground and in a fairly temperature stable environment, this would not be an issue for me. I placed the concrete in the hole and smoothed the top. The pier was complete. I did eventually place a piece of flooring tile on top of the pier to have a nice smooth surface to place the shake on.
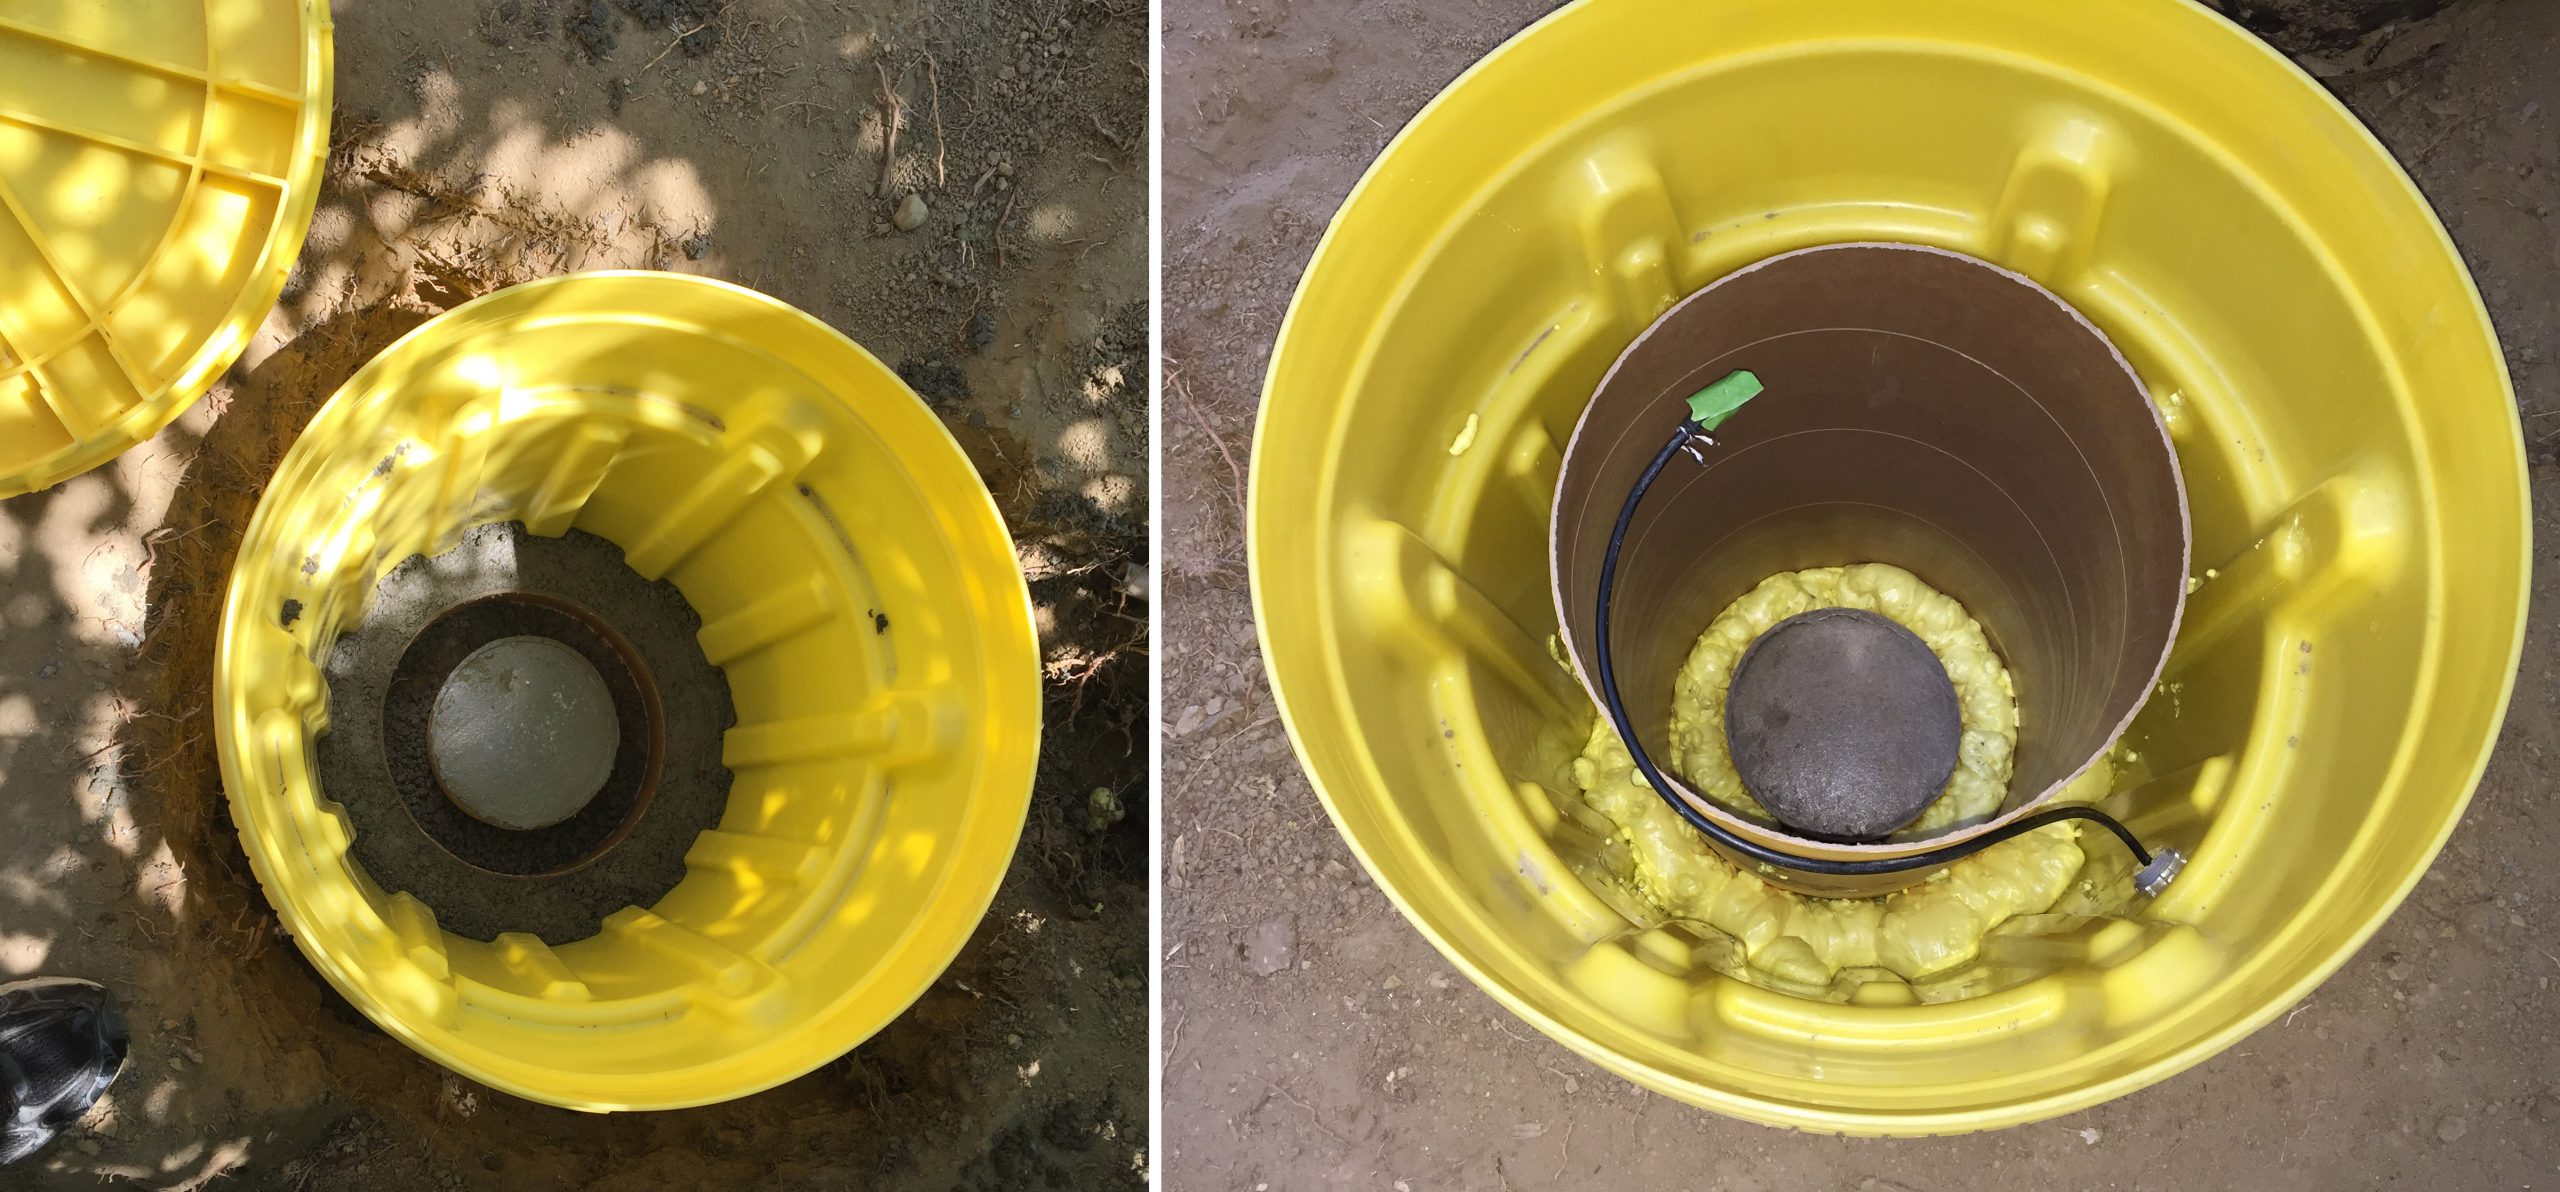
With the pier in place, it was time to build around it. I cut most of the bottom out of the overpack container. I left an inch or two on the bottom so it would sit flat in the hole. I centered the overpack over the pier. I then placed a 12 inch diameter tube form around the pier. The height of the 12 inch diameter tube was equal to the height of the pier. I then placed concrete between the overpack and the tube form. I also placed some concrete around the outside of the overpack. I only used enough on the outside of the overpack to keep the container stable. I backfilled the remainder with dirt.
Once the concrete around the 12 inch diameter tube had cured, I removed the short piece of tube form. I replaced the piece I removed with a 12 inch diameter tube that was long enough to extend to within an inch of the top of the overpack. This would create an inner ring around the pier.
INSULATION & MOISTURE PROTECTION
I had the basic structure in place now. My next step was to add insulation to keep the temperature stable in the vault and prevent moisture from getting in.
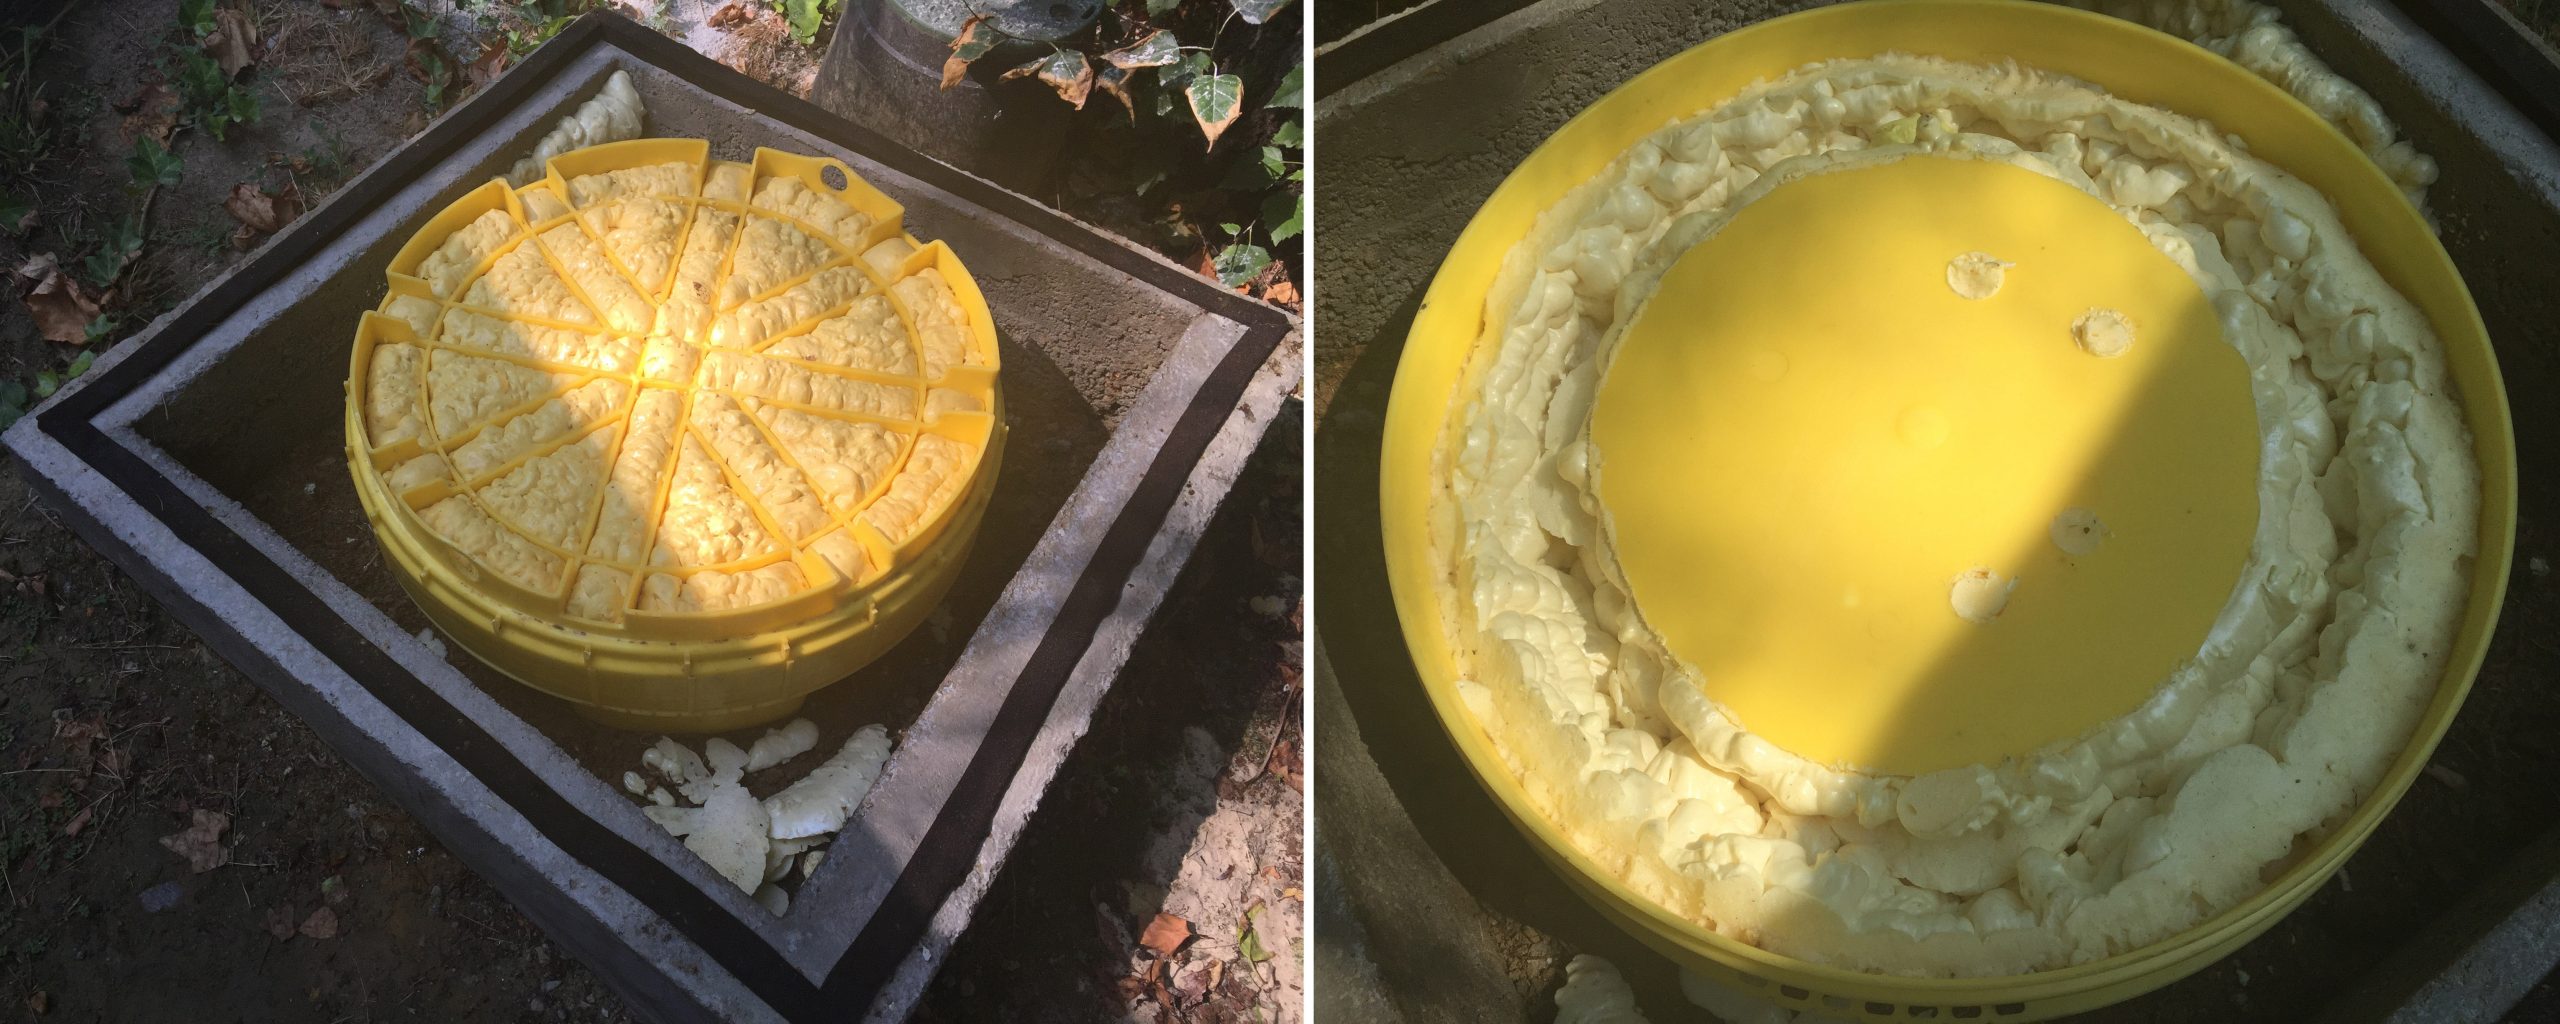
I used canned spray foam for the insulation (Great-stuff polyurethane foam insulation to be exact) and I used a lot of it! A word of caution for those that have not used it before. Make sure to wear gloves. It is very sticky and very hard to get off your skin. After a series of – spraying a layer, wait for expansion and cure, spraying a layer, wait for expansion and cure – the insulation reached the top of the container. I also sprayed foam on the top of the overpack lid.
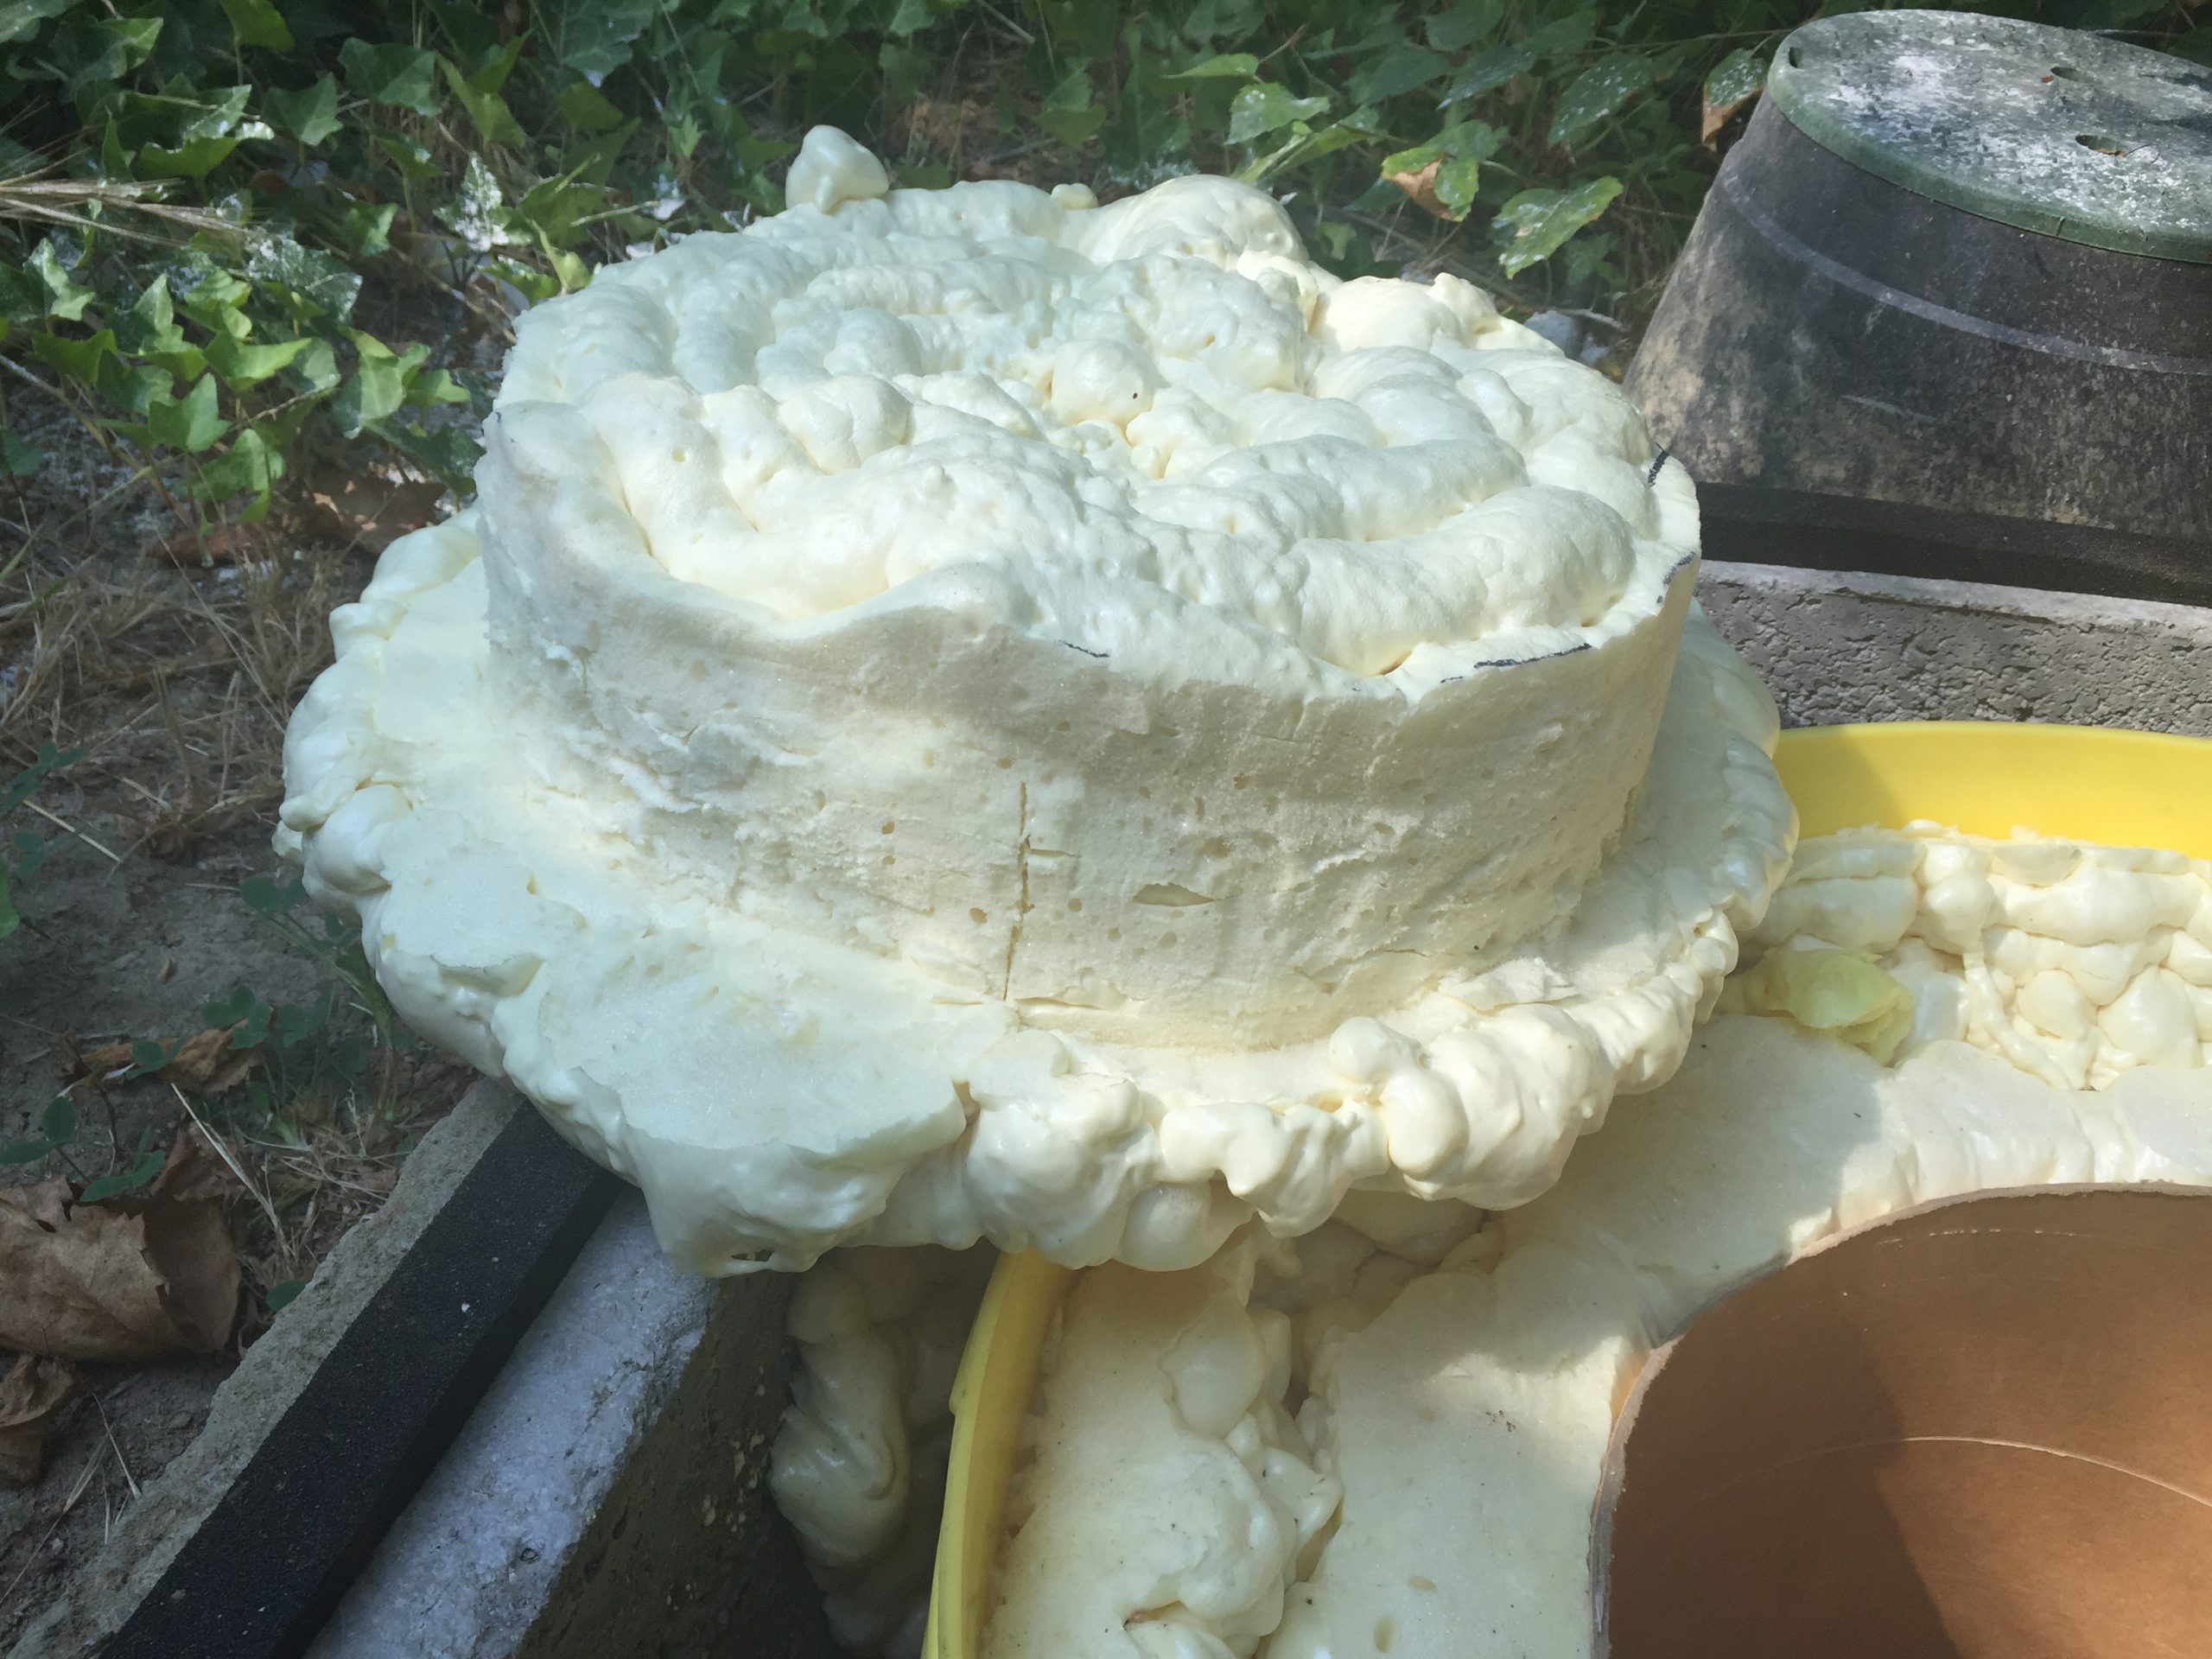
Finally, I used the cut out from the bottom of the overpack to form a cover for the 12 inch diameter tube. I spayed foam on the cut out and then trimmed the foam to the diameter of the tube. This created a plug for the top cover. I was finally done with insulation!
SECURING THE RASPBERRY SHAKE
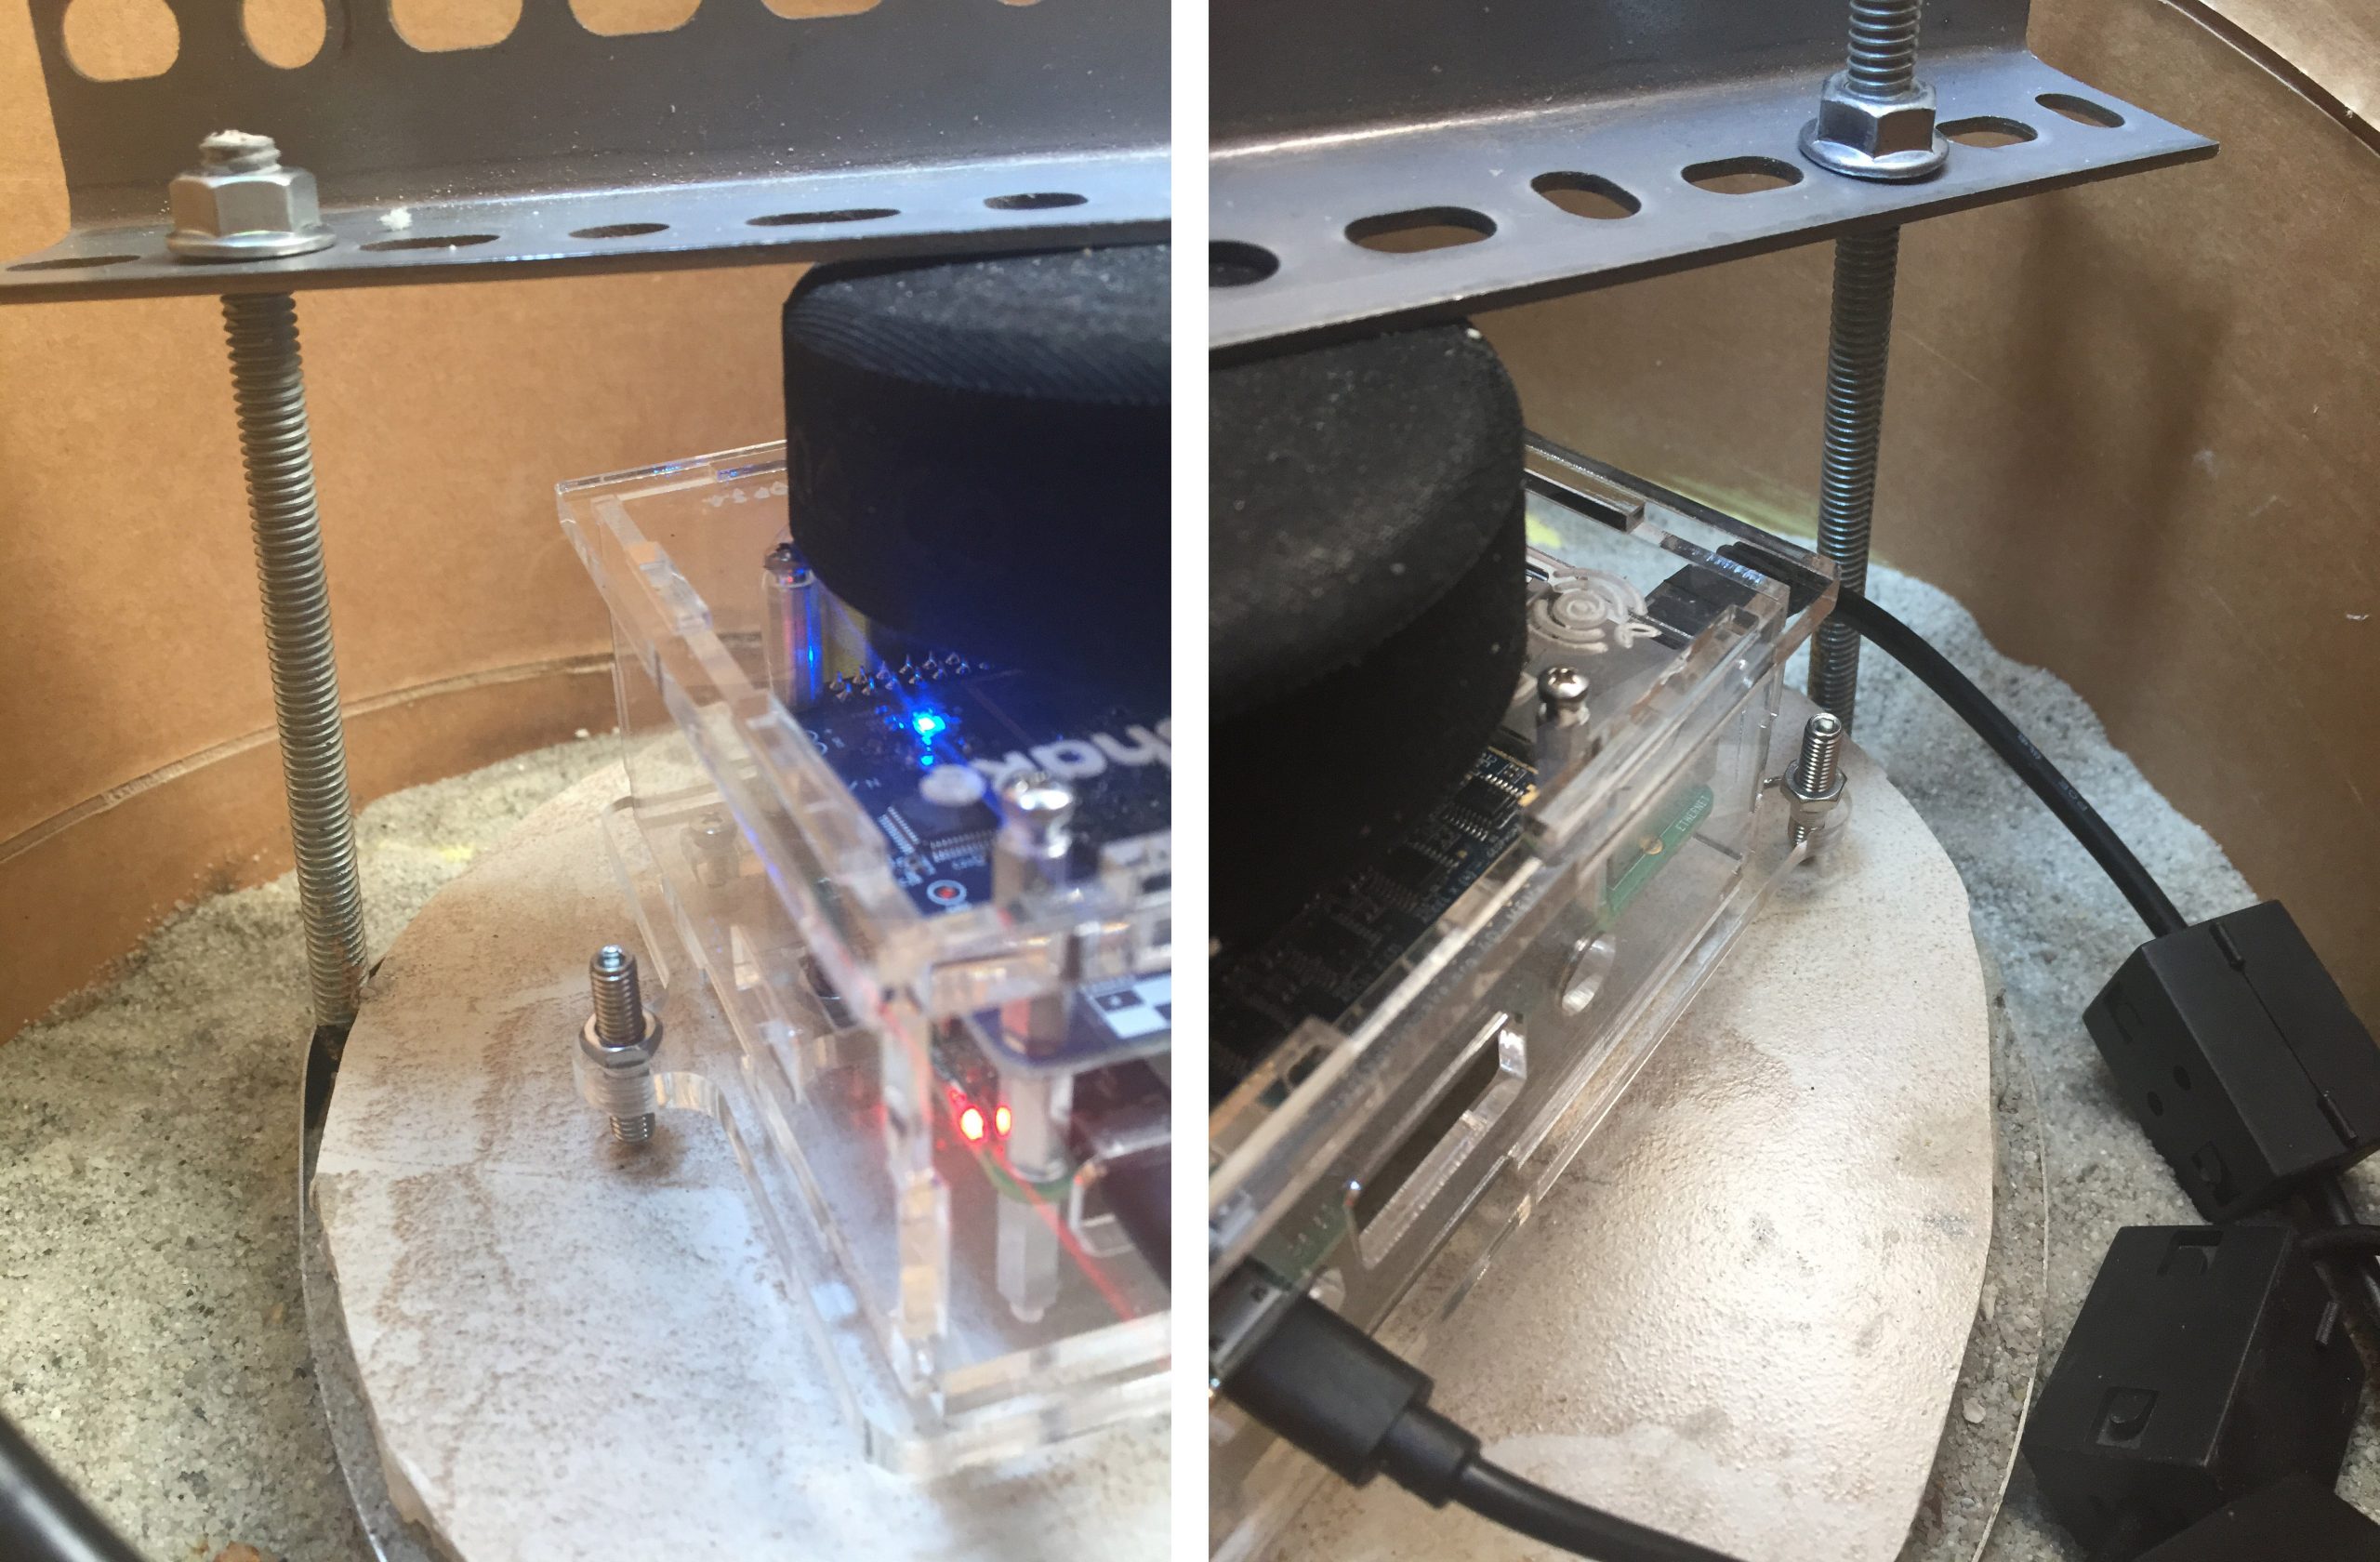
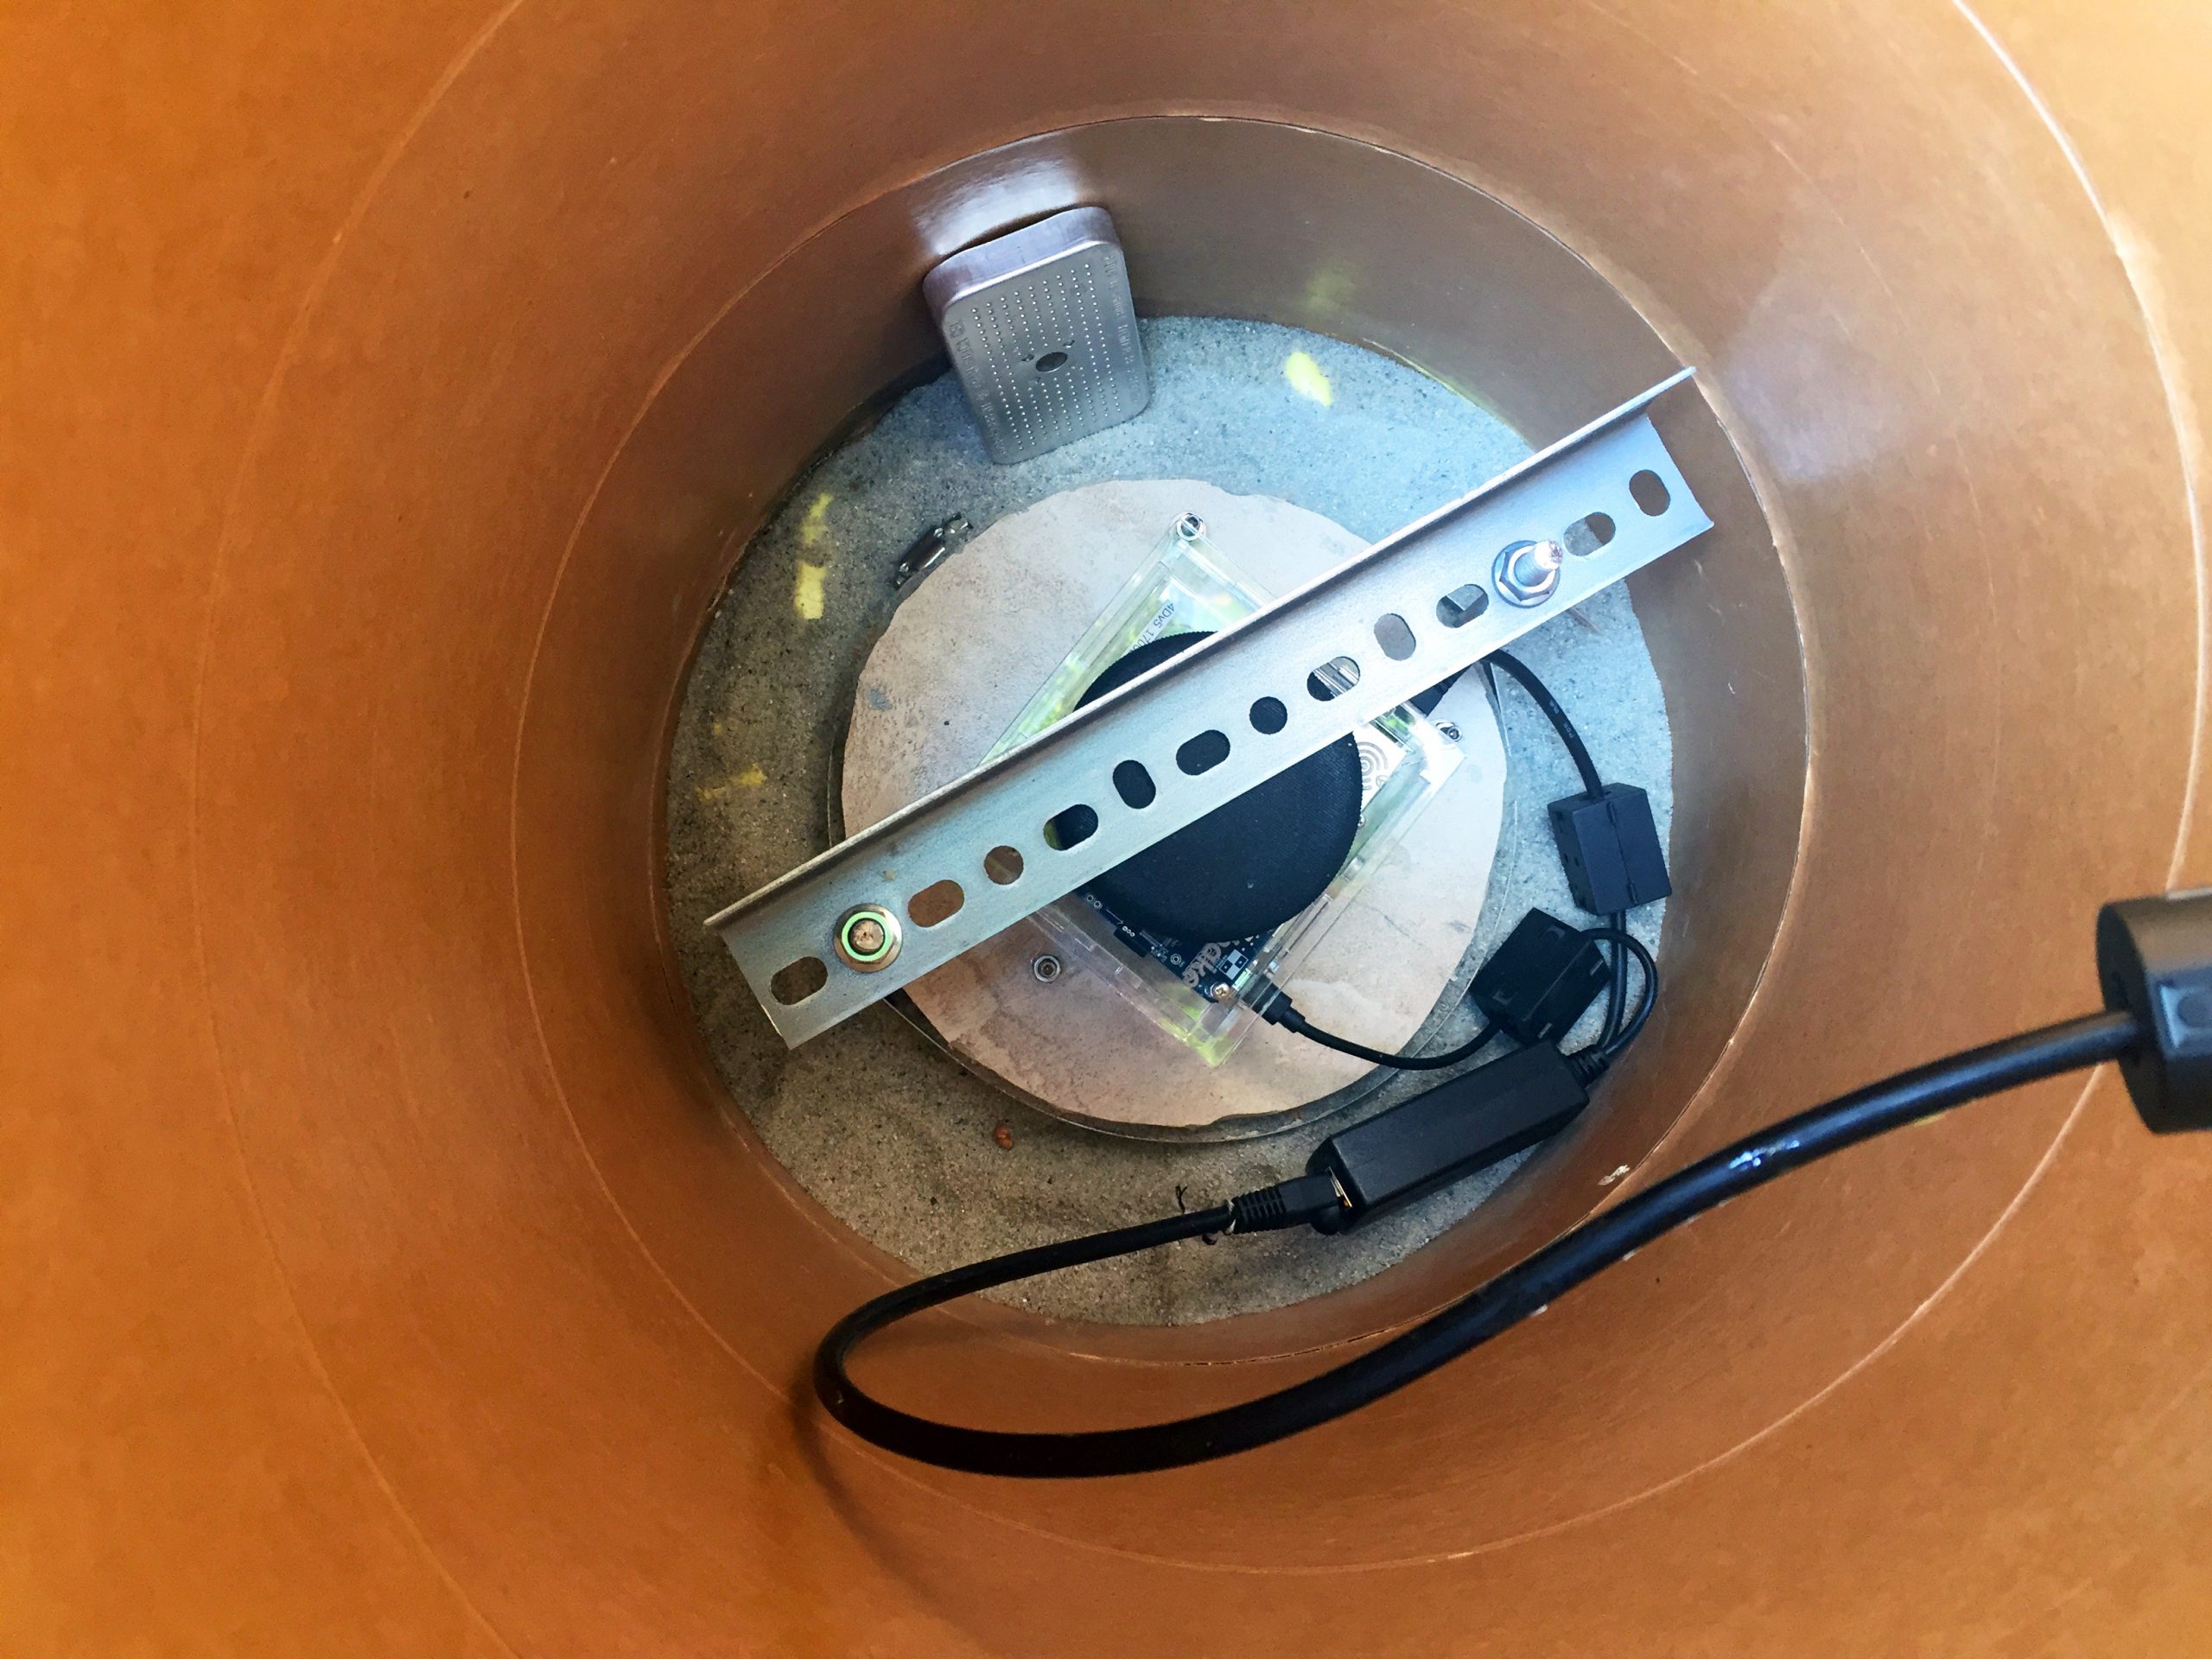
At the time of vault construction, I had a RS1D, but I later upgraded to a RS4D. There was discussion about anchoring the RS4D to prevent movement in large quakes. I came up with a securing method based on what I had on hand. Well, I did have to order one item not on hand. I ordered a large enough hose clamp to go around the 8 inch pier and tube. The clamp holds 2 threaded rods. The rods hold a piece of slotted angle iron using nuts on the rods. Between the angle iron and shake is a dense foam hockey puck. My son and I play a hockey in the garage with a foam puck at times. Hence, the puck being on hand. The nuts are only hand tight. I just have enough pressure so the shake does not slide. (note the flooring tile on top of the pier as mentioned earlier).
A FINAL TOUCH
At this point, I only had to secure the lid on the overpack and everything was ready to go. However, I wanted a little more sun and water protection. I decided to make a square wall around the overpack to direct water that came down the hill away from the overpack.
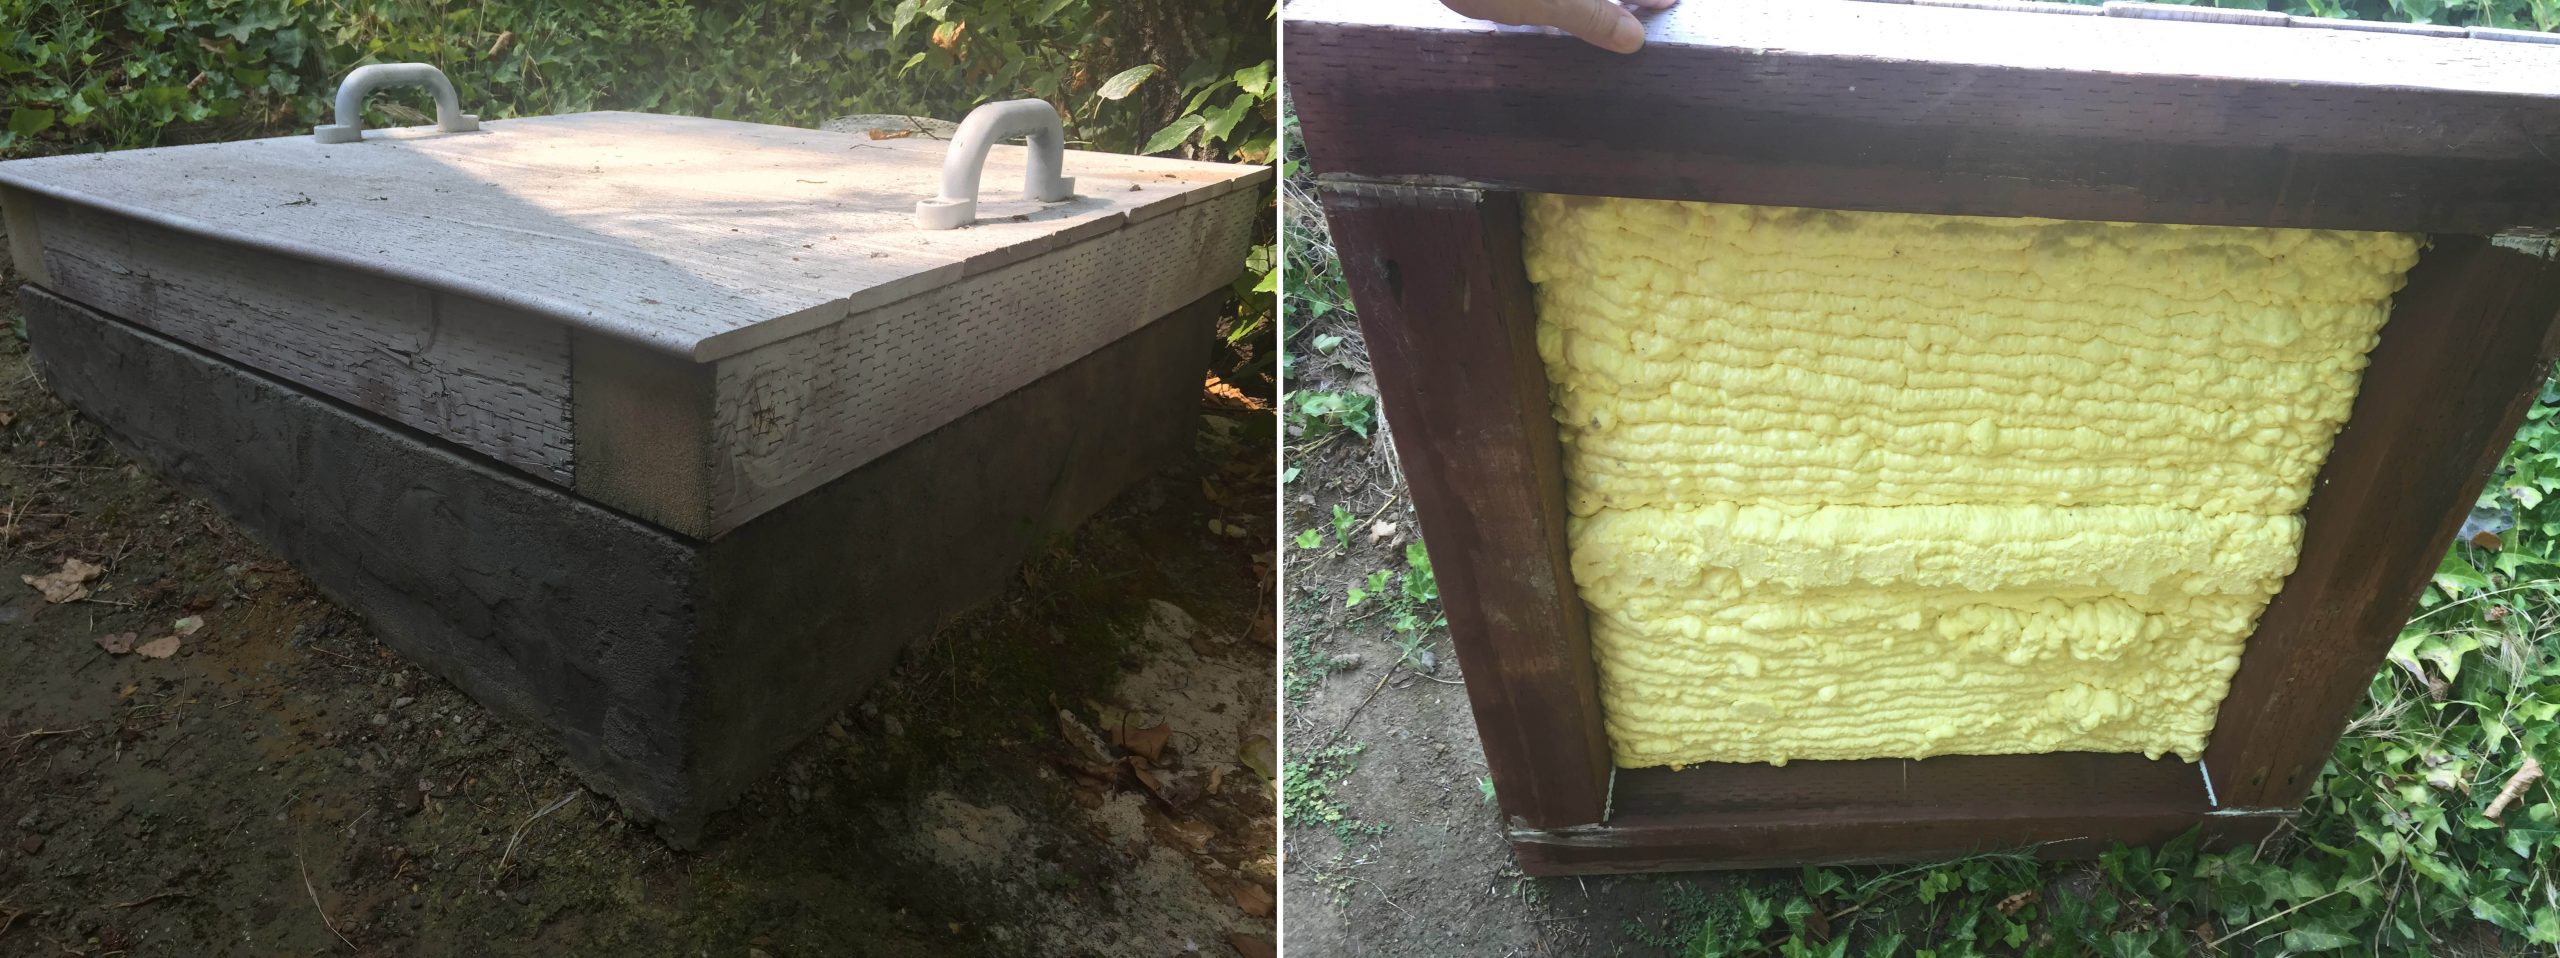
This was done using a doubled 2 x 4 form for the concrete. The wall is about 7 inches in height and 4 inches wide. The last step was to come up with a cover to protect the overpack from the sun and any rain or sprinkler water from above. The cover is constructed from 4×4’s for the frame. I used pvc fencing for the top, spray painted white to reflect heat. I placed caulking around all the joints. I added swing set handles to help lift the cover. I used more spray foam insulation under the cover. I was not quite done with the insulation after all! I placed outdoor weather stripping on top of the wall the cover sits on, to form a good seal.
MY RASPBERRY SHAKE WAS HOME
Finally, vault 2.0 was done. I placed my RS1D in its new home. I added a reusable desiccant pack to keep things extra dry. The RS1D was in the vault until it was replaced by my RS4D in October 2017. The vault has now been in use since July 2017 and I have not run into any issues with it. I know it is not perfect, but it has worked to my satisfaction. Cultural noise is not eliminated, but has been greatly reduced.
Again, the Shake performed well in the garage. The vault I constructed is going far beyond what is needed to record earthquakes with the Raspberry Shake. It was my desire to see how much I could quiet cultural noise drove to this point. For those sharing the same desire, this is one possible path you can take.
You can see my Raspberry Shake in action over at station view here.
Information Links:
Links to Vault Items:
I will do a follow up article on the software and data sharing setup shortly so watch this space!
From all of us at Raspberry Shake a special thanks to Steve Caron for sharing his awesome set up. We look forward to hearing more from you!
