A MUDDY ADVENTURE WITH RASPBERRY SHAKE
29 July, 2019 – Written by John Beale
BACKGROUND
I was seeing quite a bit of noise from nearby road traffic on my Raspberry Shake seismograph station RF7DC SHZ AM. Moving it outside the house to the back property line, about 200 feet from the road, did not help much. Apart from traffic, the site is not bad: in either location, it is fairly quiet at night in between clear noise signatures of the occasional car. When relocating it horizontally did not help, I considered the vertical direction.
Reaching bedrock would be ideal, but it turns out my location in Oregon’s Willamette Valley means I am sitting on 200 feet of sedimentary soil, residue of the Missoula Floods that formed Lake Allison here 13,000 years ago. Hard rock was out of reach, but I decided to see what I could do, figuring the deeper I went, the less surface noise I should see.
STARTING THE DIG
I started with the old-fashioned clamshell-style post hole digger. This made a 6 inch diameter hole but it was hard to use beyond 4 feet deep. Then I got a 4-inch soil auger with T-bar handle and slowly got a bit farther. Next I got a 4-inch drill type auger bit meant for gas-powered post hole diggers. Without a power head, I made an adaptor to attach this to the T-handle.
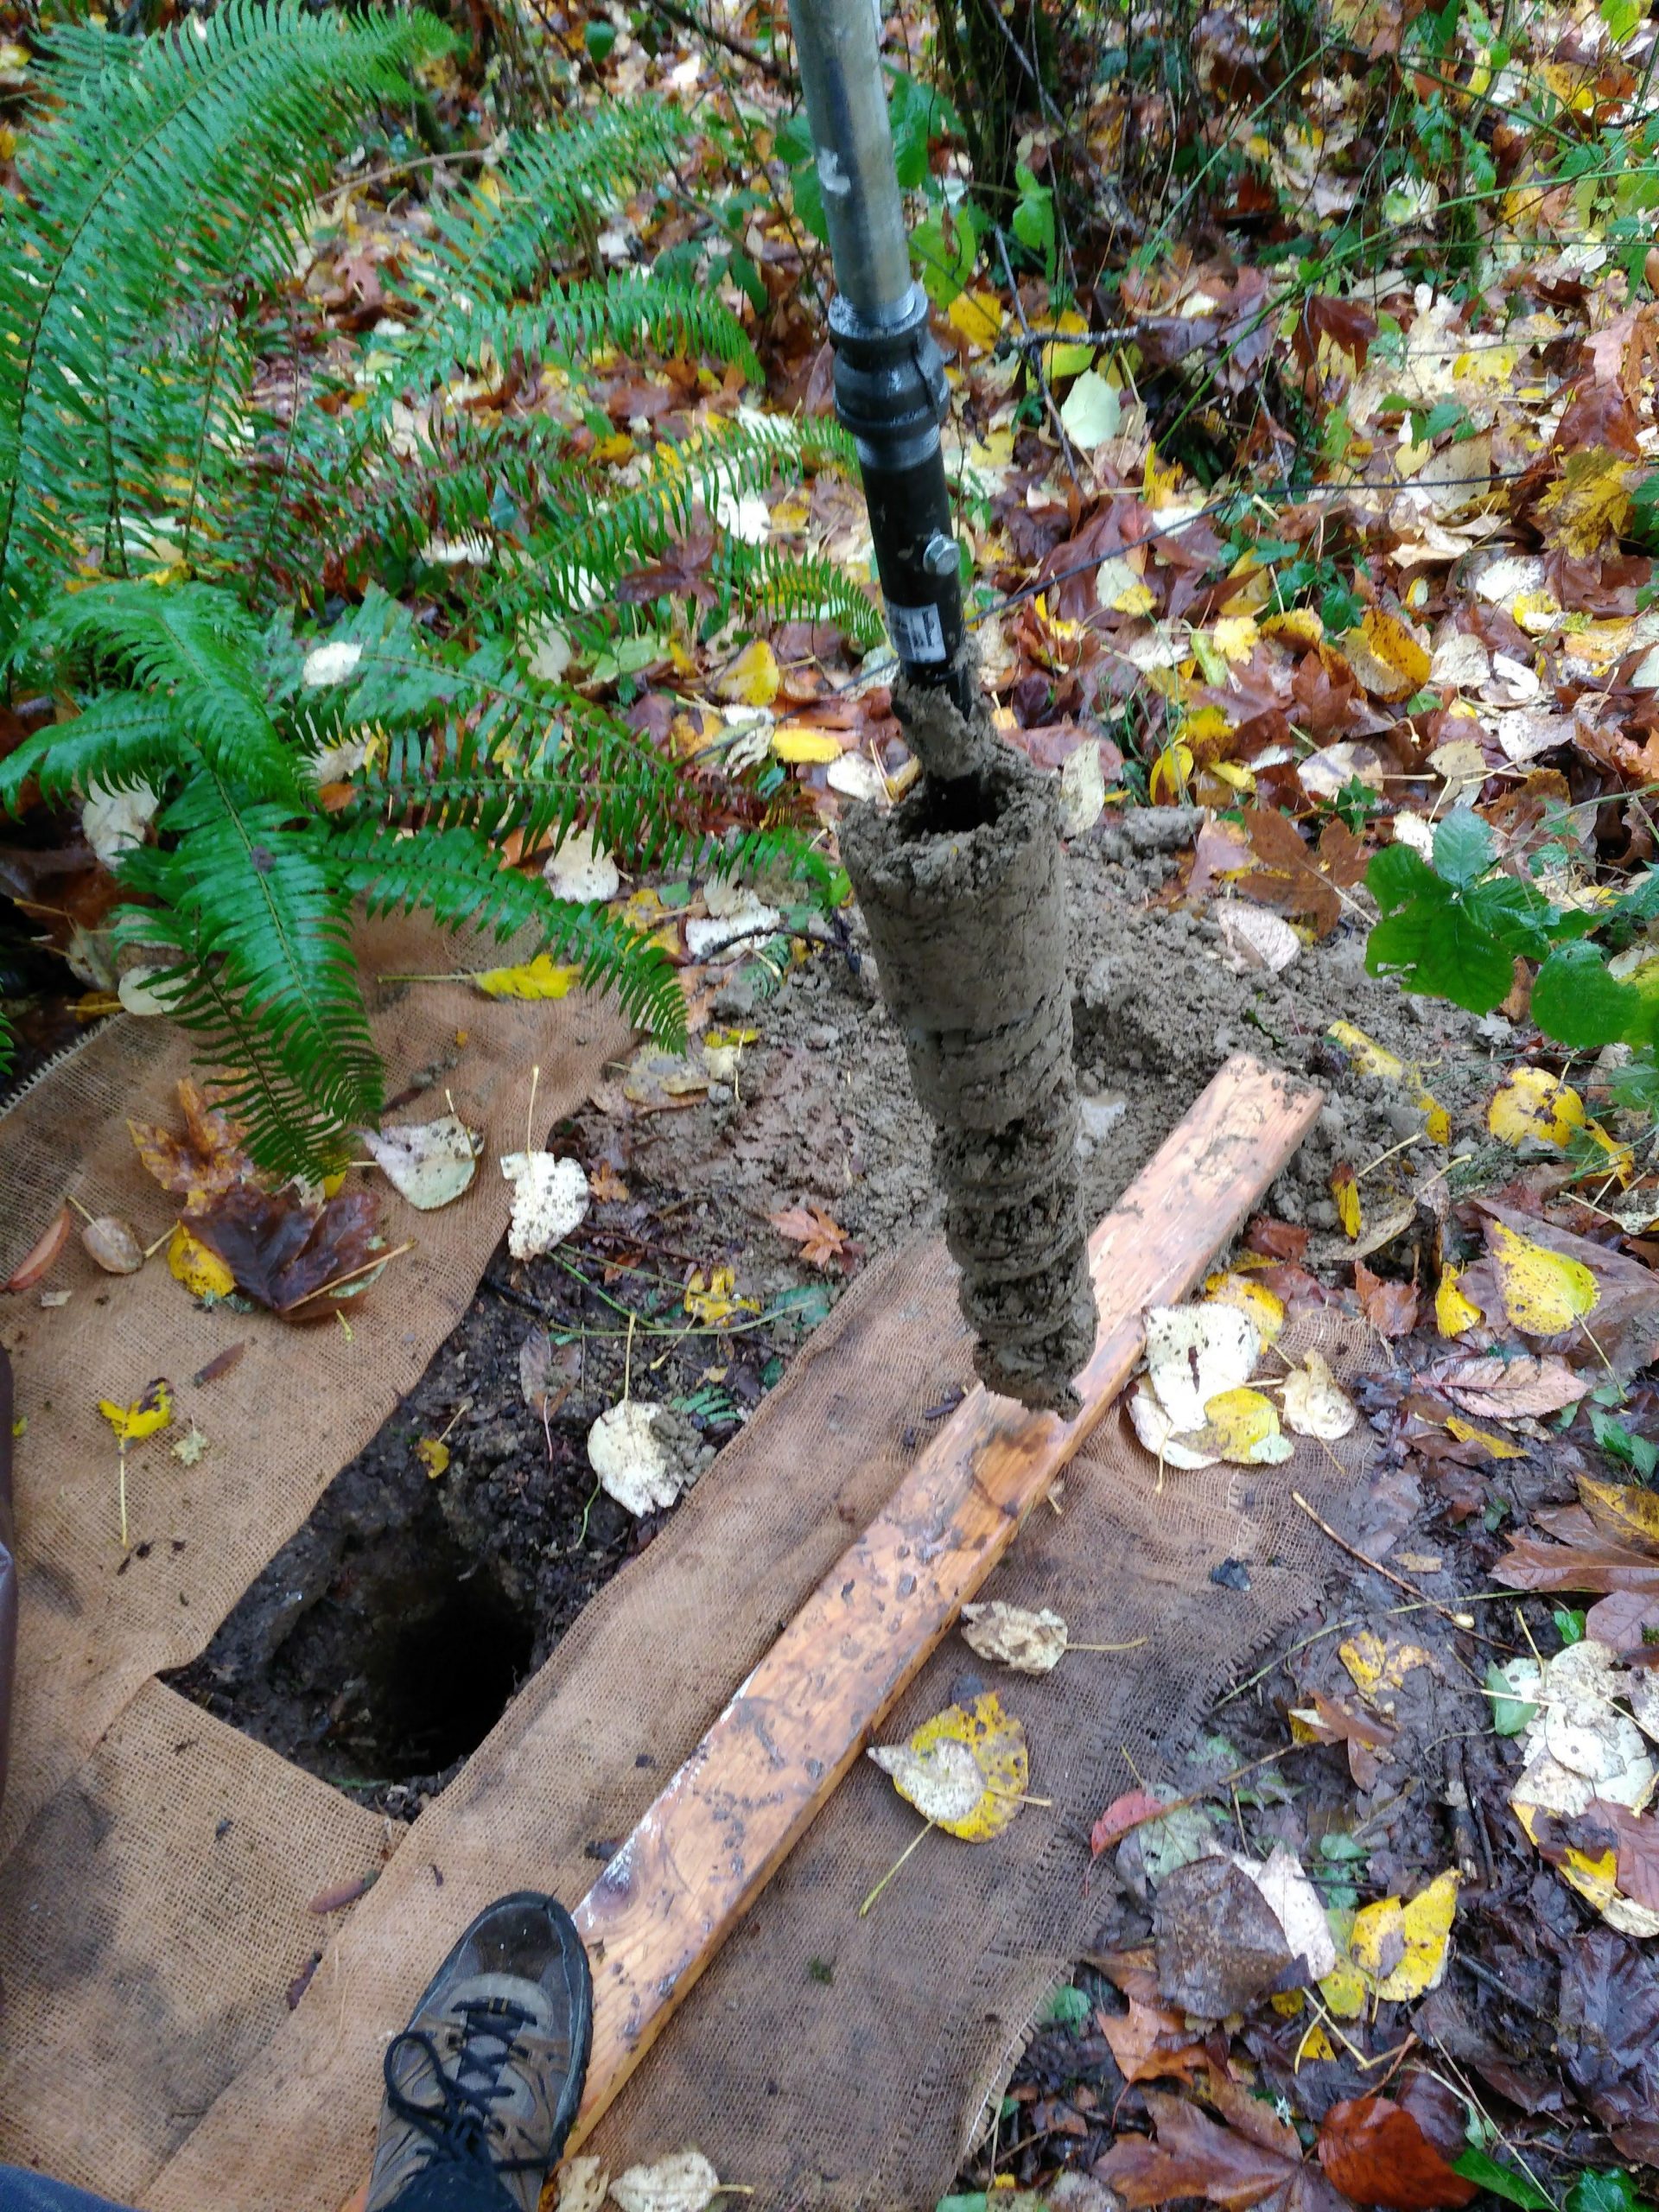
The 4-inch drill auger brings up a heavy load of dirt.
Even just by hand, this went faster than my other tools, and adding lengths of pipe I made it down to 13 feet, where I hit water.
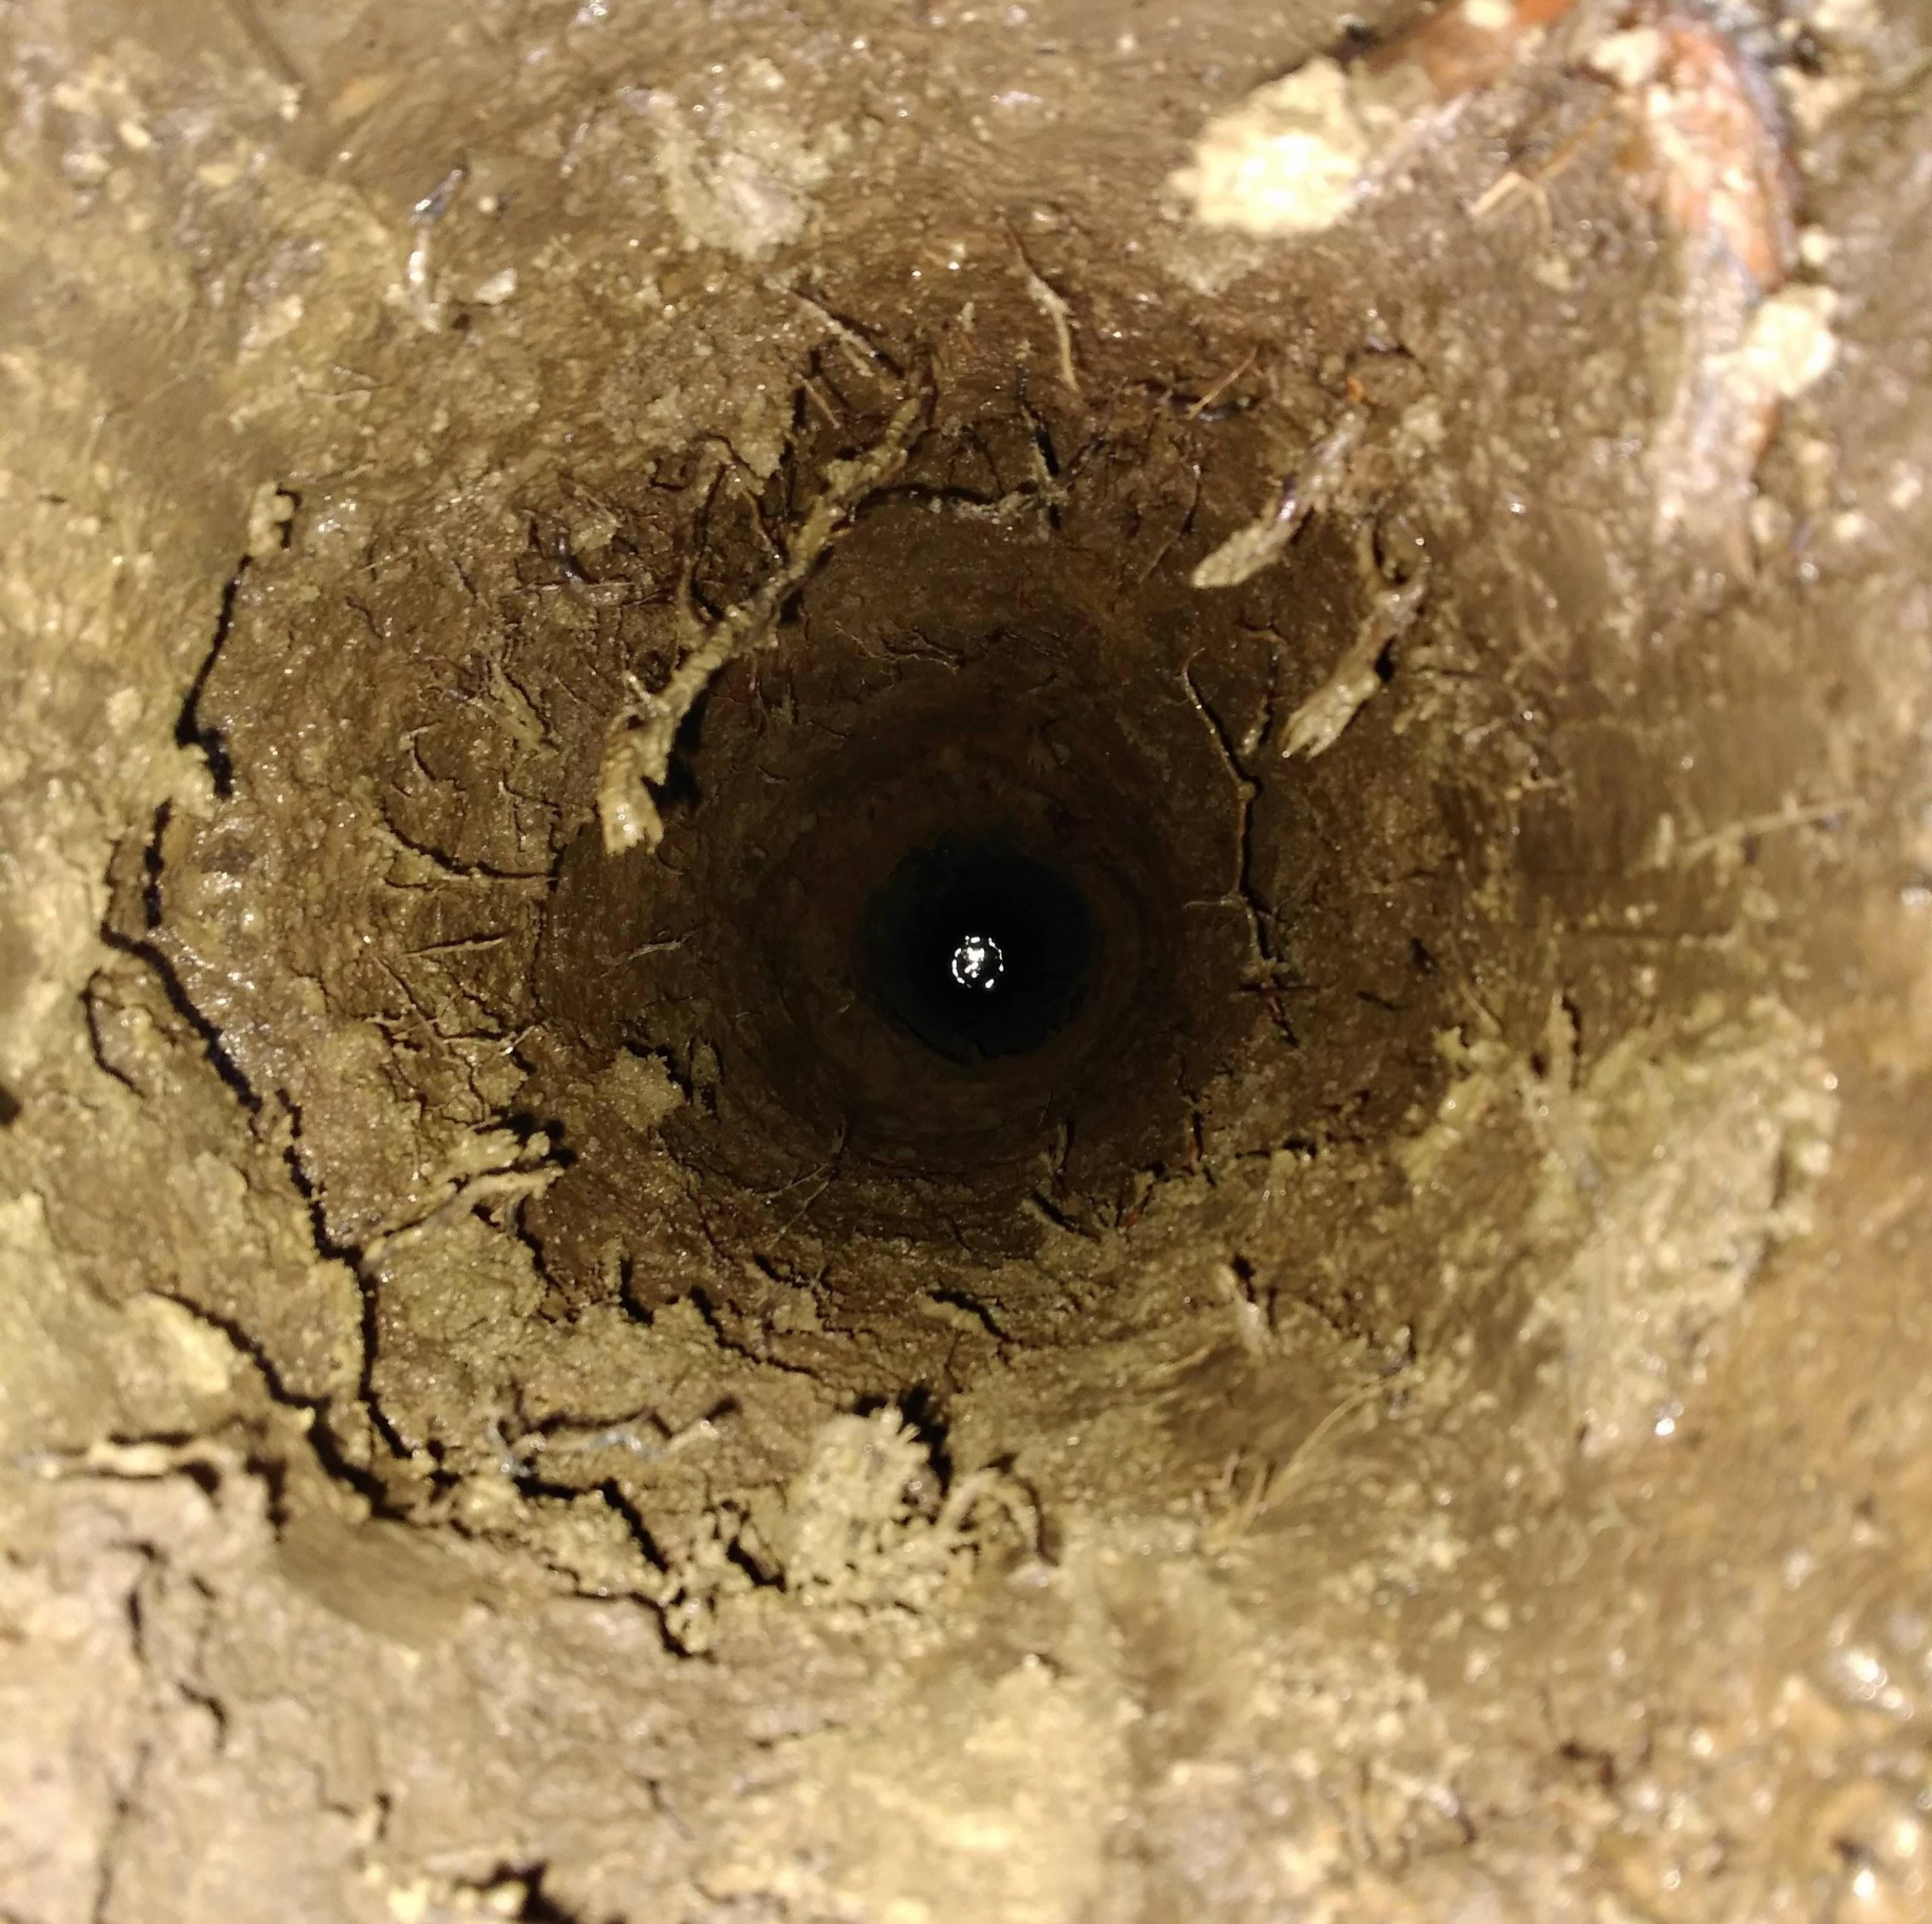
Looking down the hole, water is visible at a depth of 13 feet.
USGS has a fine-grained computer model for this area, and they say the permanent water table at my address should be 119 feet down. It seems I’m lucky enough to be on a pocket of “perched groundwater”. At any rate the sandy soil slumped back to refill the hole at the water line, so I had to change tactics.
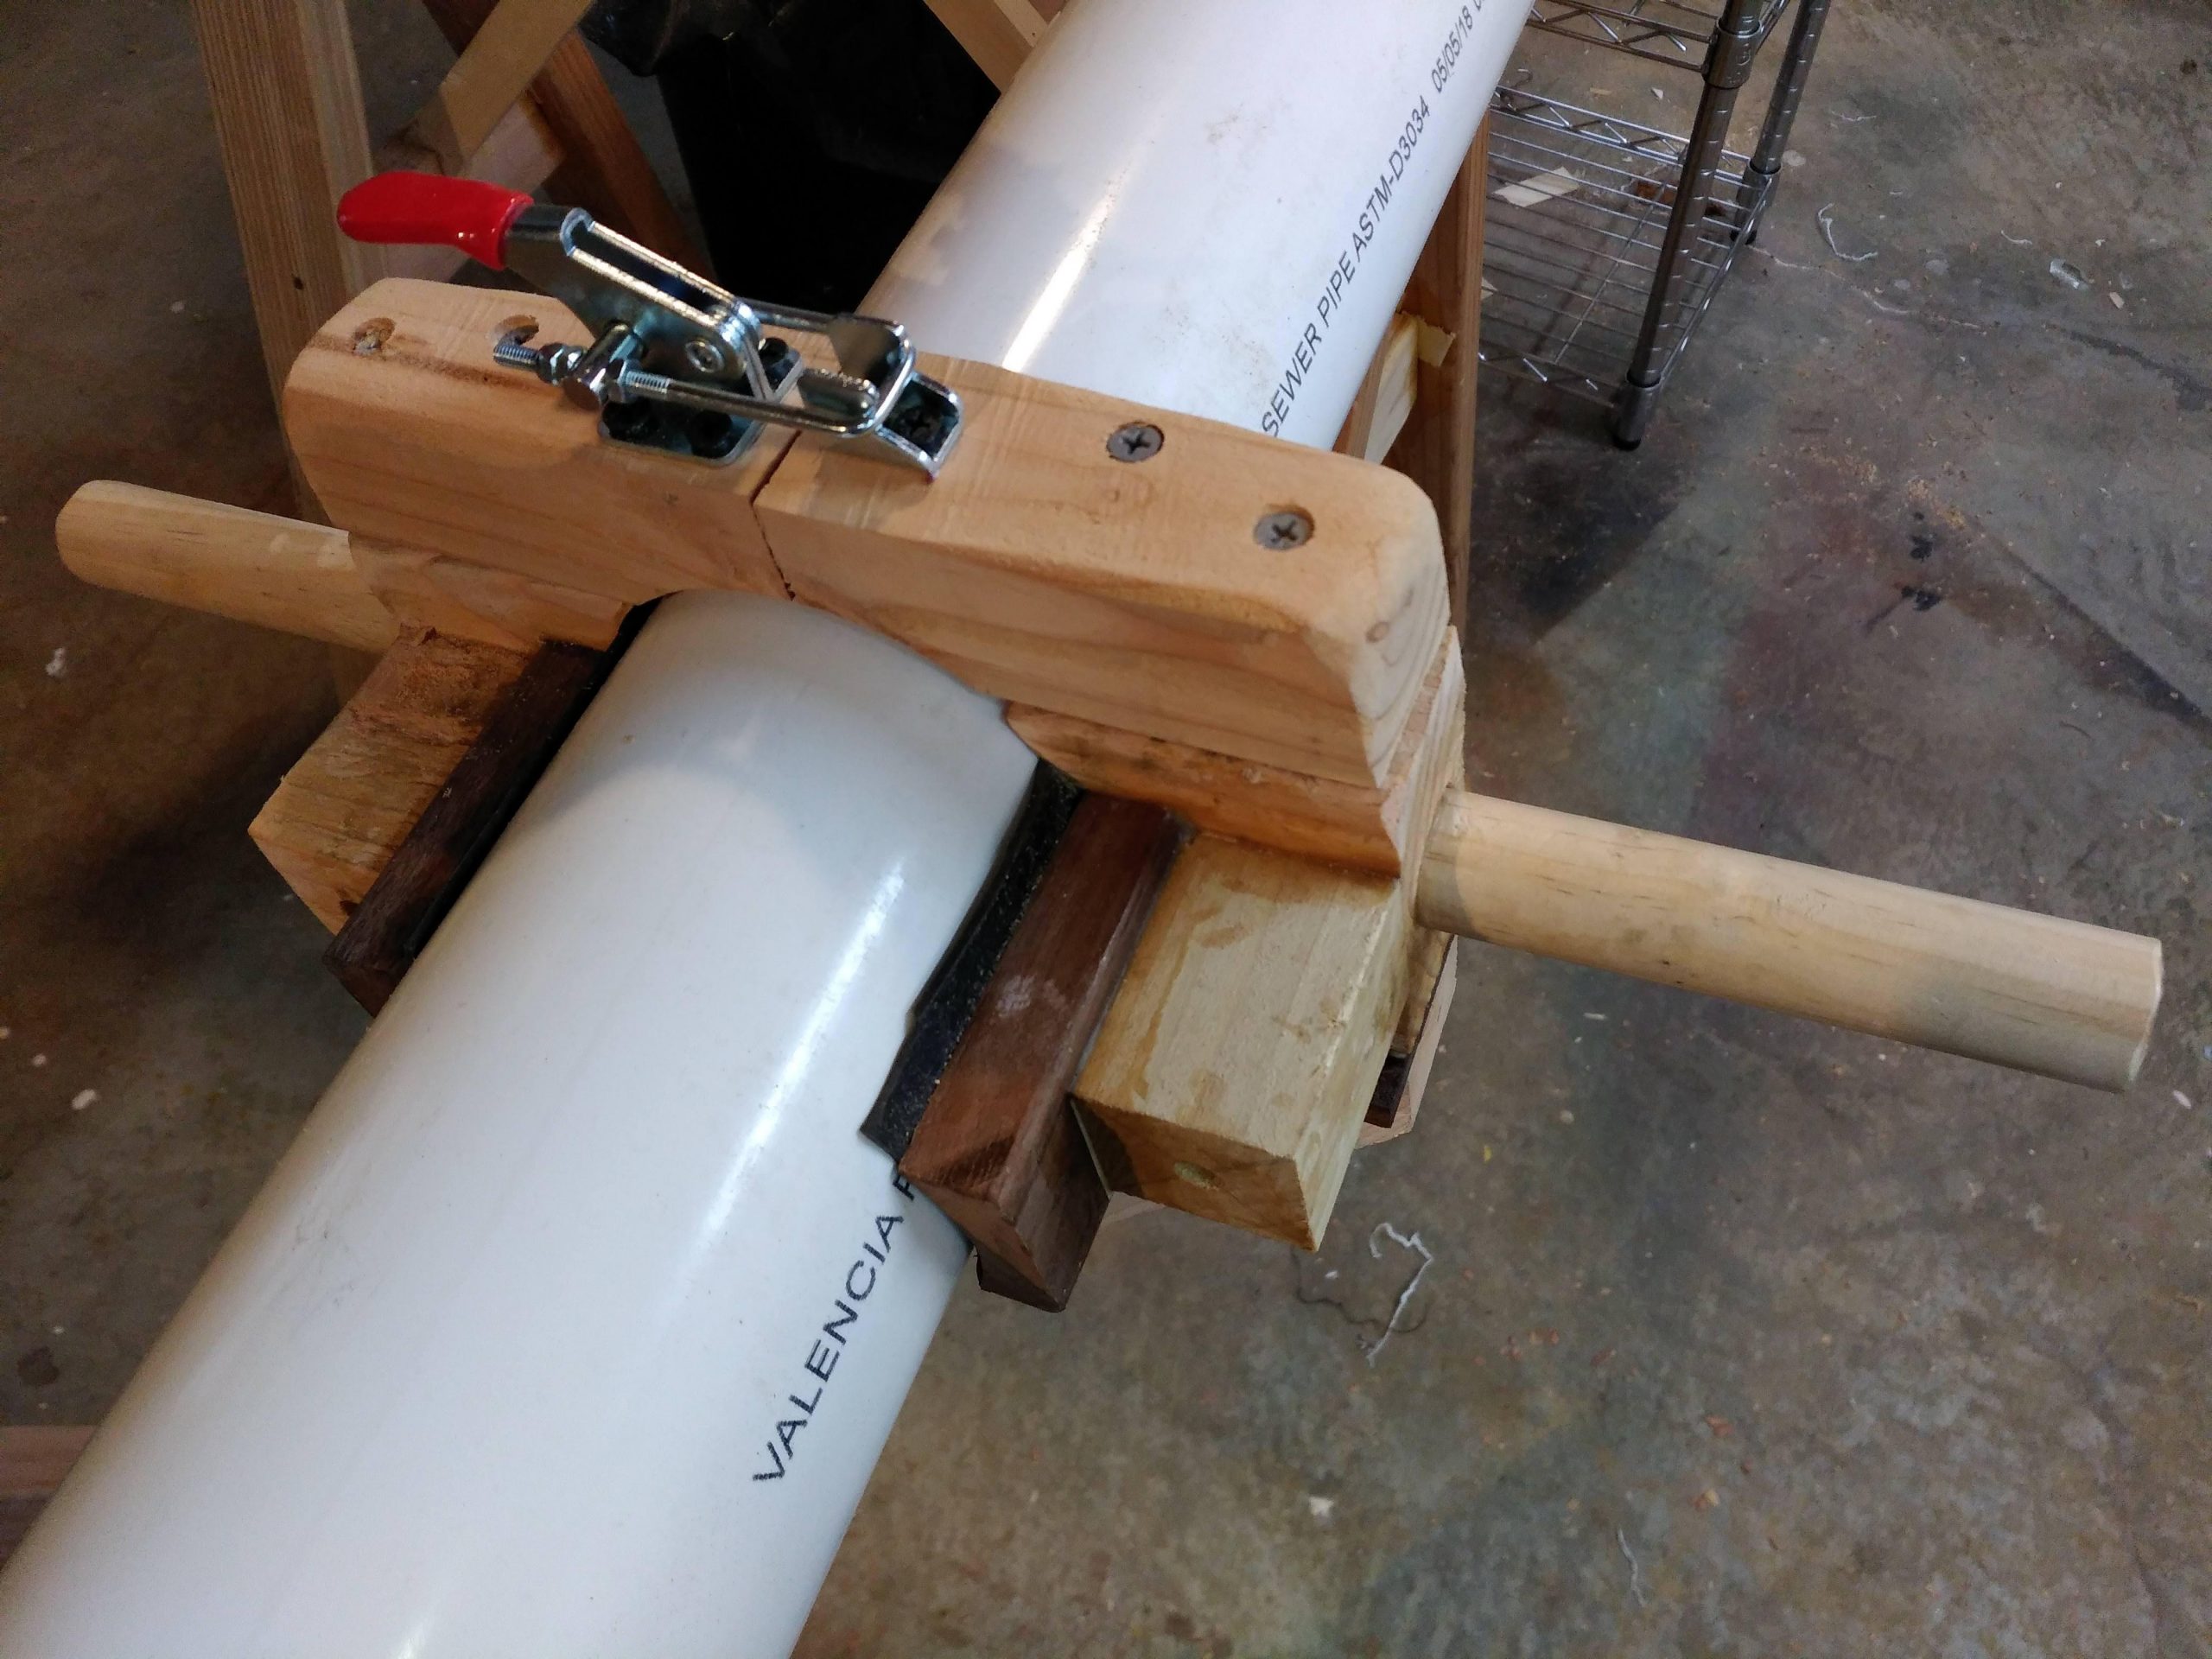
Rubber pads help grip the pipe so it can be pushed downwards.
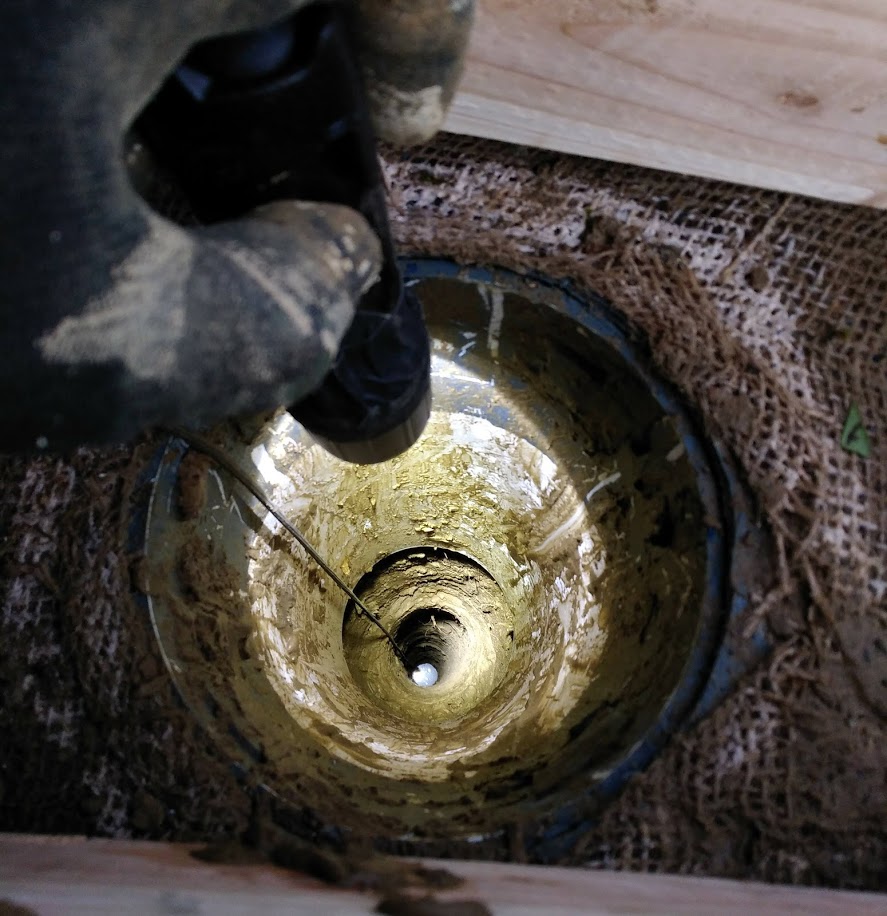
Looking down into the mud through a short 6″ topside casing I added.
I found a 4-inch PVC “sewer and drain” type pipe from the hardware store would just fit inside my auger hole.
I got two 10’ lengths of this and with added water from the garden hose I was able to work it all the way in, so I now had 20 feet of casing down, although it contained water and sand below around 14 feet.
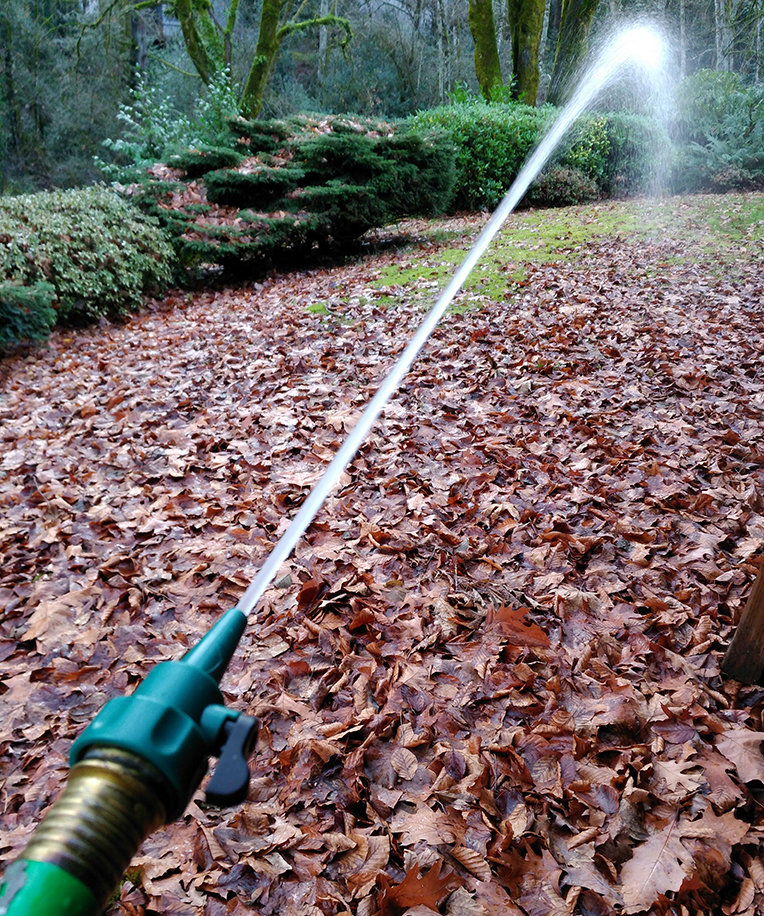
Water helped the process of inserting the pipe.
As the inner diameter of the pipe was less than 4 inches, my tools would no longer fit down inside. I found a drill-type auger on ebay that would fit, but the mud just slid back off it when I tried to lift it up. Then I tried lowering a tin can down on a string, and was able to pull up some sandy muck along with the water.
DISASTER STRIKES
Lowering the can into the water and jiggling it up and down stirred up the muck, some of which would settle back into the can, so I made slow progress this way.
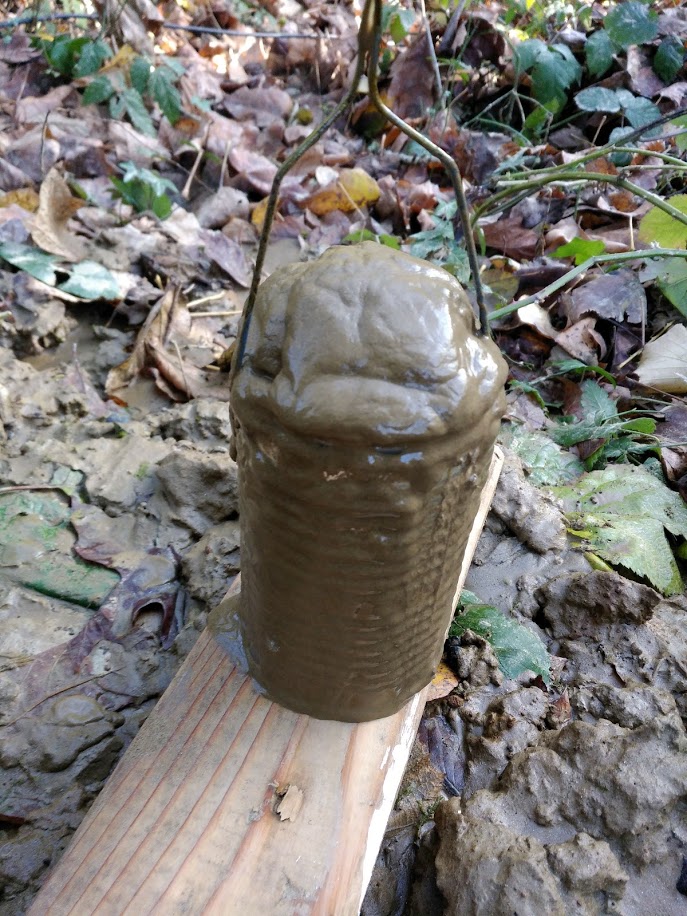
The tin can on a string brings up a heaping load of silt.
Then after leaving the can at the bottom overnight, I found it was stuck at the bottom the next morning and when I pulled harder, the string tied to it came off!
Lowering a magnet was unsuccessful. A much stronger magnet also failed.
I thought of different retrieval ideas but the design depended on whether the can had somehow gotten crossways and below the pipe, so I needed to see its position.
I got a “waterproof” USB camera on a 30-foot cable. It turns out 4 feet of water was too much, and it recorded nothing but opaque muddy water before failing.
EXTREME MEASURES
I conceived of a cunning plan. Since my hole was enclosed by a proper pipe, I added a fitting to a PVC endcap and pumped air into the pipe with a low-pressure hand pump. I thought the increased air pressure should push out the water, revealing the bottom. After some vigorous pumping the endcap came unstuck and made a sudden and intimate acquaintance with my face, prompting a detour to Urgent Care. Doing the math, it turns out 8 psi on a 4 inch diameter endcap means 100 pounds of force, who knew? I recommend that you do not try this part of the adventure at home.
I didn’t want the story to end there, so I added a window to the endcap large enough for a raspberry pi camera to look through, and returned to the fray with 150 pounds of sand bags holding the camera-equipped end cap on, with me and the hand pump huddling cautiously at the far end of 100 feet of garden hose. Pumping away as I watched the camera feed on my laptop, I discovered the water level in a pipe does not go down very quickly when the far end is firmly embedded in mud. I tried again with an air compressor and outboard 10 psi regulator, and after about 5 hours under pressure, the water dropped low enough to uncover a heap of mud and apparently, the upper rim of a tin can. It was resting upright in the pipe after all.
BACK AT IT
My 80 mm auger bit immediately speared and brought up one mangled tin can, so the whole misadventure with air pumps was unnecessary. However the auger still failed to make lasting progress in the soupy sand.
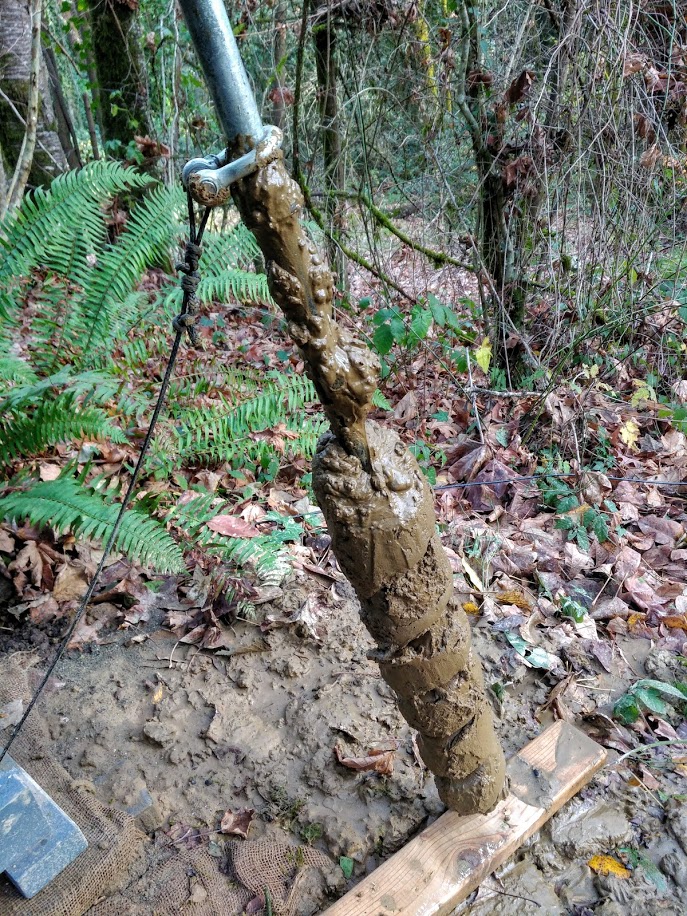
80 mm auger with a load of wet mud.
This was a good time to see what difference these efforts had made, so I moved the R-Shake from its surface concrete block, over to perch on the T-handle which was the top of the drill string extending down to the auger 22 feet below.
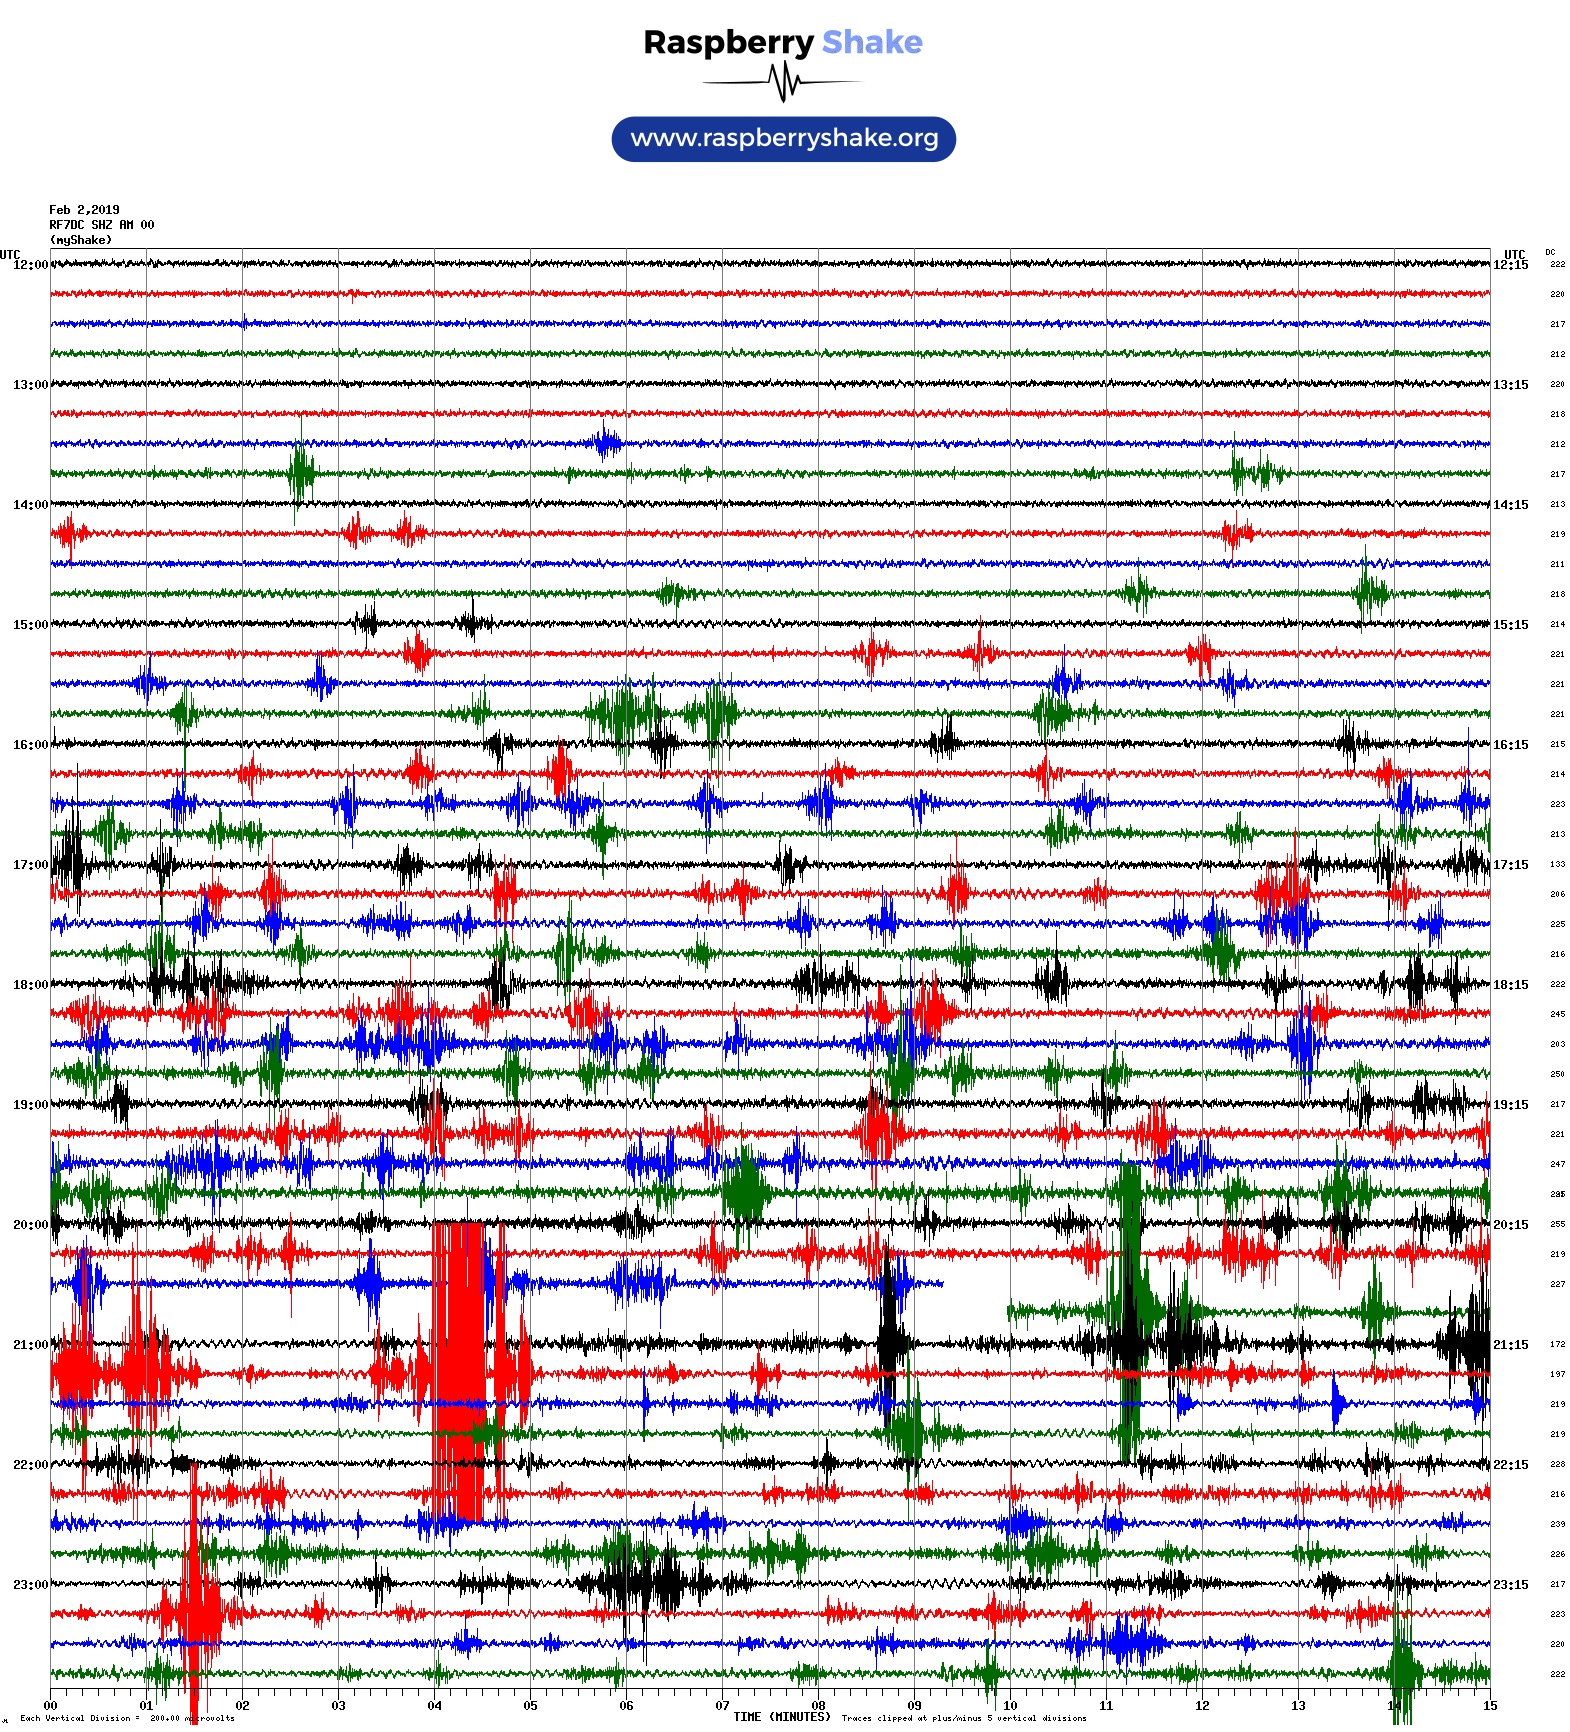
Helicorder plot before and after moving to perch my RS on the pipe.
Judging the result by eye, the traffic noise was reduced but perhaps not more than a factor of 2. I was holding out hope for a better result.
ONE LAST PUSH
At this point I got a welder, learned to use it (barely) and fabricated my own custom “mud auger” that just fit inside the pipe.
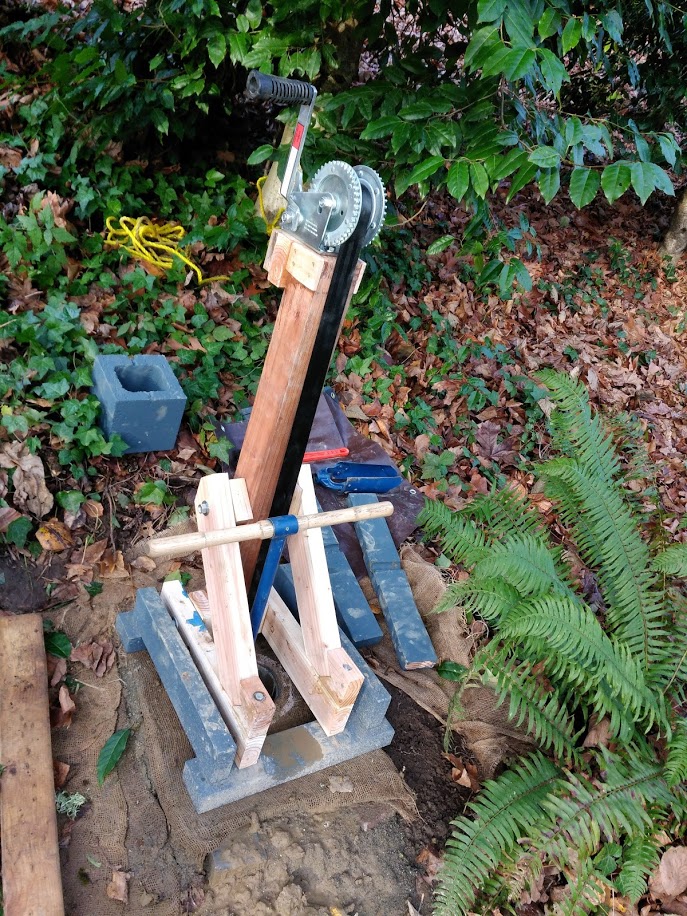
Manual boat winch on post lifts auger, despite sticky mud.
With this tool I reached 25 feet, but due to sticky conditions it now required the help of a boat winch to lift back up, and being underwater, the sidewalls below the casing simply slumped back down afterwards.
It seemed this depth was the limit for a freestanding hole, but I could still push a pipe down further.
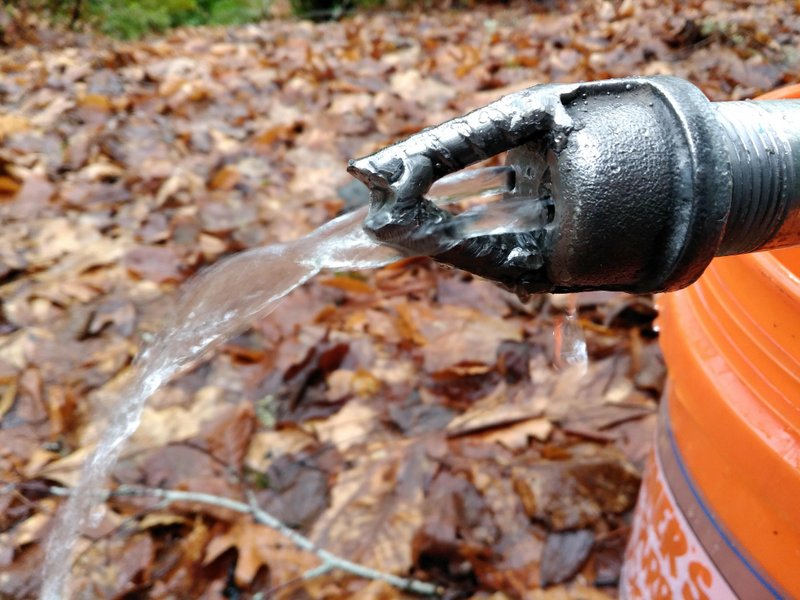
1-inch steel pipe with modified endcap for water-assisted drilling.
I welded rebar into a V on an iron endcap and added two holes for water to feed through it.
I attached this to some 10’ lengths of steel pipe with a garden hose on the other end, and by a manual process of twist, lift, rotate, drop, and repeat with the water flowing through the pipe- the “drill your own water well” method- I worked the pipe down to 40 feet. It went down at a rate of 4 feet per hour and from the feel and sound of the pipe during this process, it was all gritty hard-packed sand.
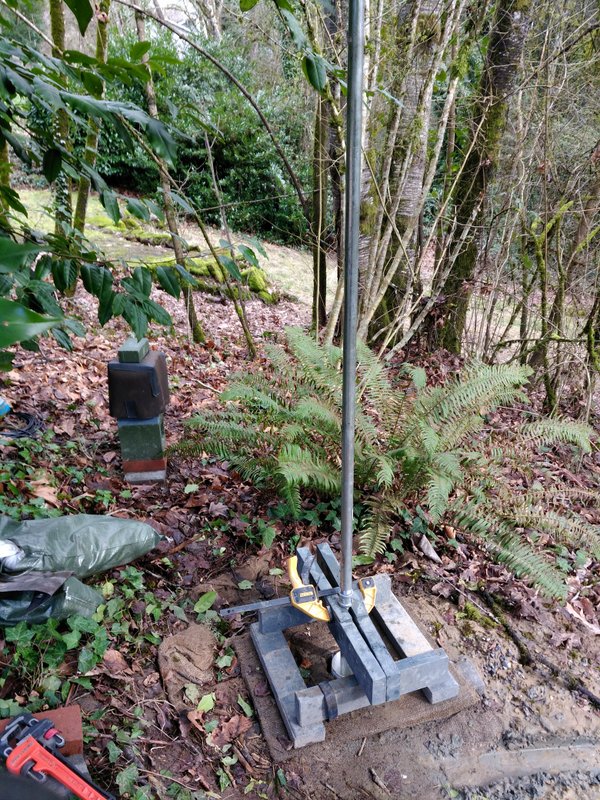
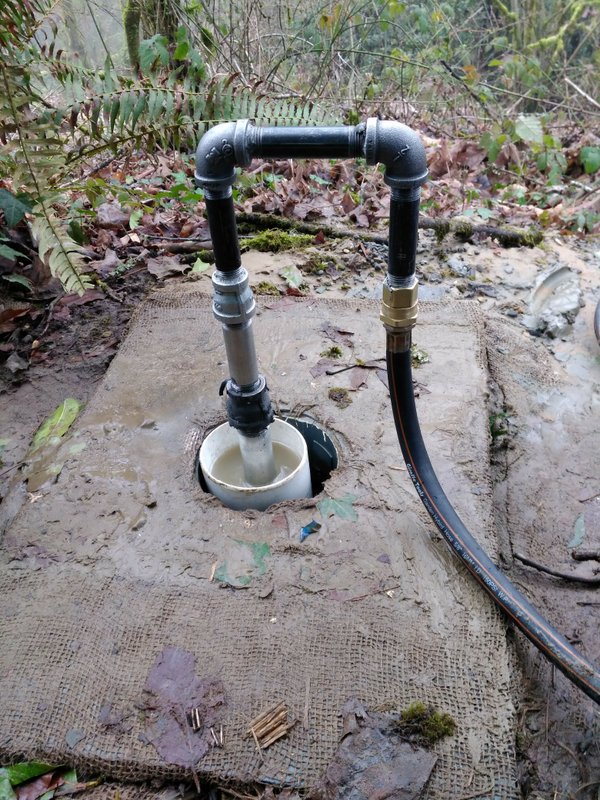
Working the final length of pipe downwards: lift, drop, repeat.
FINISHING TOUCHES
At this point I had a tall and very slender pier (1 inch diameter pipe, 40 feet long) buried deep into the ground. I removed the hose and U-shaped pipe sections and I took a deep breath and said goodbye to the hole, pouring in sand and gravel fill around the pipe to hold it in place. Then I put an end plate on the pipe, and added two 25-pound barbell weights and a concrete block to the top. This was the new home for my Shake station RF7DC.
The Shake showed an improved result, but as the traffic varies from day to day it was hard to say exactly how much better it was, without a second Shake to compare surface readings at the same time. I placed another order at the Raspberry Shake store.
When my second Raspberry Shake, R79D5, arrived, I also needed to either run a second ethernet cable out into the woods, or get a PoE- powered ethernet switch on the far end so I could connect both devices. In the end I installed a remote PoE switch, and finally co-located my two R-Shakes; with one sitting on top of my buried pipe, and the other on a concrete block a few feet away, on the surface.
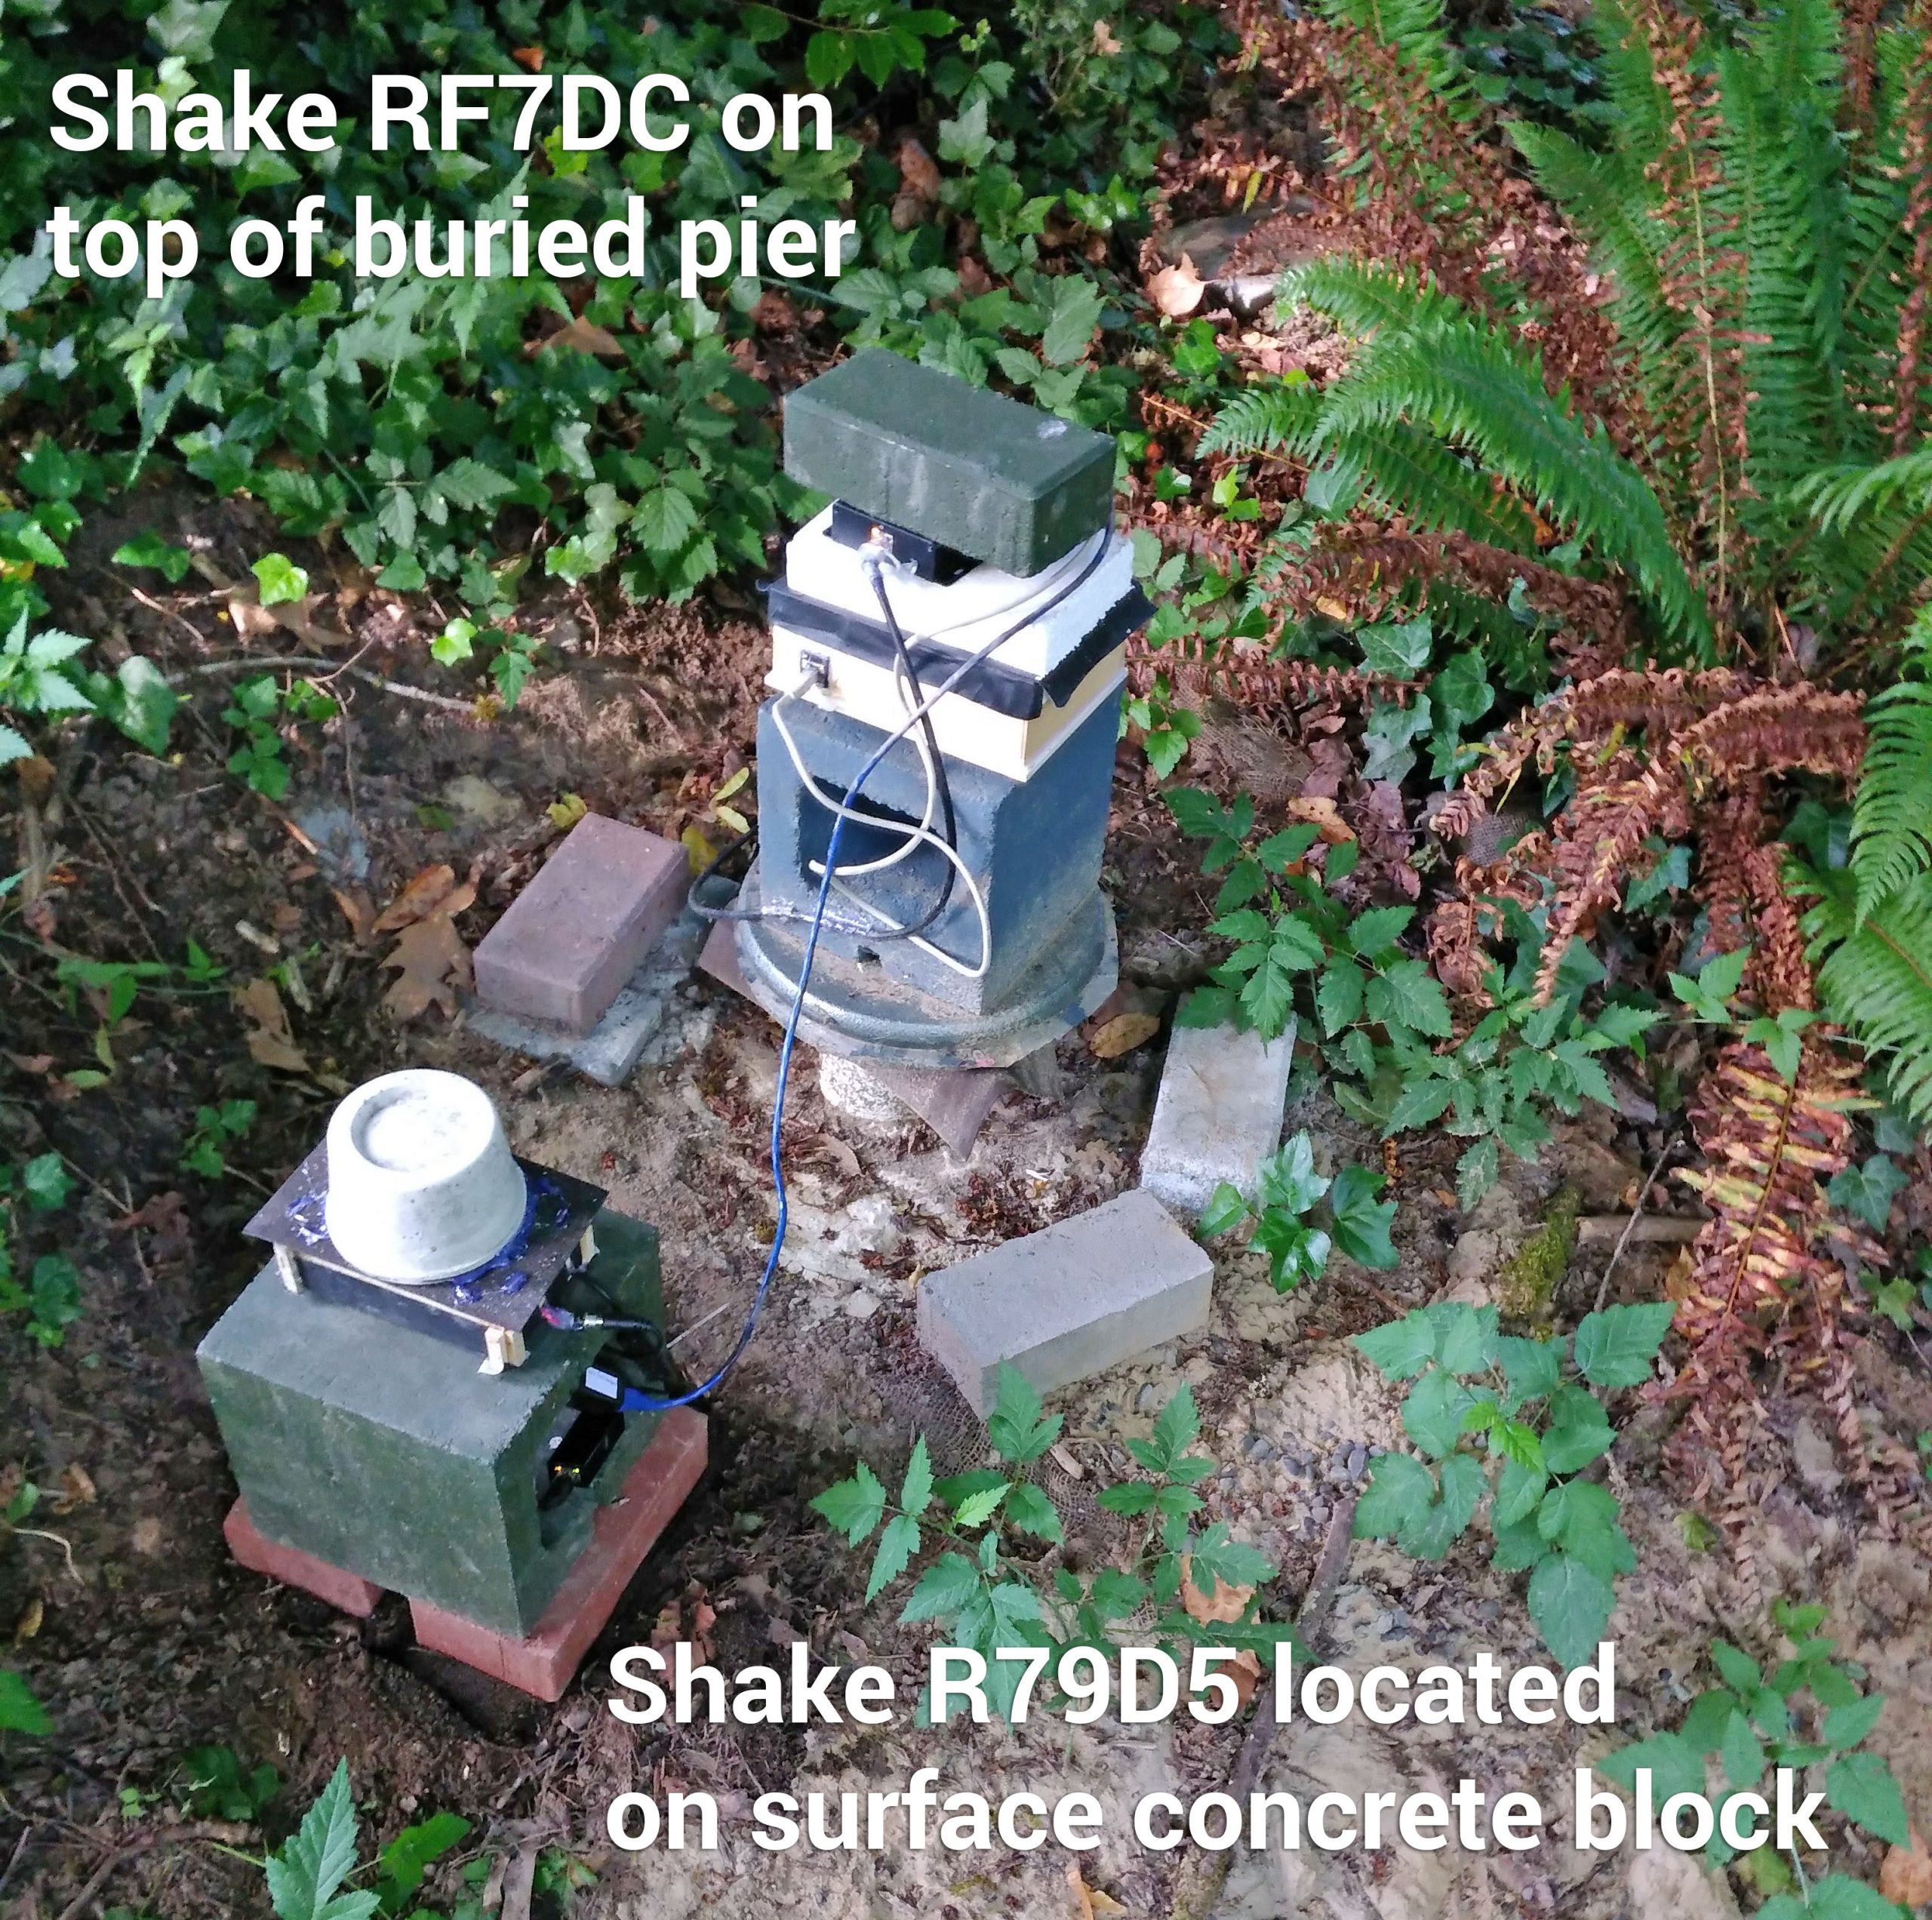
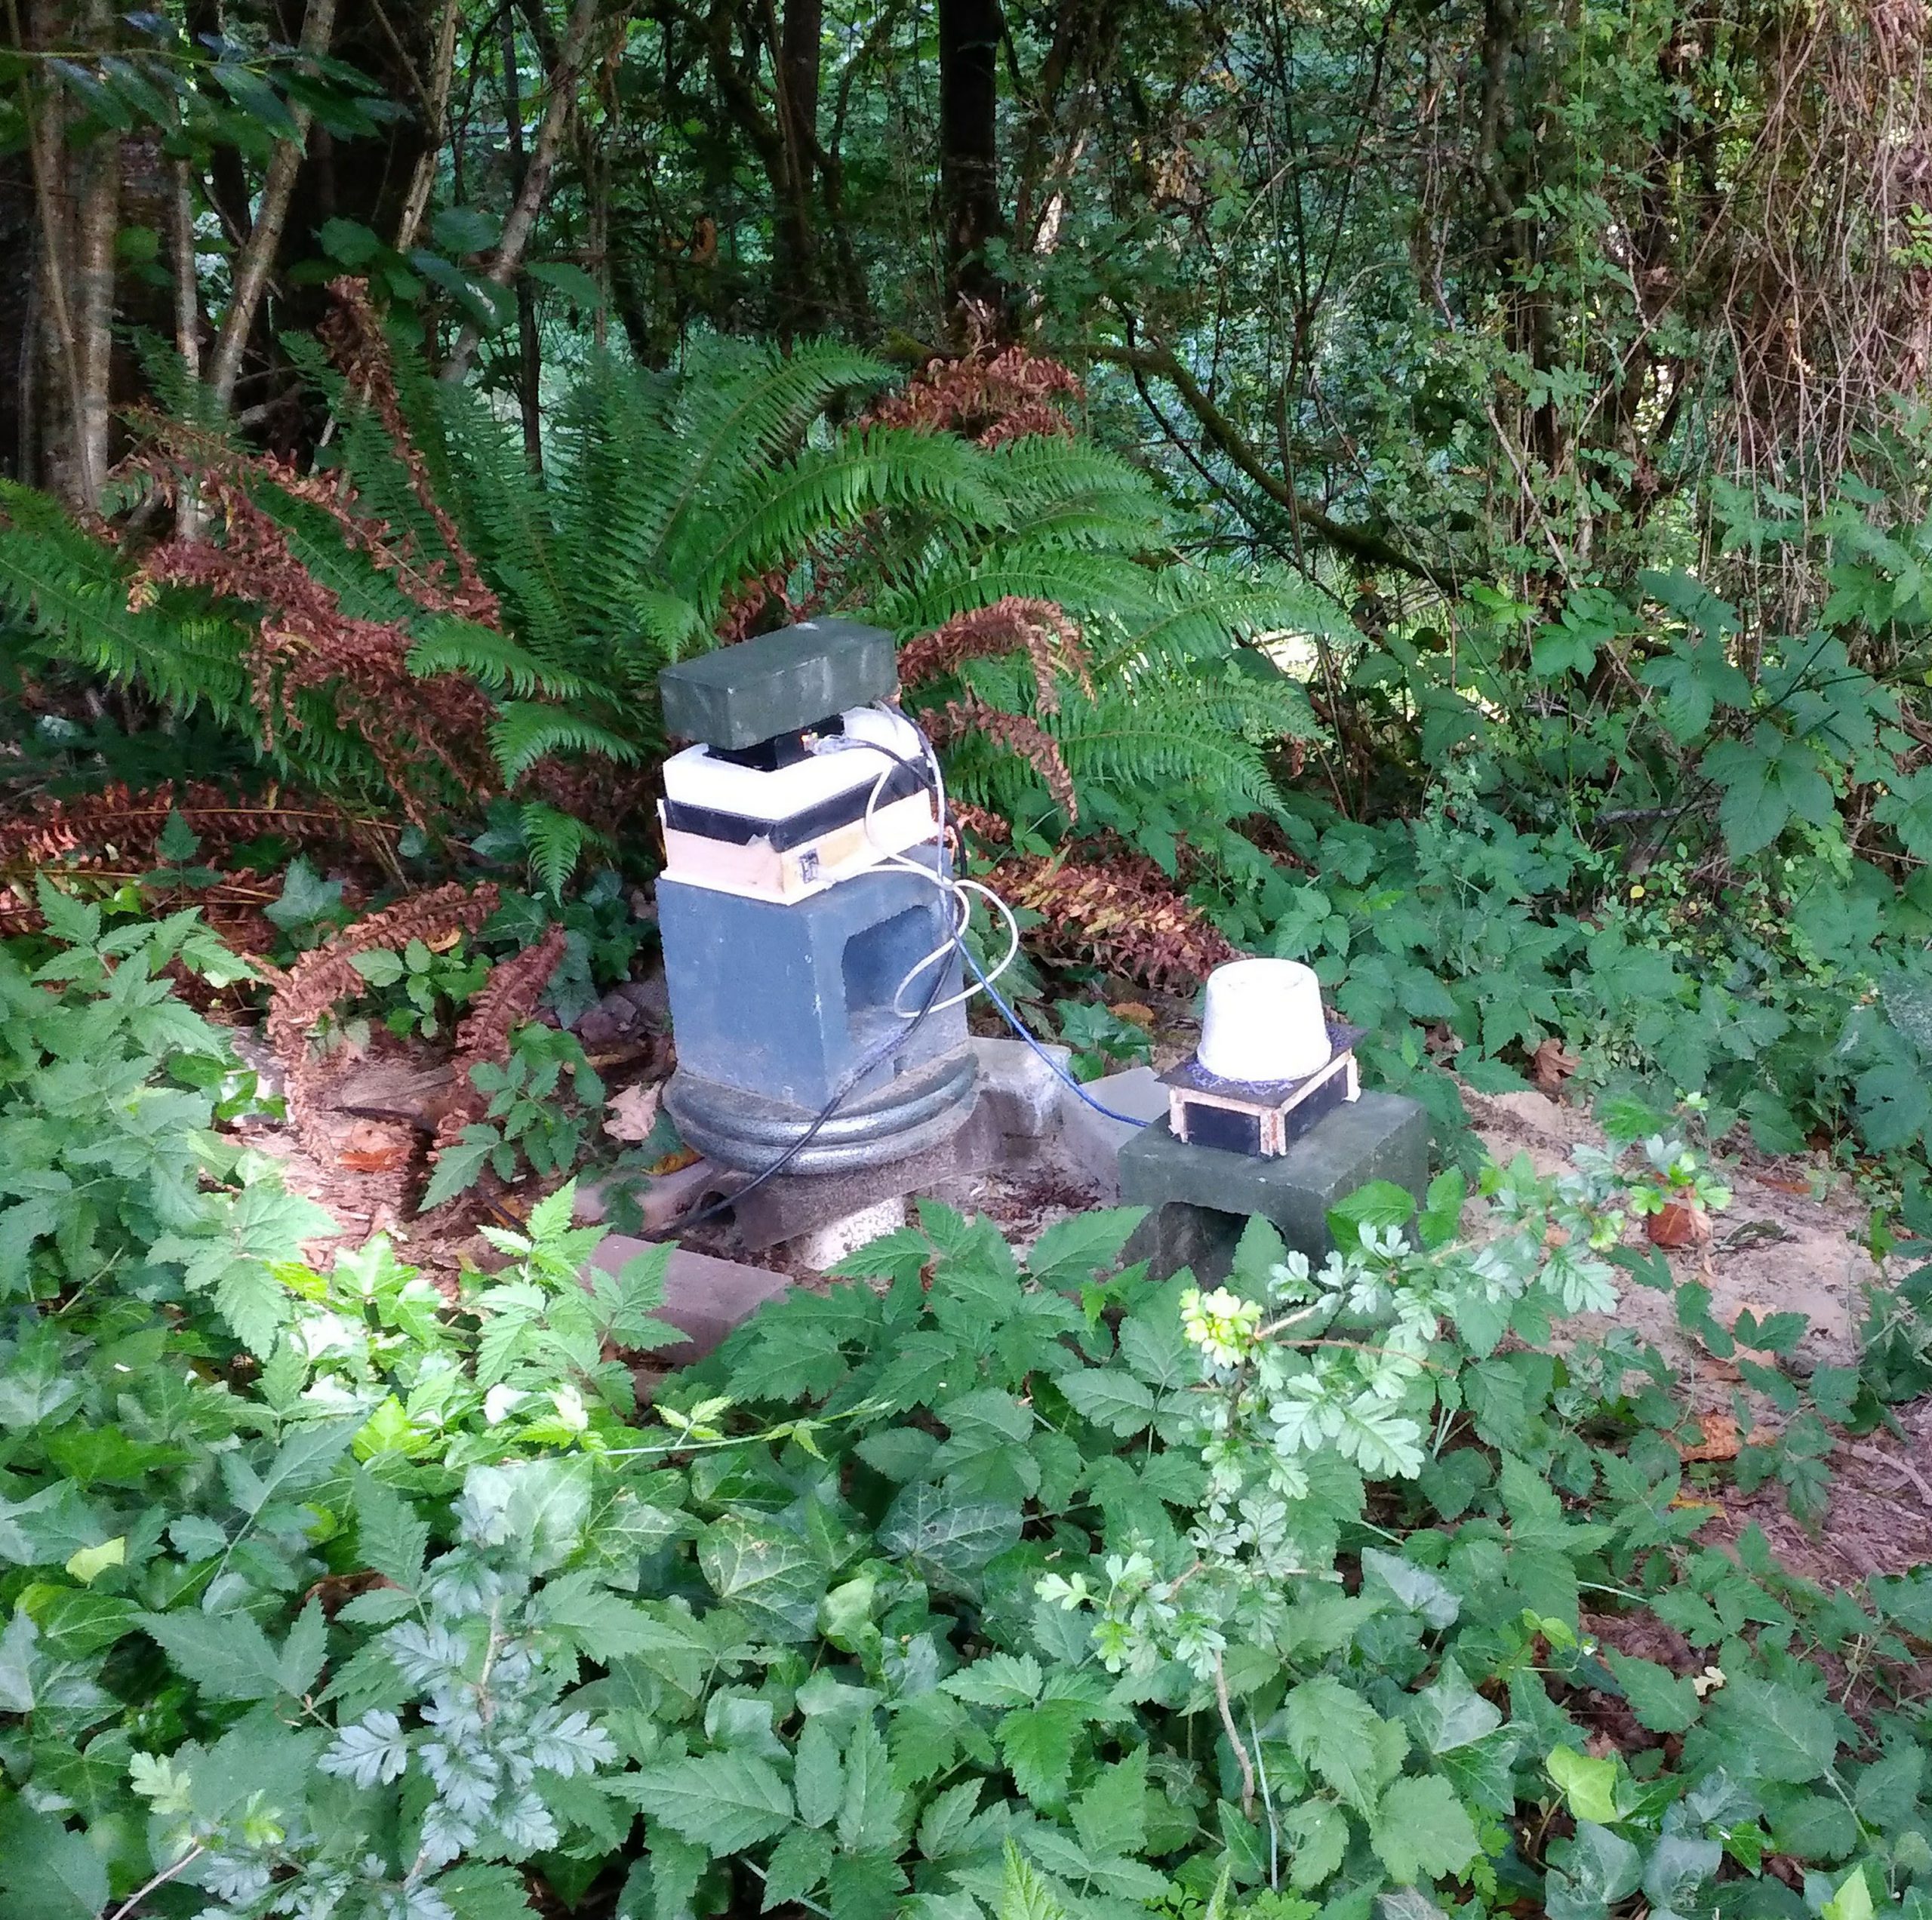
My two Raspberry Shake stations side-by-side.
RESULTS
To compare the response of both Raspberry Shake units I wanted to make a somewhat repeatable local surface noise signal so I created a home-made concrete hemisphere I used as a “thumper” to drop on the ground.
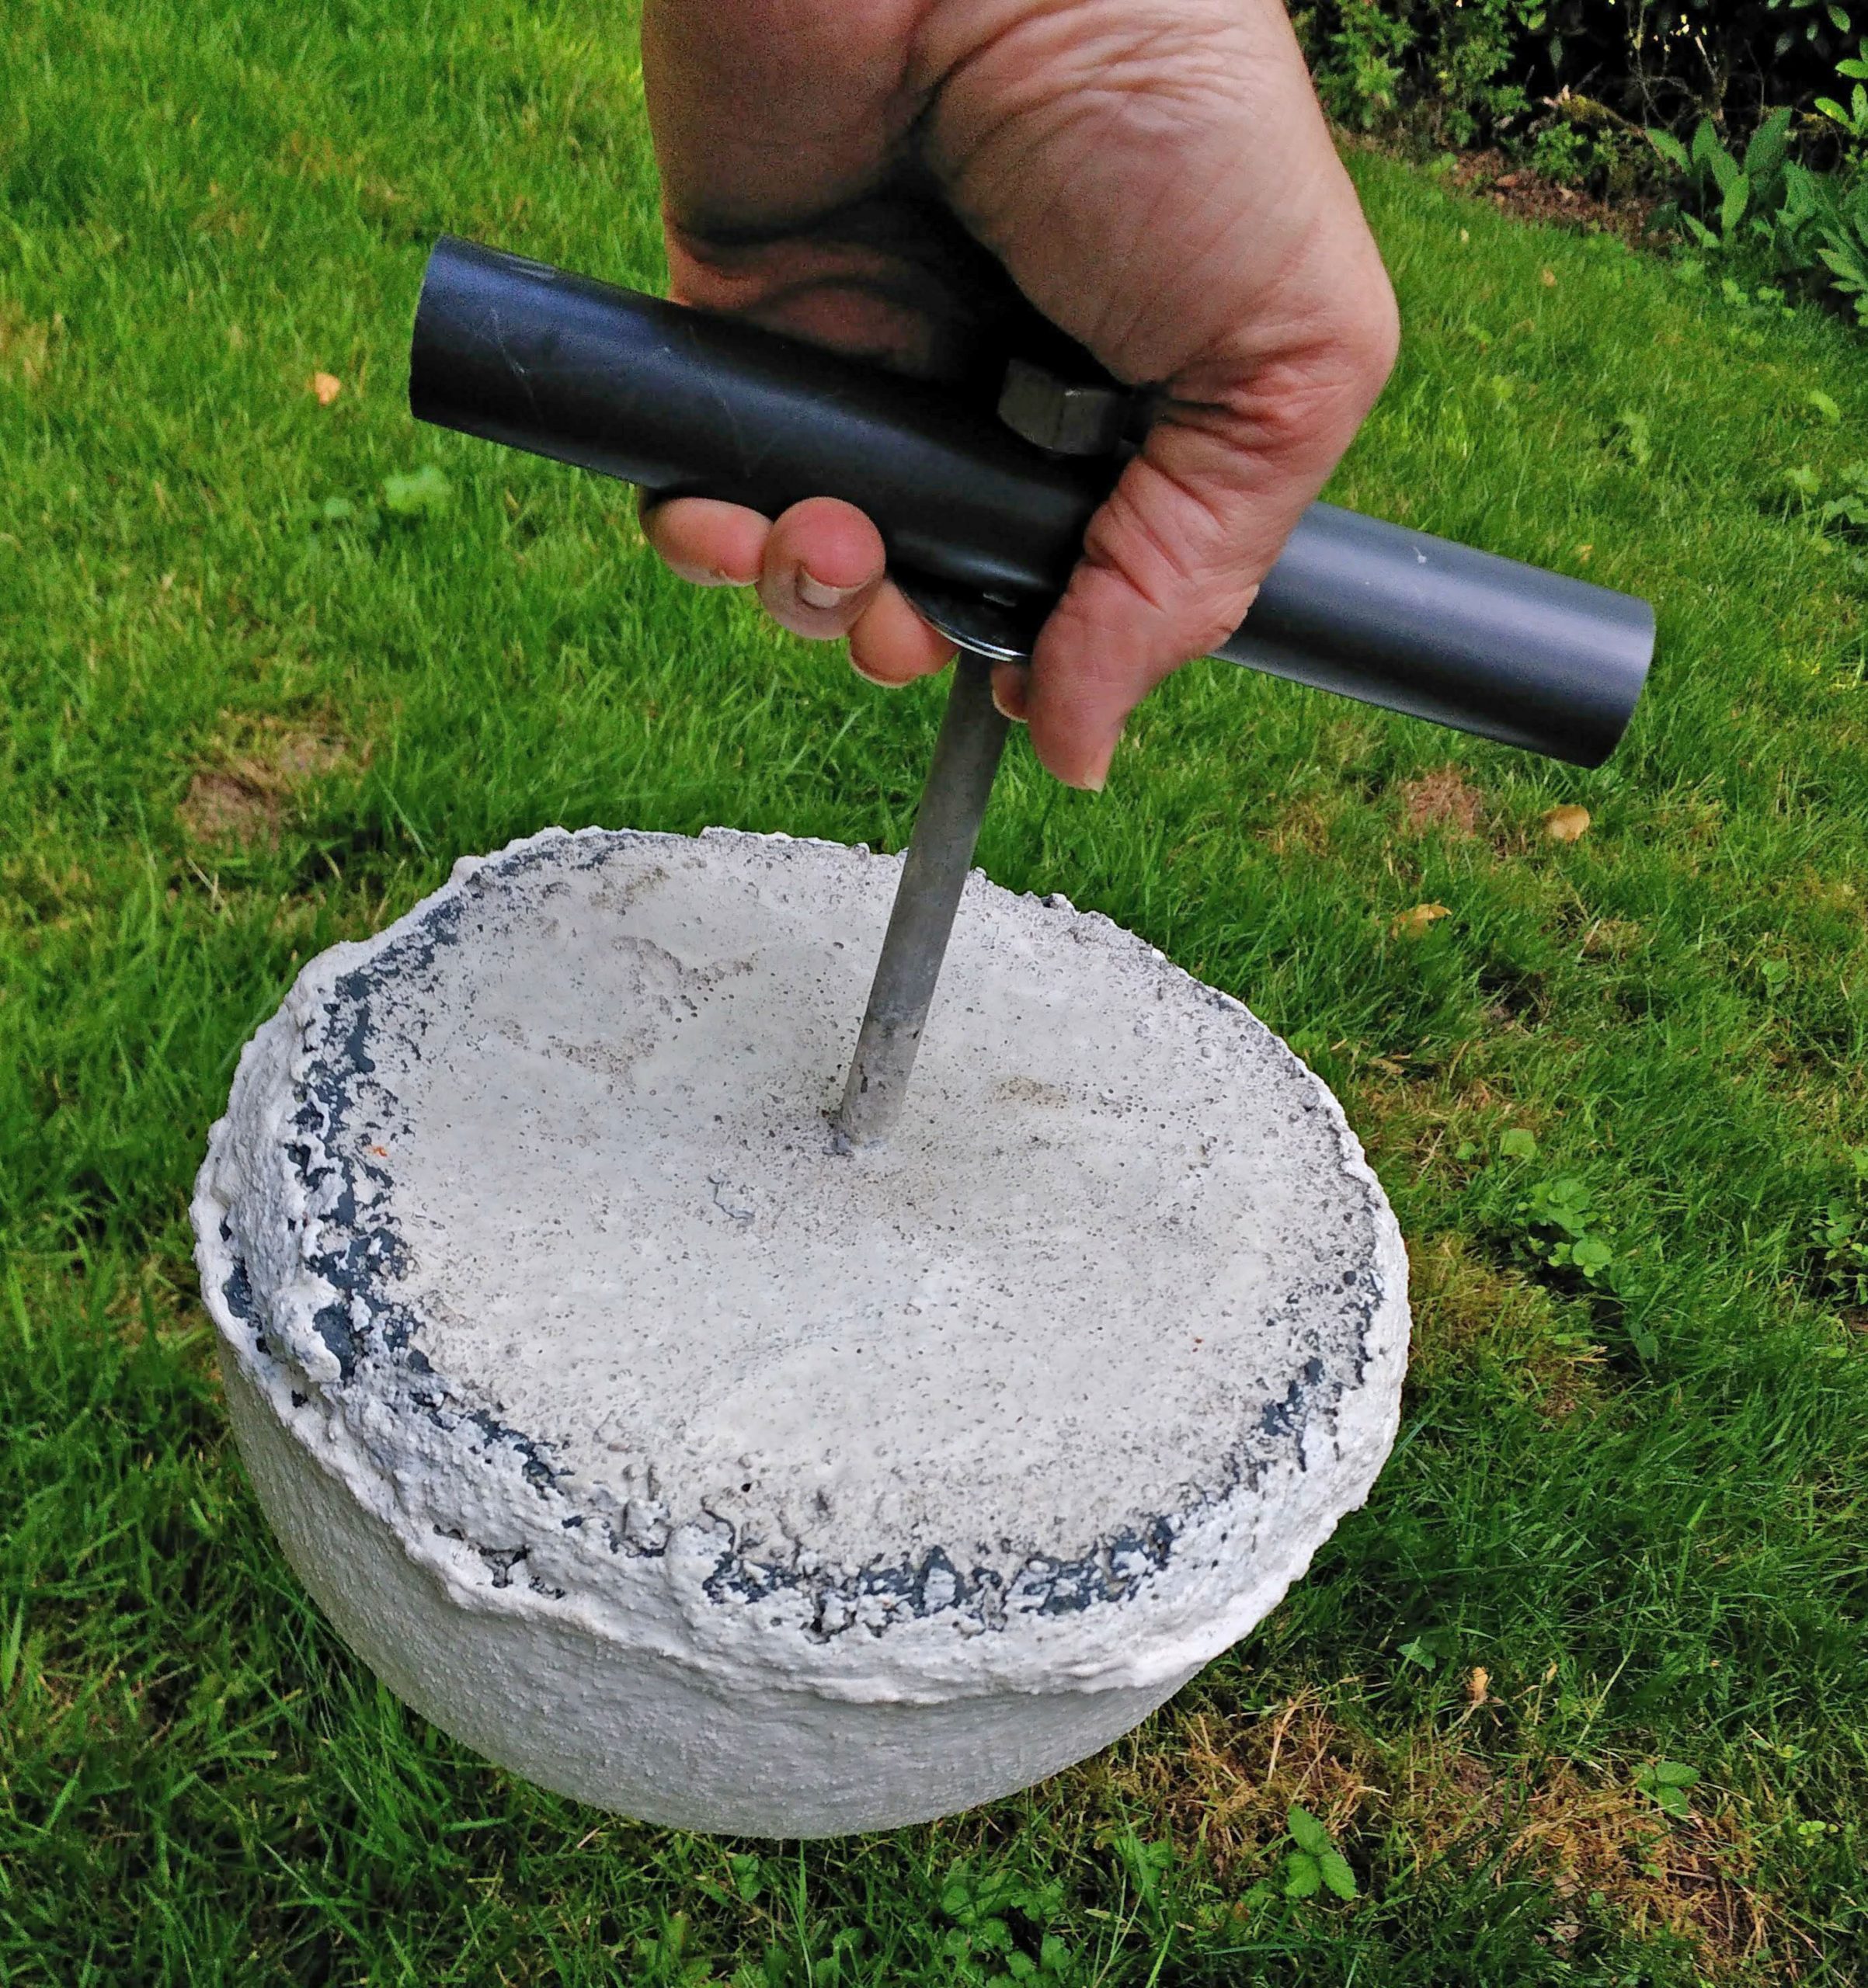
A 22-pound concrete weight makes a thump when dropped.
Here is a graph comparing the output of RF7DC, sitting on the buried 40′ pipe, with R79D5, sitting on the ground next to it.
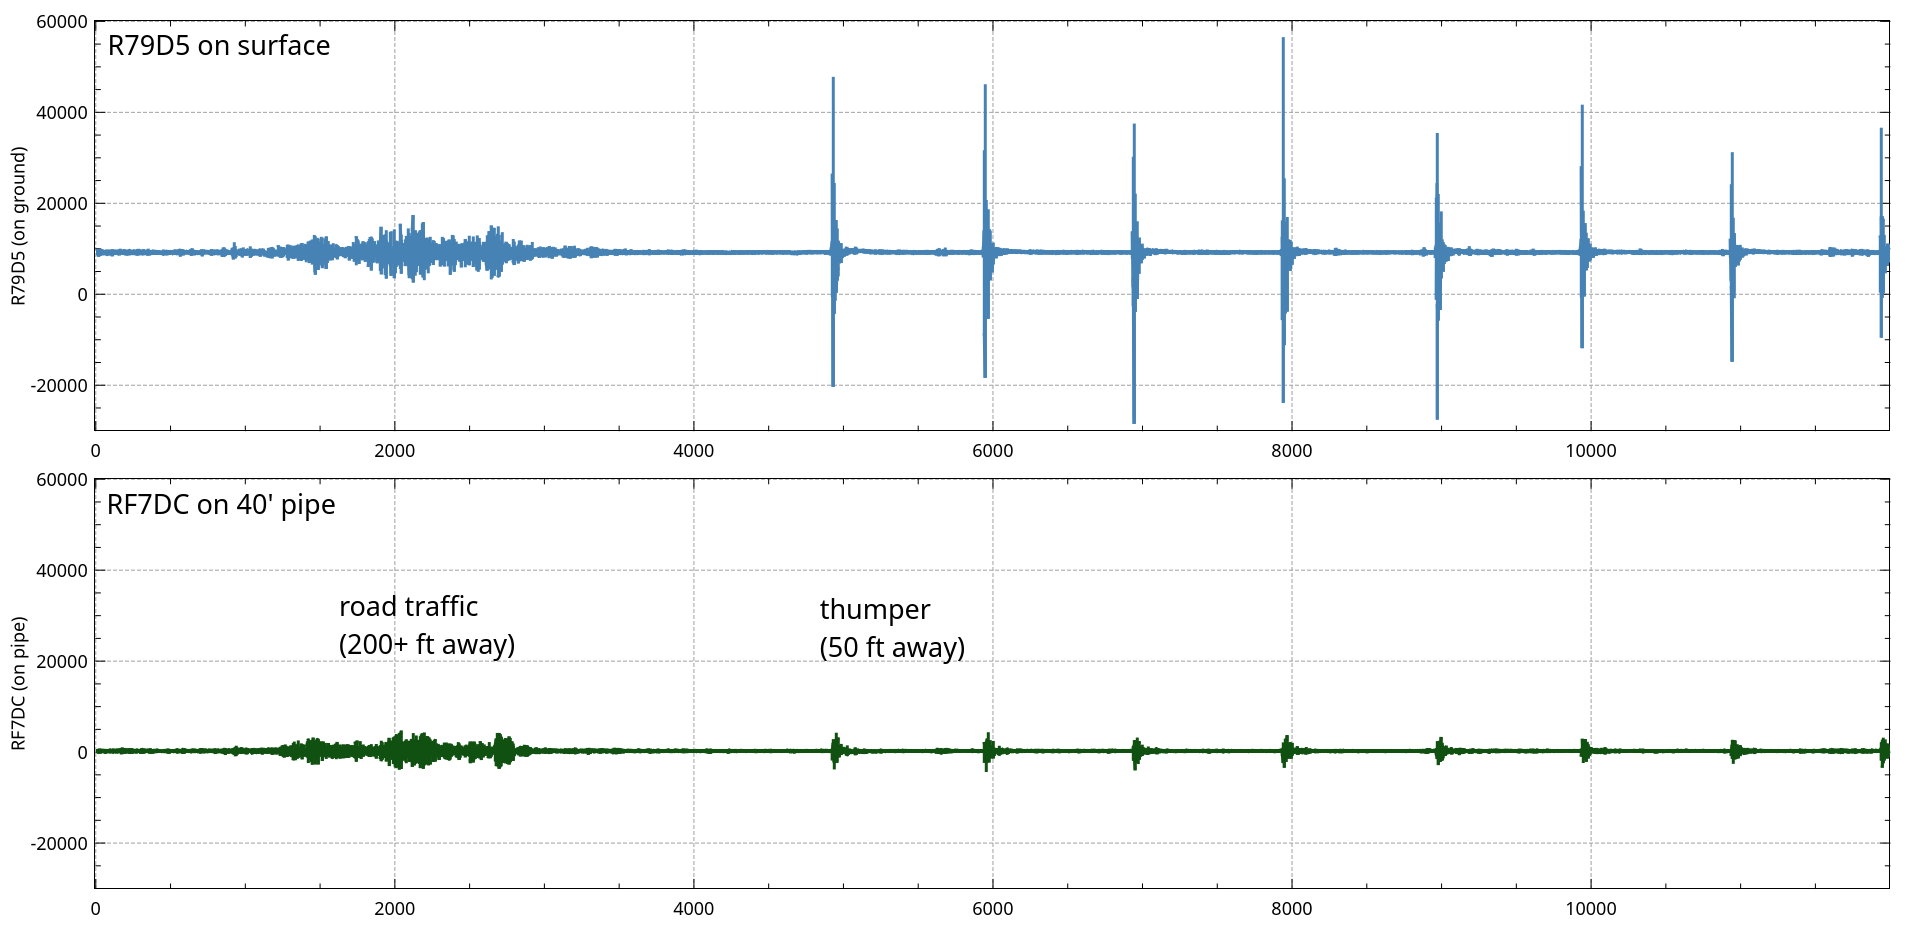
The surface station is more sensitive to local thumps than the buried-pipe station.
The first noisy signal is a car on the road about 200′ and more distant. Then you see a set of impulses as I drop the thumper weight, once every 10 seconds. This was along a line about 50 feet away from both Shake units. Each drop I moved it a few feet along the line so I could average out any local soil differences.
As far as I can tell, there is a quite significant difference in response between the two sensors, looking at the closer surface noise (50′ away) relative to the more distant traffic noise, and the absolute response of both sensors. It appears that the Shake sitting on the buried pipe is in fact less sensitive to nearby surface noise, as I had hoped.
From the above test, in practical terms, the local noise within 50 feet is usefully reduced by mounting on the 40 foot vertical pipe, but the traffic noise coming from hundreds of feet away is not so much affected by this mounting arrangement, at least on the deep sandy soil we have here.
Now to test with a real quake!
On 04 July 2019 at 04:30:44 (UTC) a magnitude 6.2 earthquake struck off the coast of Canada, about 866 km (538 miles) to the northwest of my stations.
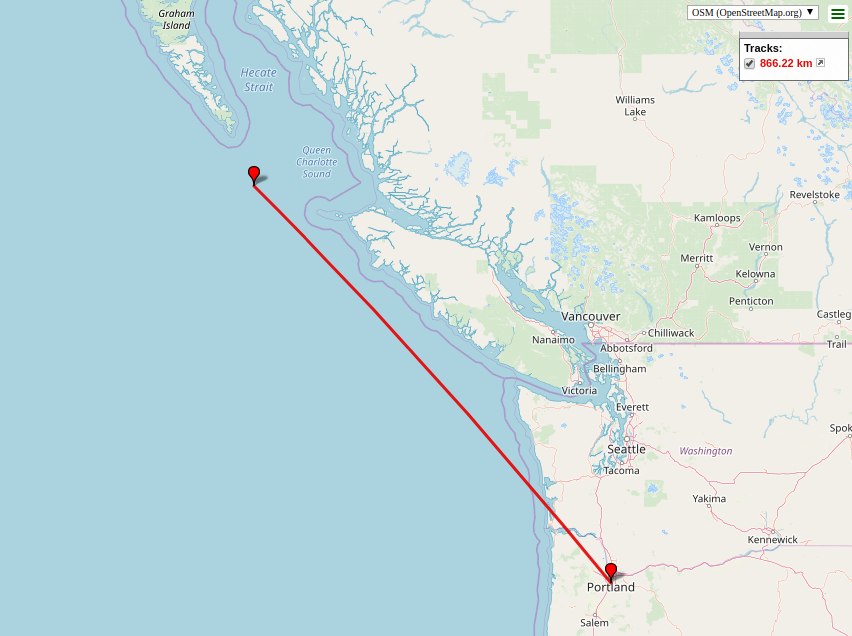
The magnitude 6.2 earthquake hit off the coast of Canada: 51.222°N 130.515°W
The quake was recorded on both my Shakes. The signals from both stations appears similar, with the seismic signal lower in amplitude than the local traffic noise. However, the local noise is mostly above 5 Hz in frequency, so using a 5 Hz low-pass filter in the Swarm application, the earthquake signal shows up much clearer on both stations.
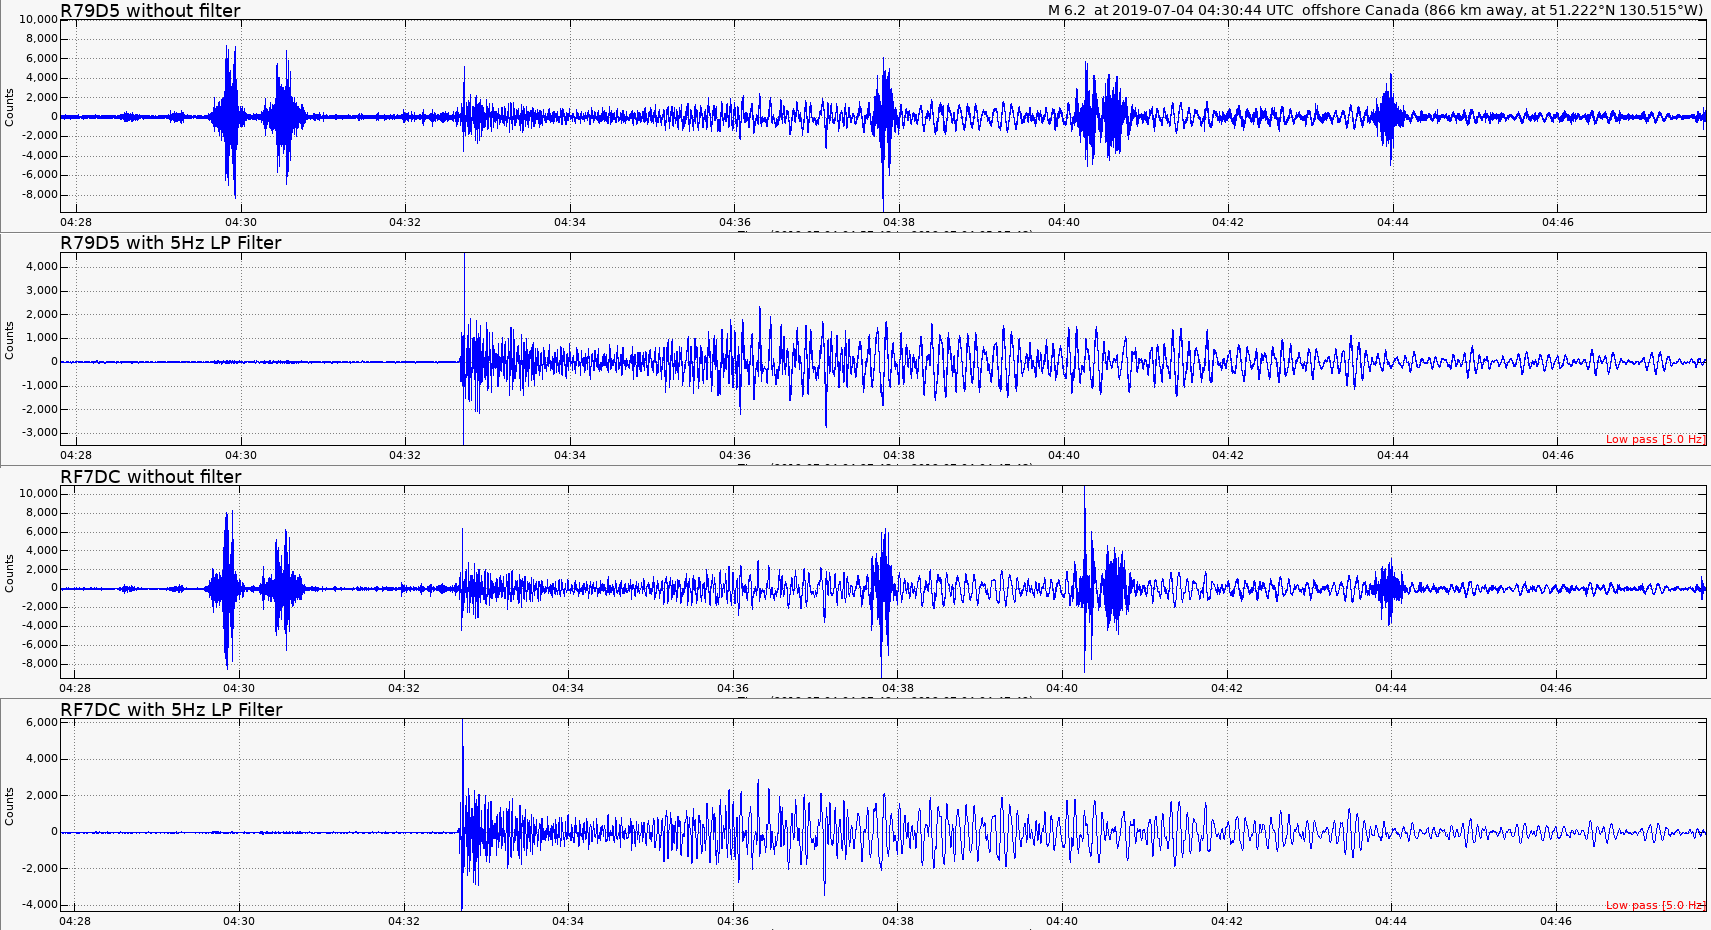
Seismic signals of the same event on both RS stations, with and without a filter.
From this data it seems to me there was only a slight visible improvement in signal-to noise quality achieved by putting RF7DC on top of the pipe pier, but a very significant improvement using the 5 Hz low-pass filter.
I had fun with the hole-drilling project, and I learned a few things. My original thought was that a 40′ buried pipe should reduce local noise, but my data shows the effects in my particular case are pretty small. If I had different local geology (eg. I was able to reach bedrock) I think the results would have been different.
“We shall not cease from exploration, and the end of all our exploring will be to arrive where we started and know the place for the first time.” -from Little Gidding, 1942 (T. S. Eliot)
We love hearing about your Raspberry Shake stories and would like to say a huge thank you to John Beale for sharing his muddy adventure.
Happy Shaking!
